This article contains the following:
Allow groups to switch between different menus
Example of three common user groups:
Description
To simplify the process when multiple users need the same permissions, you can create groups with customized permissions.
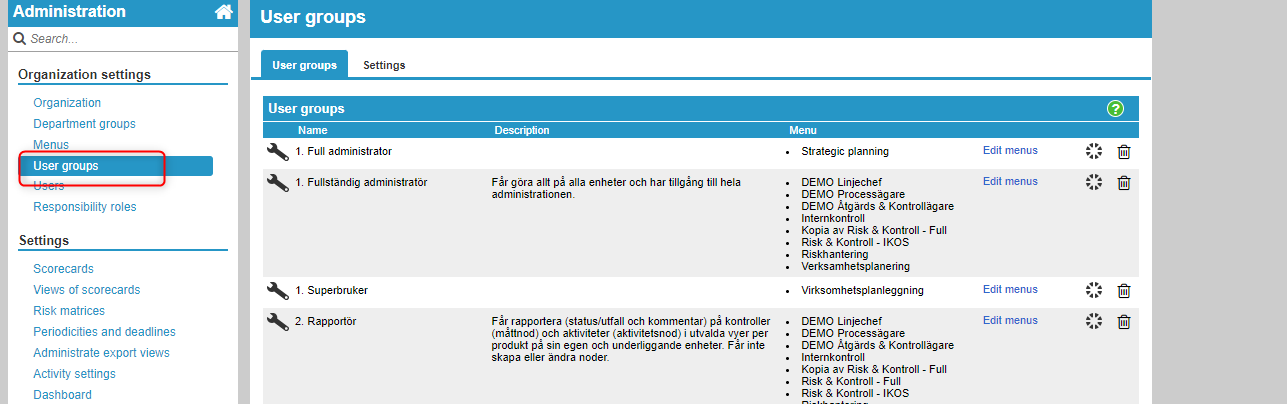
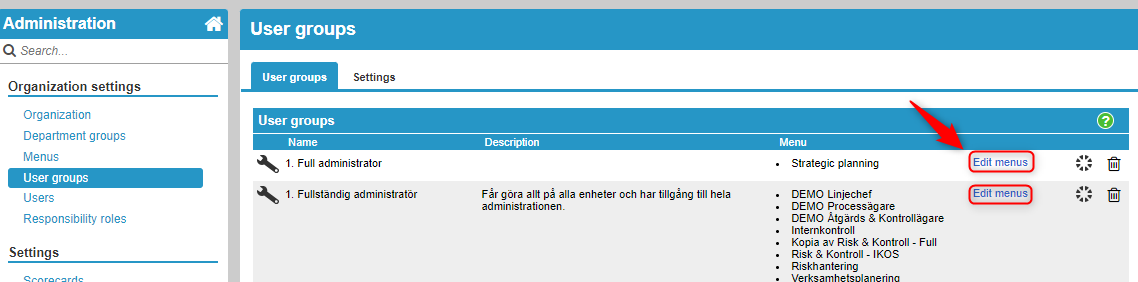
In the Administration menu, under User Groups, you will find all the existing user groups. In the list, you can see the name, description, and the menus that the user group has access to.
On this page, you can add, remove, and modify your user groups. You can also refer to the examples provided for three common user groups.
By creating and managing user groups, you can efficiently assign and manage permissions for multiple users at once, ensuring consistency and ease of administration.
Add a permission group
To add a group, click on the "Add" button below the list of existing groups. Below are the explanations for the different settings that can be made.
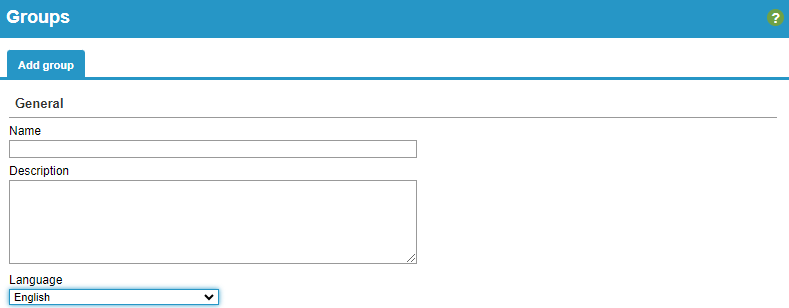
General
Provide a name and description for the group. A descriptive description makes it easier to choose permissions for users. Remember to update it when making changes.
You can specify a default language for permissions. However, users still have the ability to set their own language for their individual account.
Select the devices that should be visible/selectable for this permission group in the organization tree in Visible Devices.
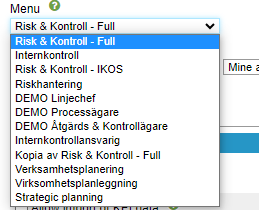
Choose the menu where users in the group should land when they log in. The settings for which menus they should have permission to choose from in the menu selector can be found under Allow groups to switch between different menus" enables groups to switch between different menus.

There are three options to choose from regarding "Administrator Permission":

-
None - Does not have access to administration.
-
Complete Administrator - This group has access to all administrative settings.
-
Local Administrator - The group is granted limited rights to administer. They have access to the menus shown in the image below. User administration and Organization Tree administration apply only to the department levels that the local administrator themselves has access to.
Local Administrators also have the ability to administer already created gadgets on Dashboards.
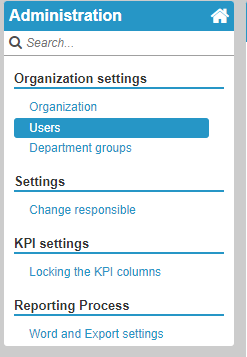
Note: The platform role "User administration" is also required to update and impersonate users, as the "Local Administrator" permission only provides access to the user menu. This role is set on a per-user basis, allowing specific individuals to have the necessary privileges for user management tasks.
General permissions
Different options are displayed here depending on the administrator's permissions set in the previous step.
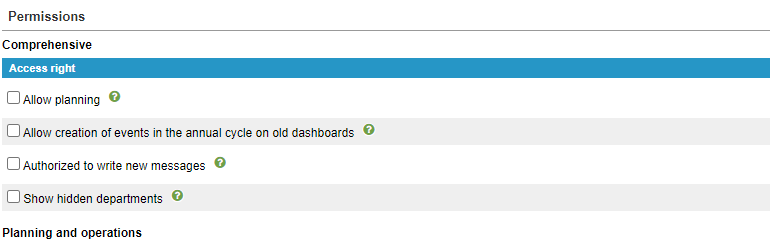
The "Allow Planning" feature provides the group with access to the planning version. Their ability to perform actions in the planning version is determined by other permission settings. The version selector is only visible when a planning version has been created. Please refer to the "Planning" section for more information.
Allow creation of events in the annual cycle on old dashboards - only visible if "none" administrator permission has been selected, as the permission is included if you are a local or full administrator.
Authorized to write new messages controls which users have the right to write new messages in the "Bulletin Board" gadget on the older type of homepage. However, we recommend using the new communication area instead.
"Show hidden departments" allows group members to see departments that are marked as hidden.
Note: Information from hidden organization can become visible to all users through filtering on underlying department and through reports created by users with permission to view hidden departments.
"Allow administration of external links" and "Allow administration of source systems and external codes" are only displayed if the permission is set to Local Administrator, providing them with the ability to manage these settings as an additional permission. Administration of source systems and external codes enables the import of measurement data.
Product-specific permissions
Here, you have the option to specify whether the authorization should apply to all products or a specific product through the drop-down list.
To enable product-specific authorization groups, please reach out to Stratsys for assistance.

Planning and operational work
Control permissions to create, delete, modify, and comment in the views.
Please note that users will have the same permissions in all scorecards through these settings unless restrictions have been made in Column-Specific Permissions or Product-Specific Permissions. Therefore, it is important to be cautious and restrictive when granting broad Standard Permissions to avoid granting excessive access rights.
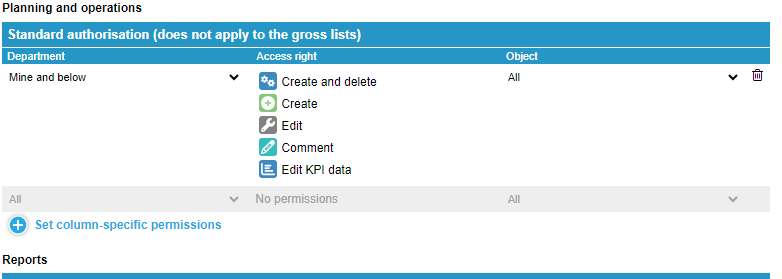
To add a permission for the group, click on the "Add" button. Specify the unit or departments for which the permission settings should apply.
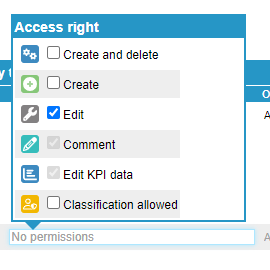
Specify the authorization that should apply to the areas (text, metrics, and/or activities) selected in the next step.
With the "Create and Delete/Create" permission, you can manage nodes on selected departments , including their underlying permissions.
With the "Edit" permission, you can perform various tasks such as renaming, changing the texts in the description fields, modifying keywords, and assigning a new responsible person to the node. It also grants permission to modify connections, consolidations, and make settings on the metrics tab. The ability to comment and edit metric data is included in the "Edit" permission.
The "Comment" permission allows users to provide comments at selected levels, while the "Edit Metric Data" permission enables the reporting of data for metrics in the tracking window.
If you use the "Secret node" feature, the option "Right to keep secret" is also included in the list.
Regarding uploaded documents, users can read documents that have been added to a node regardless of the level at which the document was added, as long as they have permission to view the node. There is no specific authorization that controls the readability of uploaded documents.
Refer to the 'Node Type Settings' for instructions on how to enable document uploads. Additionally, you can check out the 'Upload Documents' and 'Document View' sections for more information on the upload process itself.
Departments
An area consists of one of the three node types: text, metrics, or activities. You also have the option to select "All". Confirm your choices by clicking on the Save button.
Column-specific permissions
If you want the user group to have different permissions for a specific scorecard column, you can set it up here. These permissions can both limit and expand the access for the selected columns. The columns you choose here will only have the permissions specified here, even if the general permissions are higher. Here's how you do it:
- Click on "Set Column-Specific Permissions."
- Select "Organization" and "Permissions" as described above.
- Where you choose the "Scope" in the general permission settings, specify exactly which scorecard column the setting should apply to.
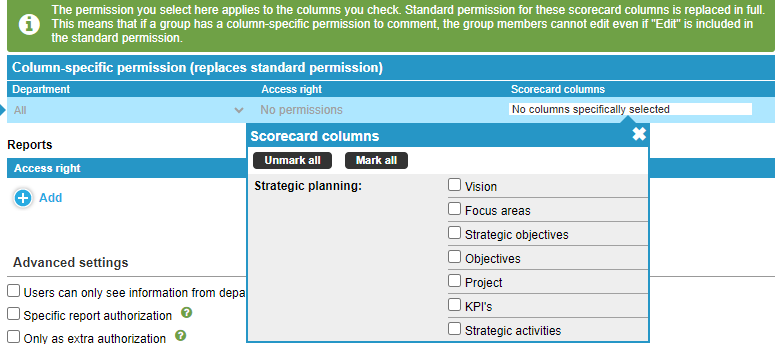
When adding a new scorecard, it may be necessary to review all your user groups to ensure that users do not have excessive permissions in the new scorecard, as it initially does not have any column-specific restrictions
Remove a permission
To remove a permission, click on the "Trash Can" icon located to the right of the permission.
Reports
Manage permissions for what can be done in the reports.
Added report permissions are displayed in a summary list where you can see the permissions and the part of the organization they apply to. If you want to make changes to an already added report permission, you can remove it and add it again. Click on the "Trash bin" icon and then "Add" to reconfigure the permission.
Permission
-
Create and manage reports
Provides authorization to create new reports, make changes to existing reports, and duplicate existing reports. It also grants permission to disable a report template and archive reports. -
Remove Reports
Provides authorization to delete existing reports. -
Edit customized reports
Grants permission to manage customized report templates, set specific permissions for reports, and enable reporting for reports. -
Write in reports
Grants permission to report/write in reports. If a user has permission but is missing the report button, it may be because the report or section has specific permissions set. This means that only selected users are allowed to write in the section or report. -
Approve completed headers/sections in reports
Grants permission to approve headers that have been completed by the reporters. See "Mark a header as completed". -
Approve entire reports
Gives users overall responsibility for approving entire reports on the departments they have permission for. This includes sending the report to Finished or Analysis. This permission also allows users to write an Introduction on the front page and a Foreword in reports, as well as finalize reports without simultaneous access by other users. -
Revert status of a report from reporting to department template (unit-specific report template)
Allows reverting the status of a report from reporting to the unit-specific report template on one's own unit. -
Revert status of completed delivered reports
Allows reverting the status from Analysis to Reporting and from Finished to Reporting or Analysis (for reports without an analysis phase) on all reporting departments where reports have been delivered. -
Revert status of completed assigned reports
Grants permission to revert the status of completed reports on assigned departments. Used to allow the reporter to revert the status from Finished on their own unit. -
Prepare assigned reports
Users with permission to prepare assigned reports gain access to the preparation phase on the unit where they have reporting permission. Settings are made in the Analysis phase. -
Prepare delivered reports
Users with permission to prepare delivered reports gain access to the preparation phase on all reporting departments for the report. Settings are made in the Analysis phase.
For all distributed reports, users must have permission at the top-level unit of the report to make changes that affect the report template itself.
Department
Choose which part of the organization the authorization should apply to.
To add the reporting permission to the list, click on the "Add" button. Don't forget to click "Save" before leaving the page.
Advanced settings
In views, users can only see information from departments that are visible in the unit selector. This setting restricts users from using unit filtering as a way to access information from underlying departments. With the setting enabled, users in the group can only see information from the departments they have in the organization tree.
Specific reporting permission This setting allows users in the group to report in measurement columns and keyword groups that require specific reporting permission. The setting is used to lock values in certain columns (e.g., target values) for other users. Specific reporting permission can also grant permission to add keywords to a keyword group. See Add a keyword group.
This setting only applies to specific reporting permissions for metrics, not headers in reports.
It only allows the permission to be used as an additional permission. Additional permissions are only displayed in the list of additional permissions to make the regular list of permissions more clear and easier to navigate, especially for those who have many different user groups.
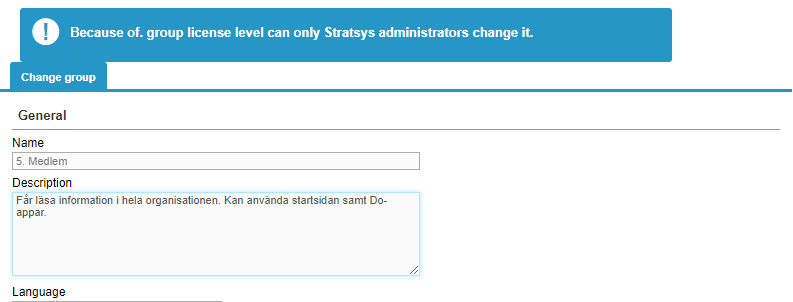
Edit user group
To modify a user group, click on the "Wrench" icon to the left of the group's name. Then, follow the same steps as in "Add a user group."
If the user group has the license level of "Reporter" or "Member," you will need to contact Stratsys to request changes. The fields will be grayed out, and the following information will be displayed:
Remove user group
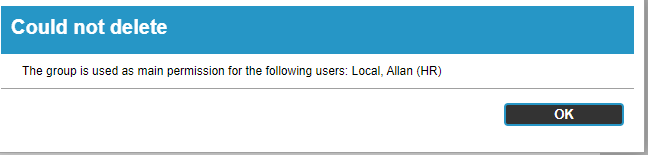
Allow groups to switch between different menus.
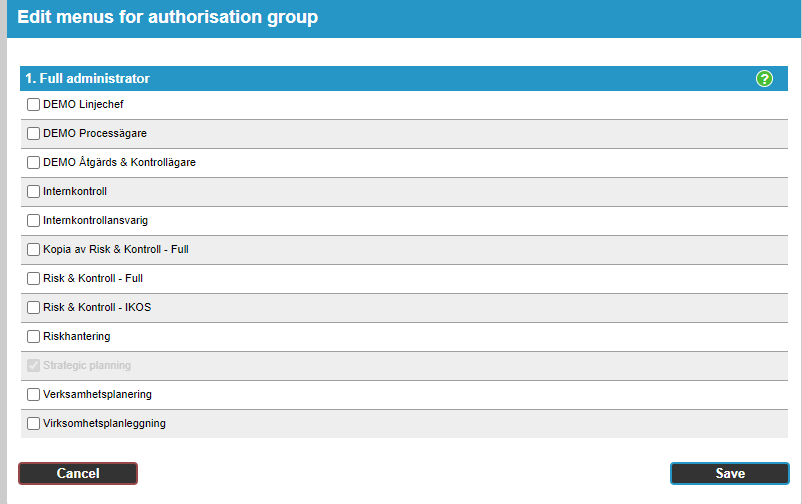
One of the menus will be grayed out and cannot be deselected. This is because all Permission Groups must have a menu selected for the system to determine which information should be displayed to the user after logging in.
Example of three common user groups:
Nedan följer exempel på tre vanligt förekommande grupper och hur dessa konfigureras:
1) User Group "Global Administrator" - individuals who should have full permission to make settings on all departments in the organization.
-
In the dropdown menu "Visible departments " under "General," select the option "All."
-
In the dropdown menu "Administrator permission" under "General," select the option "Full."
-
Under "General," allow "Planning" and "Permission to write new messages on the homepage."
-
Under "Permissions" for "Planning and operational work," specify the item as "All," permission as "Create and Delete," and unit as "All."
-
Under "Permissions" for "Reports," specify all permissions except "Prepare assigned reports" and "Prepare delivered reports." These should only be available to selected individuals who belong to a separate user group. Select "All" under Unit.
2) User Group "Create and modify my unit" - for example, unit managers who should have the right to create and modify only their own unit and its sub-departments.
-
In the dropdown menu "Visible departments" under "General," select the option "All."
-
In the dropdown menu "Administrator permission" under "General," select the option "None."
-
Under "General," do not allow "Planning" or "Permission to write new messages on the homepage."
-
Under "Permissions" for "Planning and operational work," specify the item as "All," permission as "Create and Delete," and unit as "Mine."
-
Under "Permissions" for "Reports," specify "Edit unit-specific reports," "Write in reports," and "Approve completed sections in reports." Select "Mine and sub-departments" under Unit.
3) User Group "Read all departments" - for individuals who are not actively working with the system but should still be able to access and follow the performance management work.
-
In the dropdown menu "Visible departments" under "General," select the option "All."
-
In the dropdown menu "Administrator permission" under "General," select the option "None."
-
Under "Permissions" for "Planning and operational work," specify the item as "All," permission as "Read documents," and unit as "All."
-
Do not add any permissions under "Permissions" for "Reports."