Sharing gadgets within the organization
Description
On your dashboards, you can display interesting information using various gadgets to create a dynamic and up-to-date system.
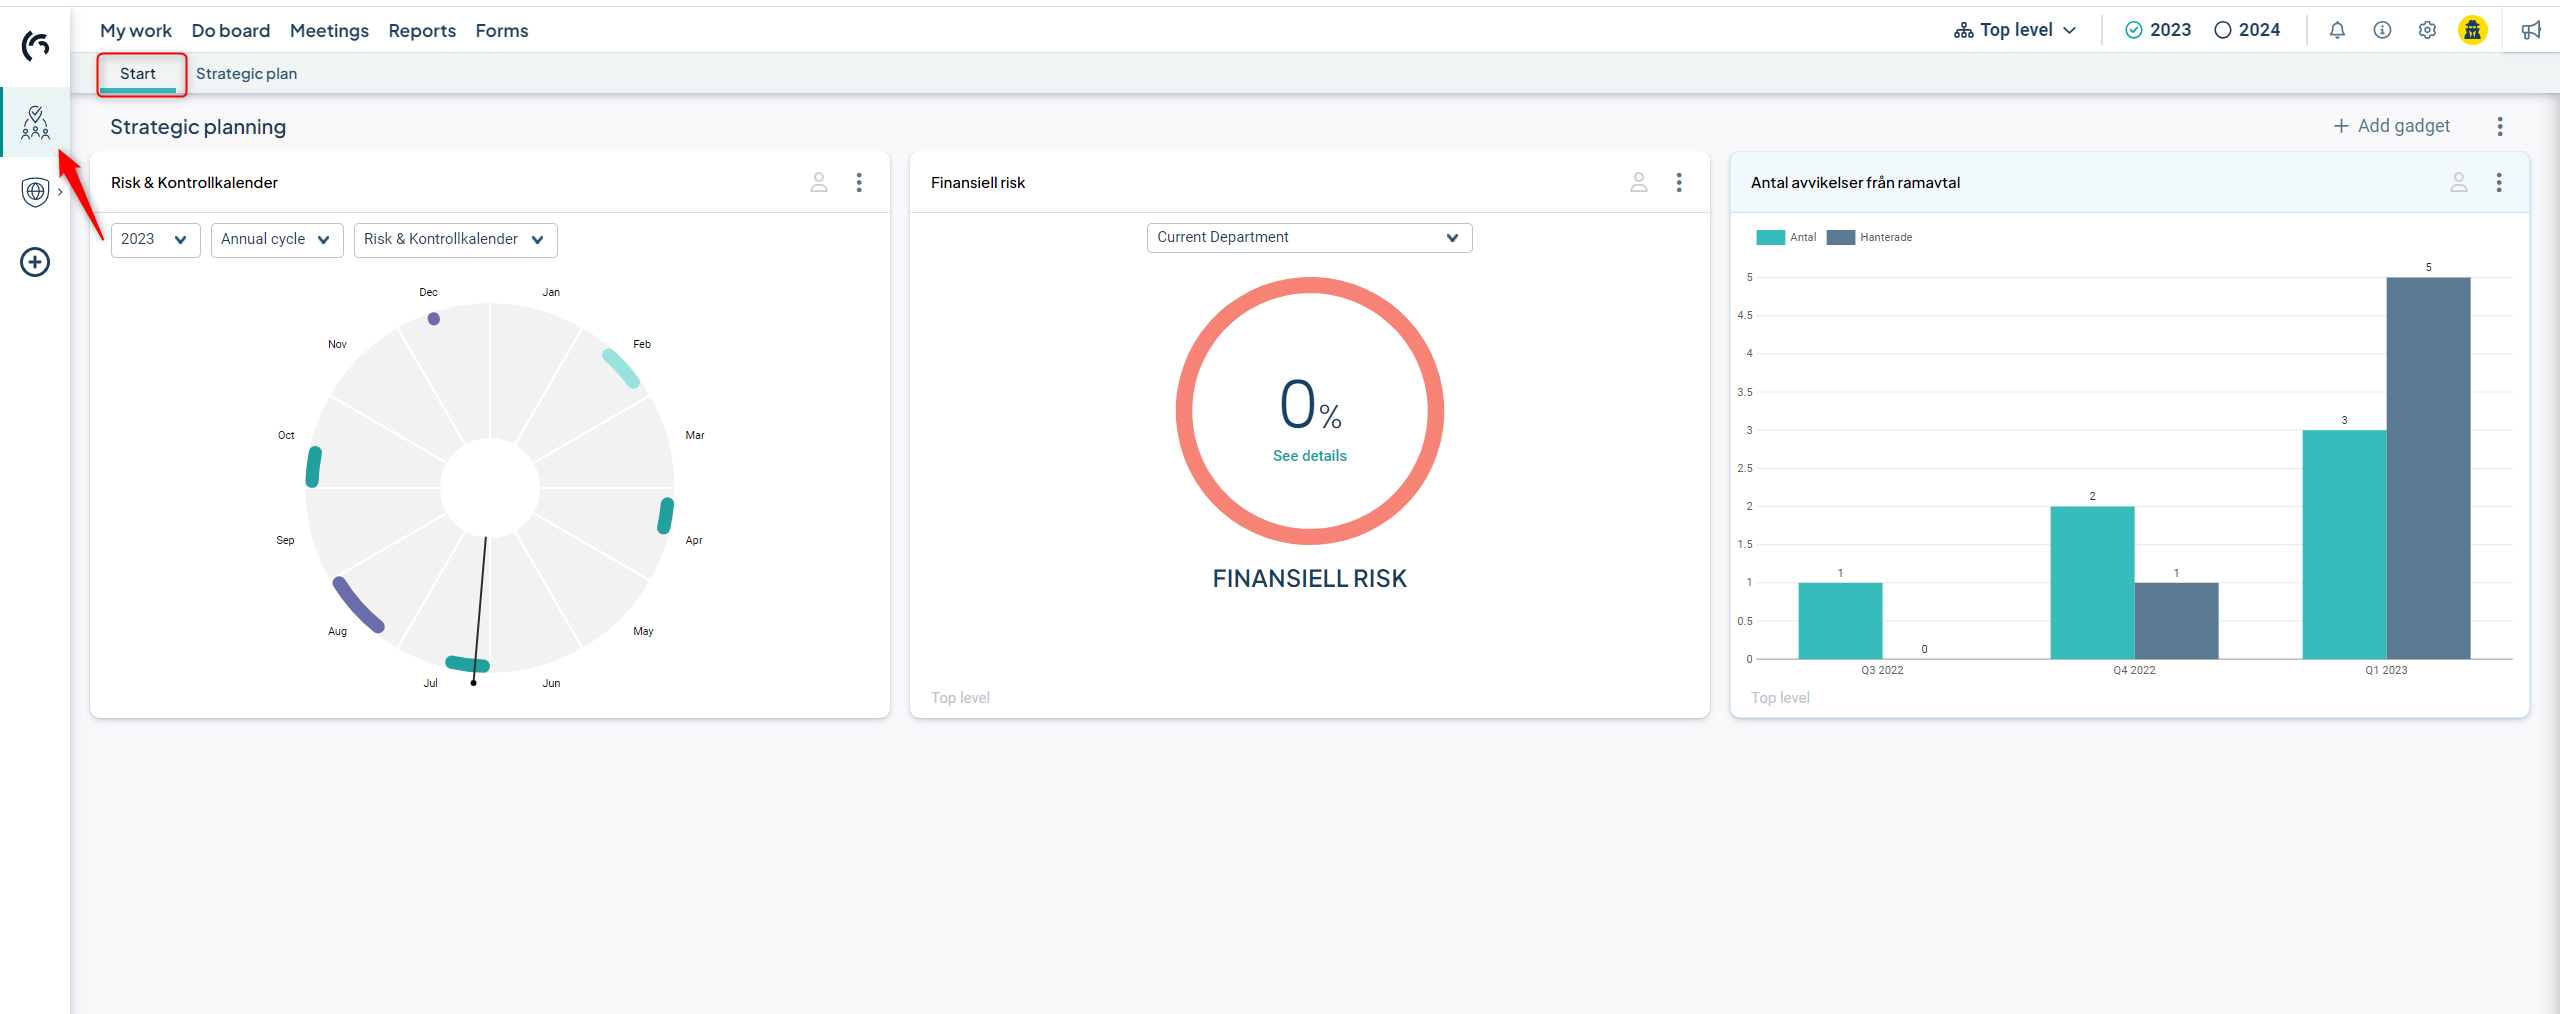
There are two types of dashboards in Stratsys.
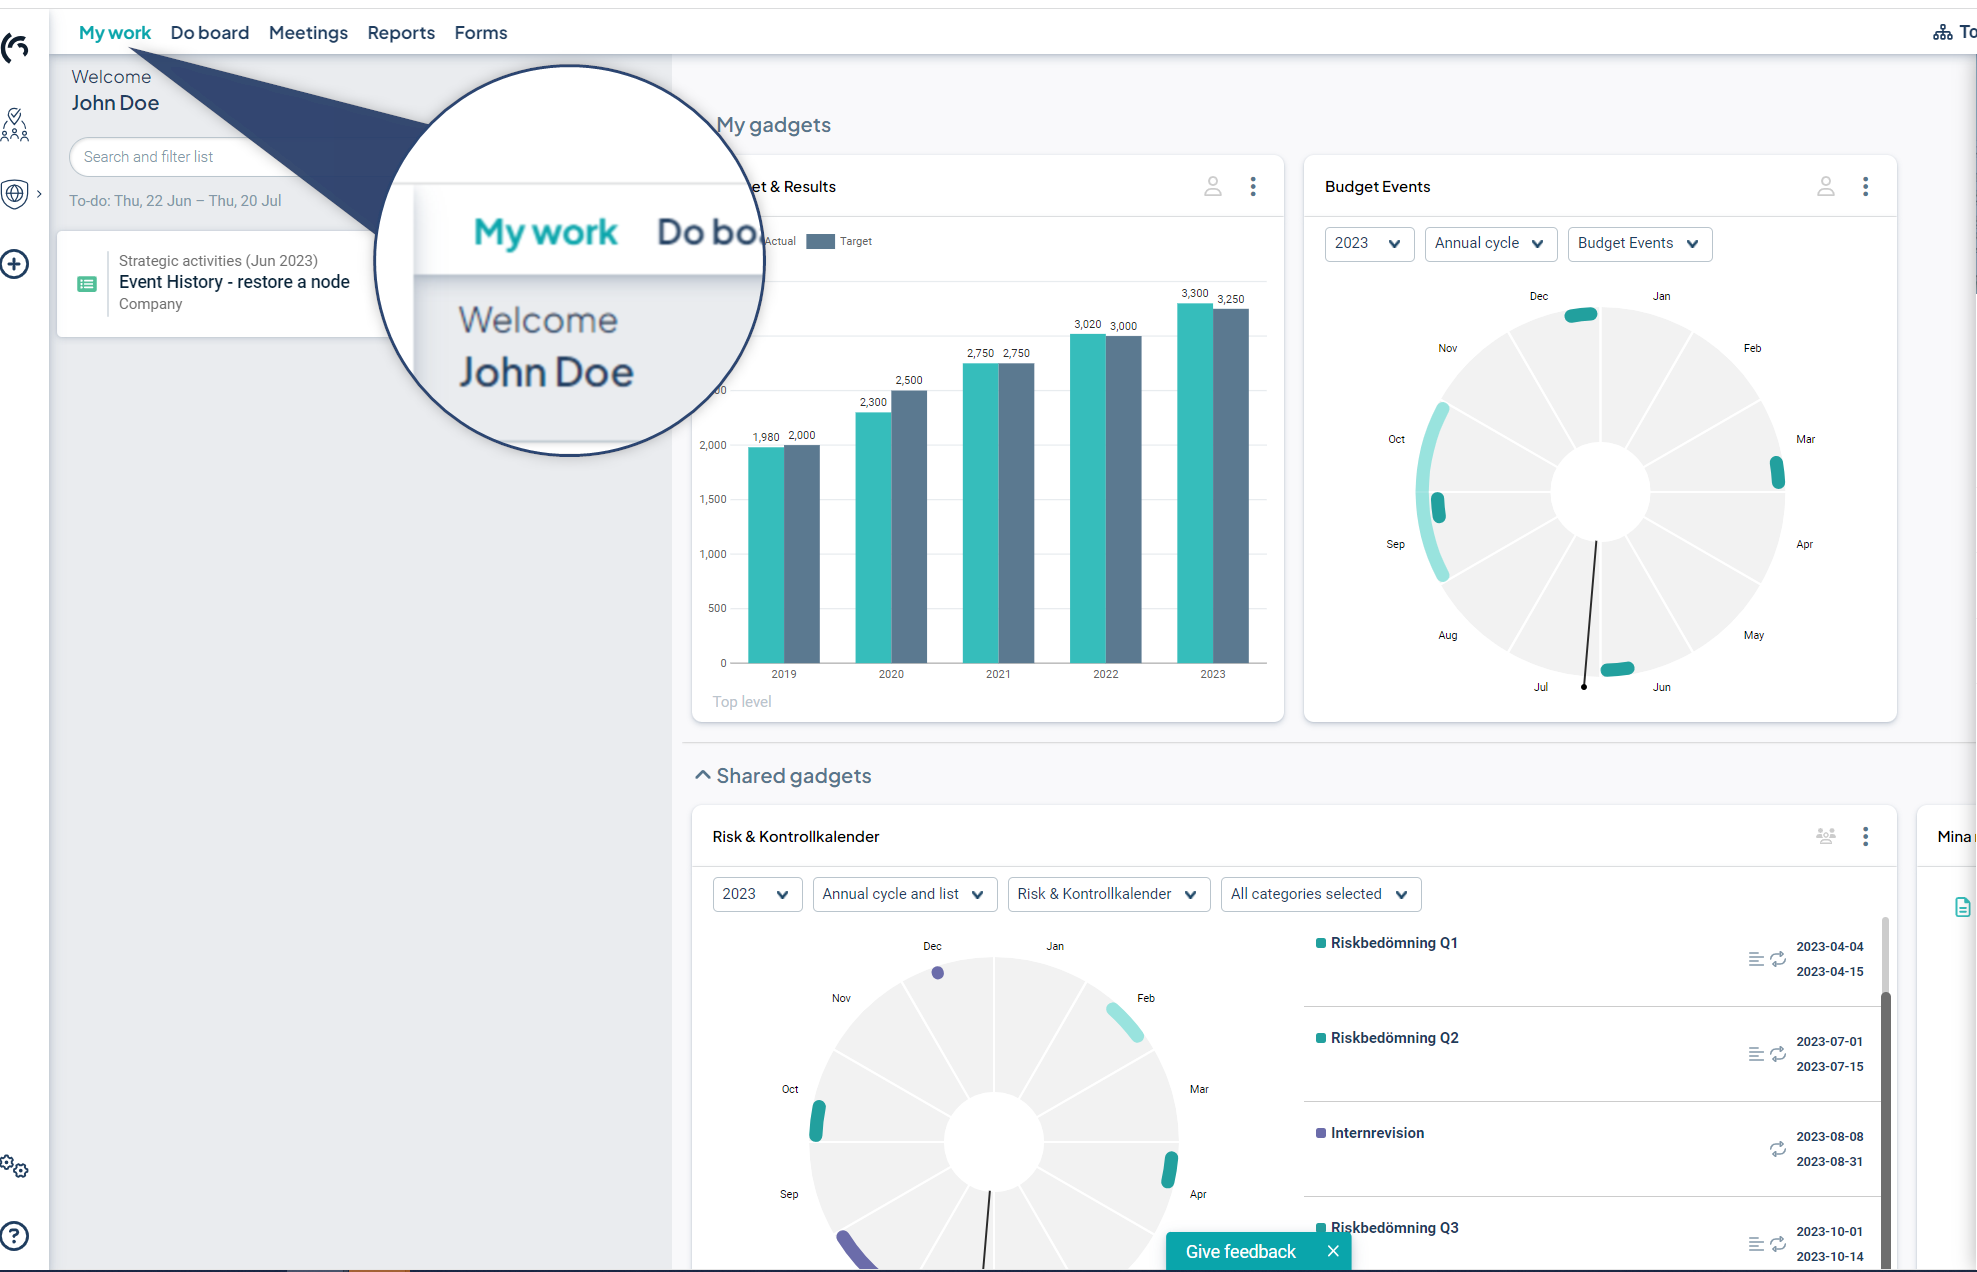
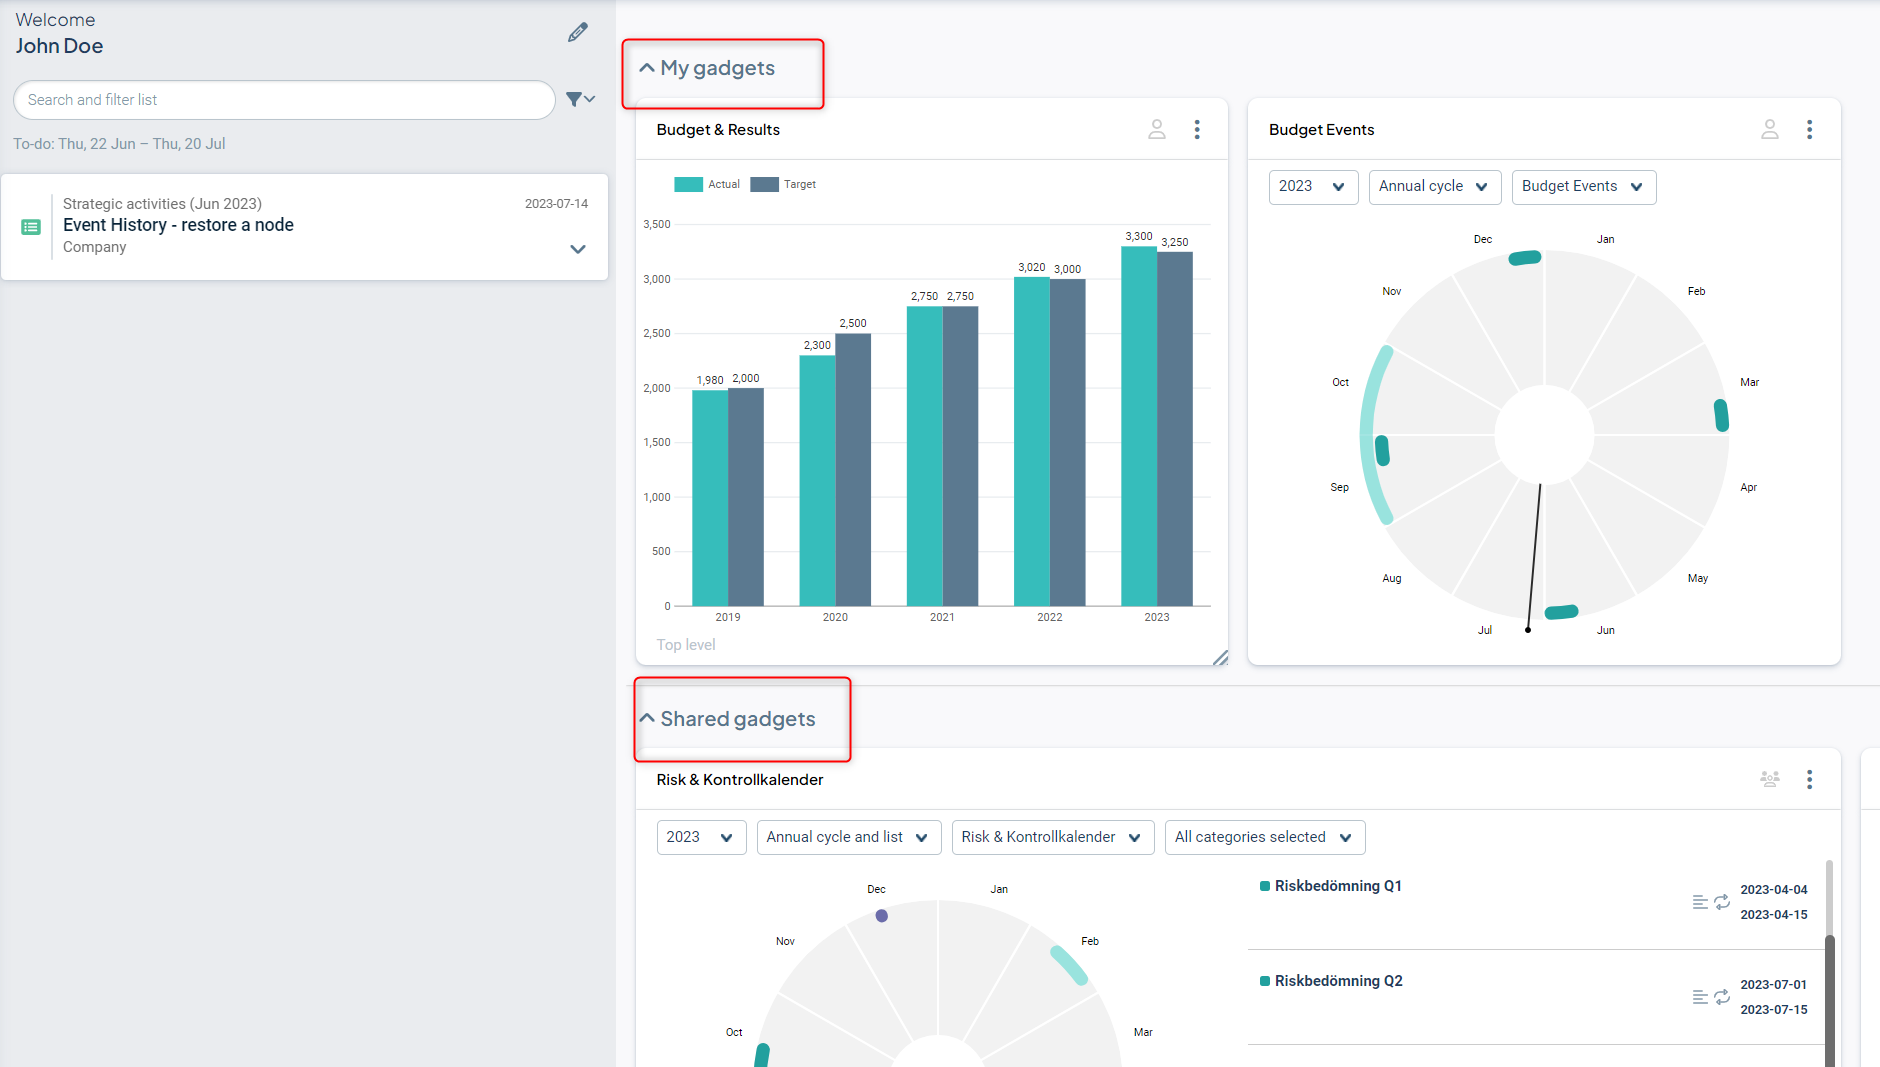
First, there is the general dashboard on the homepage, which you access by clicking on "My Work" - in the image, it is the middle area that represents the dashboard, with the to-do list on the left and the communication area on the right:
You can also activate a product-specific dashboard for the products you use, which will be displayed as the homepage when you select a product or product menu in the left menu.
The general dashboard is always enabled and displayed for all users.
The product-specific dashboard requires activation and will then be displayed for all users who have access to the respective product.
As a Full Administrator, you have the ability to manage Year Wheel categories and add Owners to product dashboards on the dashboards.
Adding a gadget
Users can add gadgets to the general dashboard for display on their own page. The gadgets that users add to the general page will appear at the top, under "My gadgets". Local or full administrators can also distribute gadgets to the organization, and these will appear under "Shared gadgets".
On a product dashboard, only an owner can add and distribute gadgets. Therefore, there is no distinction between "my" and "shared" gadgets.
Click on the "Add gadget" button to create a new gadget. If you do not see the button, it means you do not have the necessary permissions (applies to product dashboards).

Select the type of gadget you want to add (read more about the different types of gadgets further down in the article):

Depending on the gadget you have chosen, you will then need to fill in different details. Please refer to the specific gadget for more information.
The name of the gadget is pre-filled, but can be changed in the gadget's settings. Note that the gadget does NOT automatically change its name if you change the name of the underlying component, for example, a measure.
Maximise gadget
You have the option to temporarily maximize a gadget, such as for displaying it during a presentation. Simply select the "Maximize" option from the overflow menu.
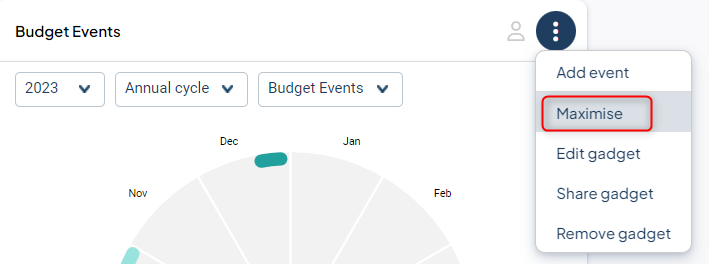
To exit the maximized view, simply click on the cross in the top right corner.
Edit gadget
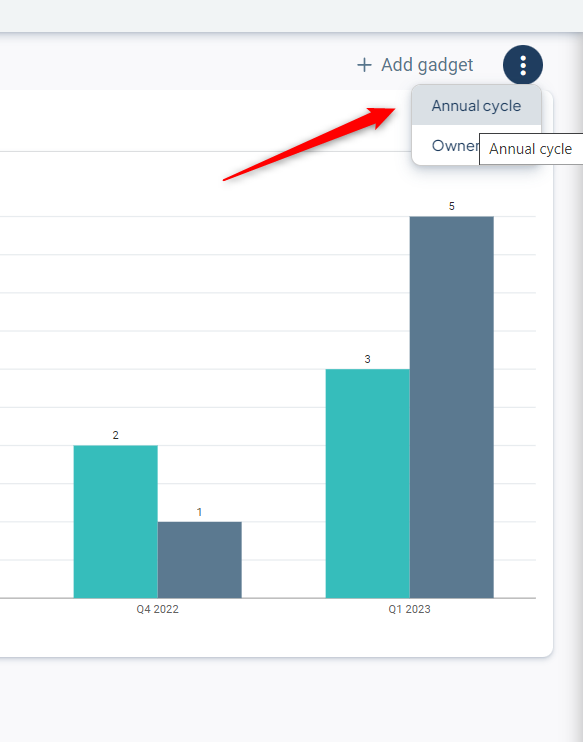
To resize your gadget, simply use drag-and-drop in the bottom right corner. If the gadget is shared, only the administrator can change its size. However, you can always adjust the size of custom gadgets.
To change the placement of a gadget, simply hover your mouse over the top row of the gadget you want to move, and then you can drag it to the desired location. If the gadget is shared, only the administrator can change the placement. However, you can always adjust the placement of custom gadgets.
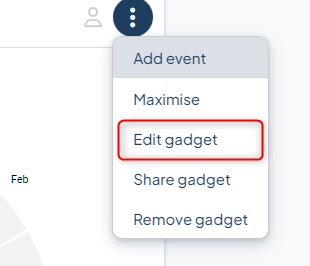
To change the name of your gadget, simply select "Edit" from the overflow menu:
The ability to change other settings depends on the type of gadget. For more information about specific gadgets, please refer to the relevant gadget information.
Sharing gadgets within the organization
A gadget can be displayed only for the user who adds it or shared with the organization.
On the general dashboard in My Work, you can share if you are a local or full administrator.
To add and share gadgets on product-specific dashboards, you need to be the owner of the dashboard itself. If you don't have the ability to add gadgets, it means you are not the owner. A full administrator can grant you this permission.
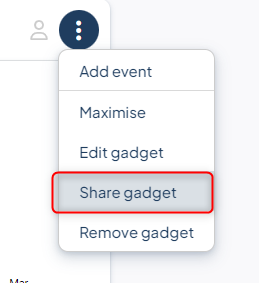
To share a gadget after it has been added, you can use the overflow menu.
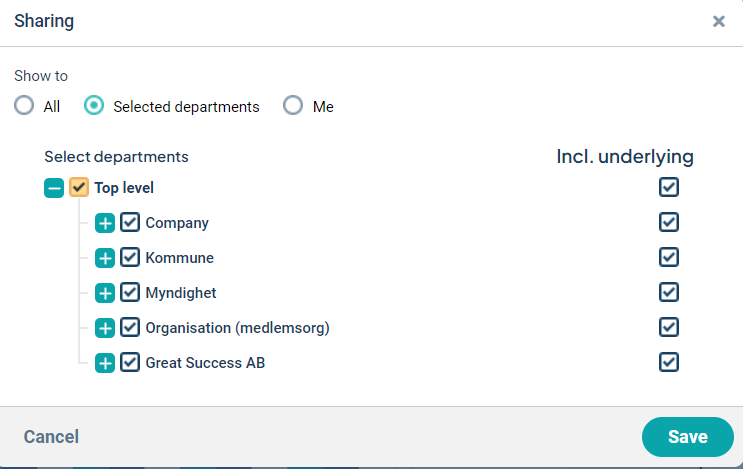
Choose which units the gadget should be displayed for and save. If you are a local admin, you can only choose to display for the units you have authorization for as a local admin. If you are a full administrator, you can also choose to display for All:
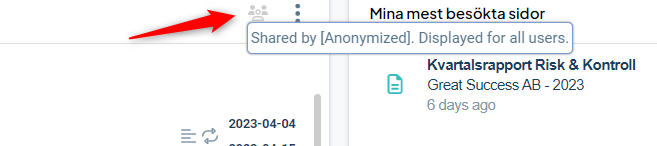
After sharing, you can see who has shared and who it is displayed for by hovering your cursor over the user icon:
Remove gadget
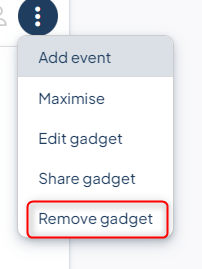
To remove a gadget, simply select "Edit" from the overflow menu:
If the icon displays a single user as above, the gadget is only displayed for you and therefore disappears for. If the icon shows multiple users, it is removed for all these users.
No information is permanently removed when you delete a gadget since it only displays information from other parts of the system or external systems.
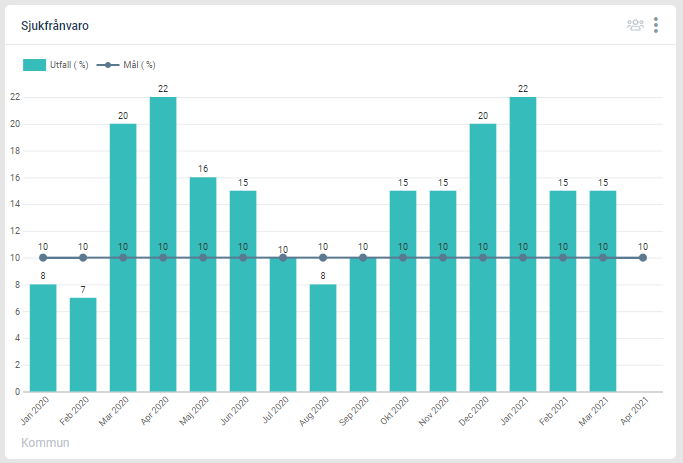
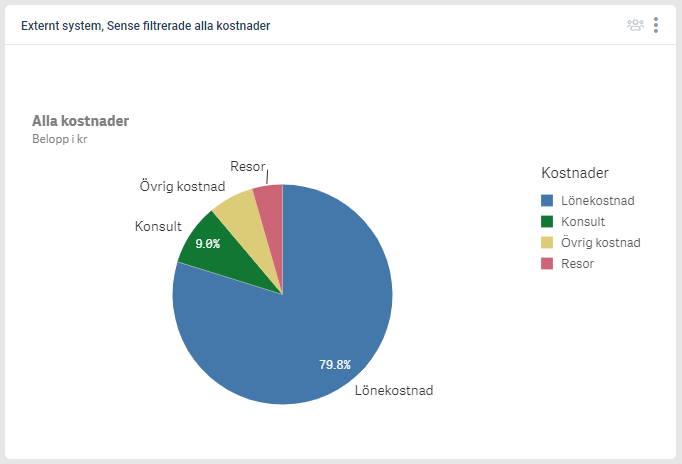
Chart gadget
With a chart gadget, you can visually represent your organization's metrics/indicators/key figures.
Gadget for external page
With the gadget for the external page, you can display pre-set external pages and other pages from the internet.
You can easily create an external page by using your own URL or selecting from a list of preset links..
Note that simply filling in "https" in the gadget is not enough. The link you want to use must have an SSL certificate, meaning the source must actually be "https" for the gadget to display the correct information.
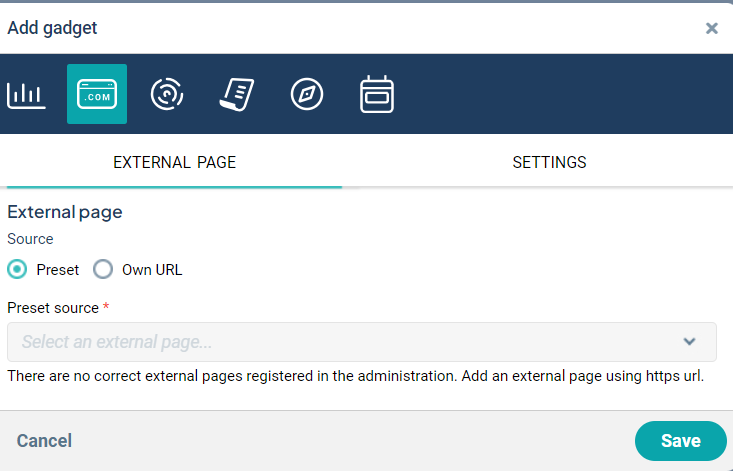
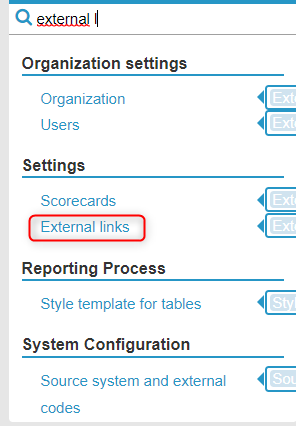
The preset sources are created in the Administration under External Links by a Full Administrator.
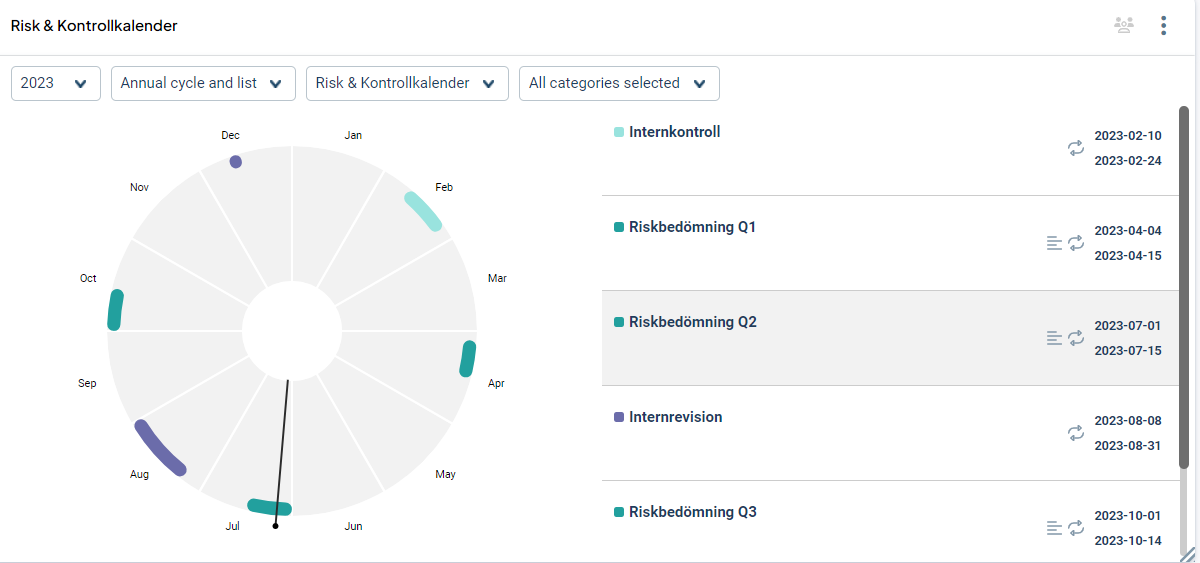
Gadget for year wheel
The Year Wheel gadget allows you to display important events that your organization wants to keep track of. Please note that this gadget does not support the old Year Wheels found in the administration section.
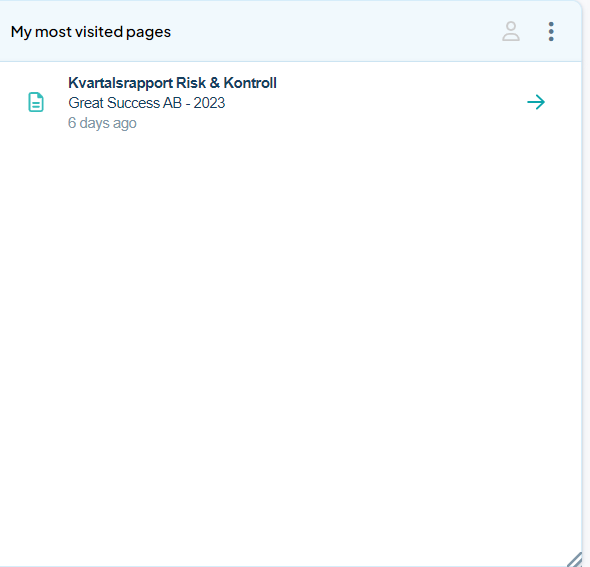
My Most Visited Pages Gadget
The "My Most Visited Pages" gadget serves as quick links to the pages you frequently visit in Stratsys. This gadget has general settings and is therefore easy to add.
The gadget is not available as an option on product dashboards.
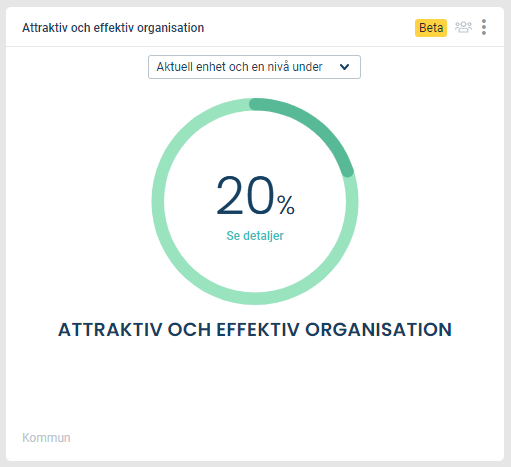
Progress Overview gadget
The Progress Overview gadget visually displays the status of your planned activities for a specific goal, allowing you to also view details.
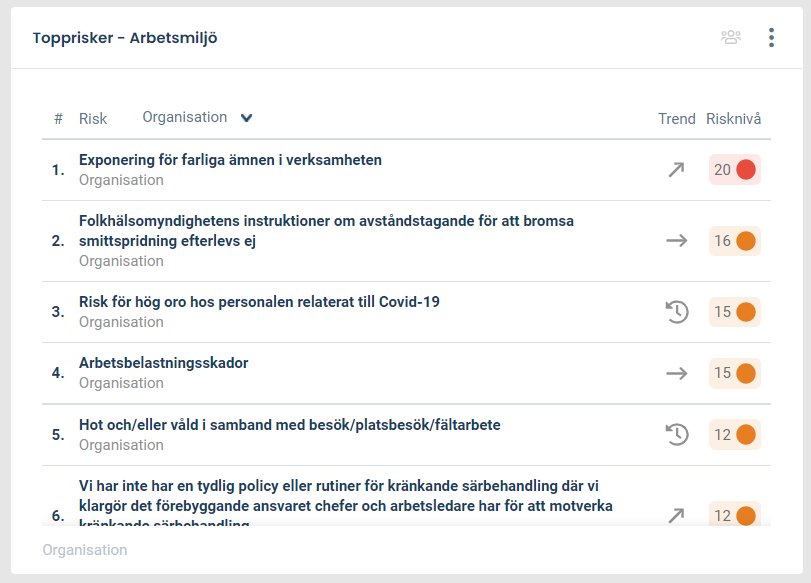
Gadget for top risks
With a product license, such as Risk and Control, you can visualize your top risks on the product's homepage.