Update existing views to support the workflow that your organization requires.
View Settings
Update existing views to support the workflow that your organization requires.
Tip: Don’t recognize the images? You might be working in our classic view type. Instead, see the following article: View Settings for Classic Views
Add or Remove a Column from the View
Settings for Including Objects
Description
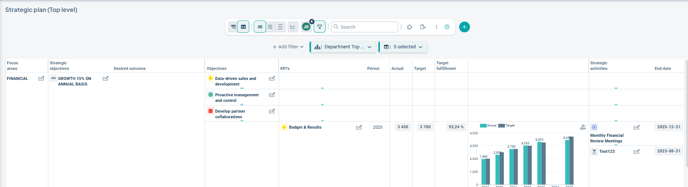
The areas where information can be displayed and edited are called views. This article describes the settings available for the new workspace, which, unlike classic view types, includes multiple display modes.
Feel free to read the article about the new workspace!
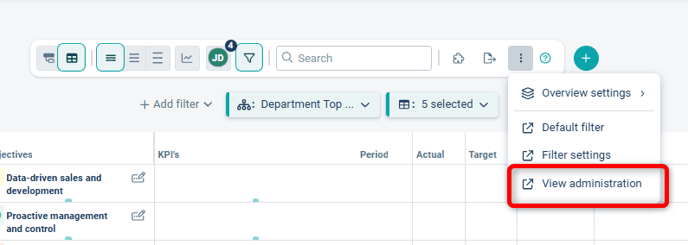
Access the Administration
From the view:
To access the settings from the view you are currently in, click the three dots on the right side of the toolbar and select "View Administration":
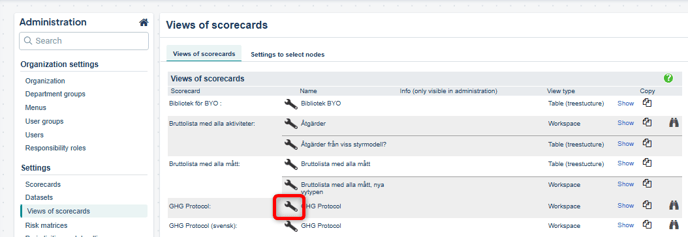
From the Administration:
To edit, copy, or add a view from the administration, go to the "Views of Management Models" menu. The views are sorted alphabetically by management model.
Edit settings for a specific view by clicking the wrench icon for that view:
Add or Copy a View
Read about how to add a new view or copy an existing one and place it in a menu in this article: Create or Copy a View.
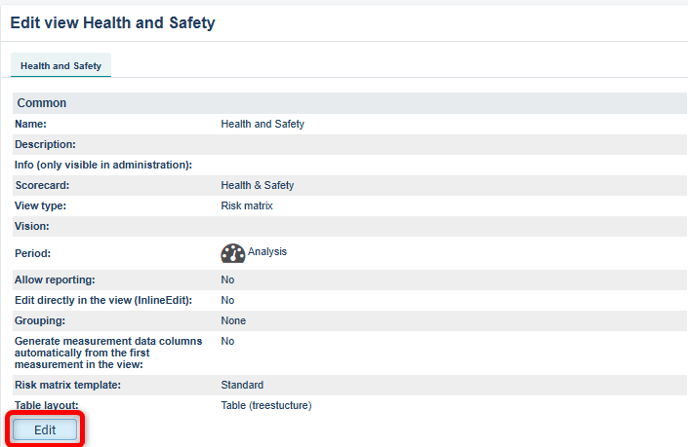
View Settings – Edit a View
There are many settings for views. Here is a brief overview of what they mean. Many settings have green question marks that provide further explanations.
Tip: Experiment without affecting users by copying the view. Try changing the settings in the copy. Once satisfied, you can replace the existing view with your new copy in the menu administration.
The view's settings consist of three sections:
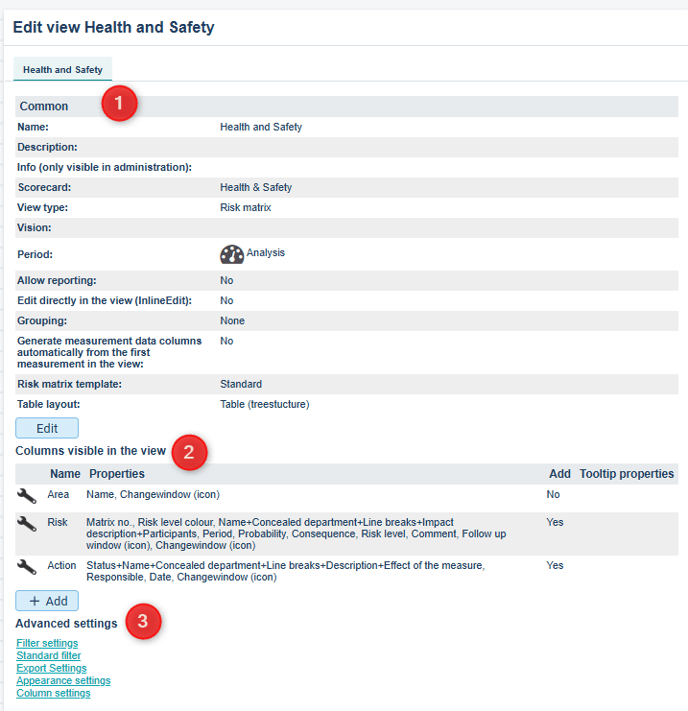
General Settings
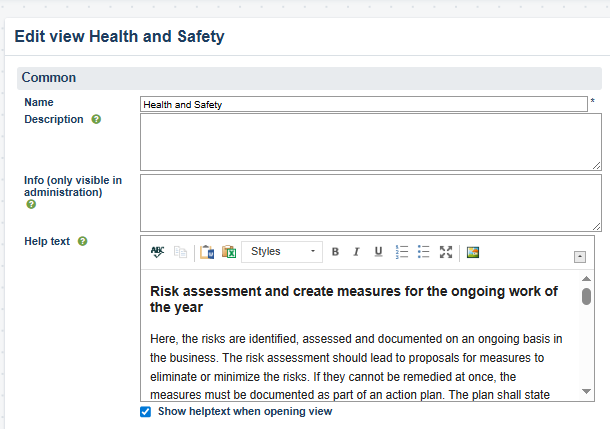
Click the Edit button to modify the general settings.
Under General, you can specify the name and various descriptions. Help text is managed from the communication area – see the following article: Help Texts in the New View Type
The Display Mode determines how data is presented and organized. This article only describes the new workspace. Read more about classic display modes.
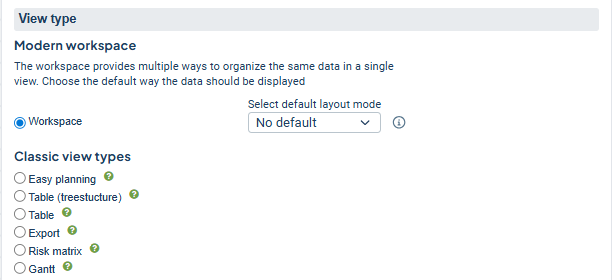
Unlike classic view types, the new workspace includes several different display modes where you can select which display mode should be the default for the workspace:
- No default setting: With this option, the user will always return to the most recently selected display mode.
- Other options: The selected mode (Table or Thread) will be shown as the default for the user in each new session.*
Note: The first time a mode is set as the default, you may need to either log in again or close and reopen your browser.
*Session refers to each new login instance. It also includes cases where the browser is closed and reopened.

Tip!
To update a classic "Tree – drag and drop" view to the modern interface, change the display mode to "Workspace" for the classic view and set 'Thread Mode' as the default.
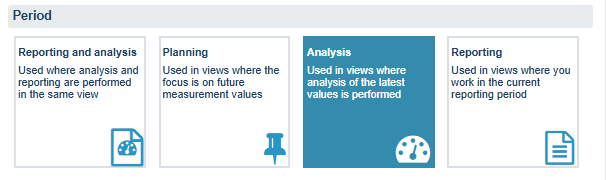
Period determines from which period information is displayed in the view. Show advanced settings to see exactly what is activated for the different options. Also read more in the article Period Settings.
Select a desired Sorting Method for the view. Read more about the different sorting options.

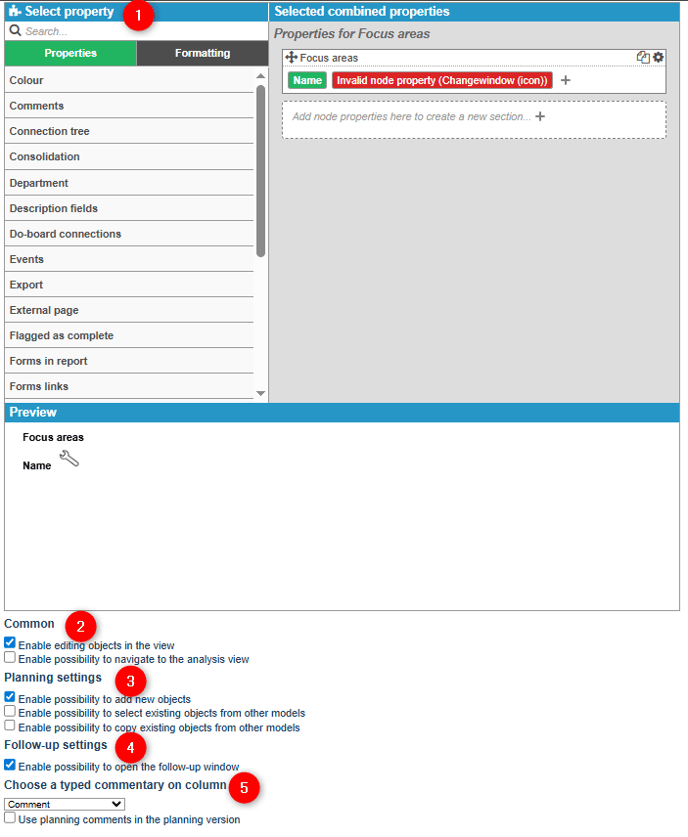
Settings for Each Column
Under column settings, you can adjust the properties and settings for the column. You can also add new columns that you want to display in the view, or remove columns.

Click the wrench icon to access the settings for the column.
-
At the top, the properties to be displayed for the object in the view are shown. Read more about object properties. If you have converted a classic view to the new view type, some properties will appear in red and be marked as invalid. These can only be removed.
-
Under Common, you choose whether the object can be edited and whether the analysis view can be opened.
-
Under Planning Settings, you can enable the ability to add and include objects in the view in different ways.
-
Under Follow-up Settings, you can enable follow-up of the objects.
-
The Typed Comment is the comment type that will automatically be displayed in the follow-up window (if no other comment type is activated via the node properties).
When you enable editing, follow-up, and the addition of new objects, the view will automatically adjust and display these features in standardized locations.
For example, the plus sign will appear if you have enabled Add, and the follow-up icon will be shown if you allow the follow-up window.
However, other settings must also permit the user to add objects – see this article for troubleshooting: Why can't I add a node in the view?

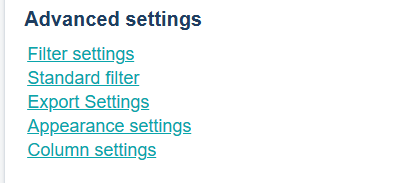
Advanced Settings
In the advanced settings, you configure Filter Settings and Default Filters – see the linked articles for more information.
Column Settings provides an overview and allows you to configure properties for all columns displayed in the view.
Add or Remove a Column from the View
When removing or adding a column to a view, always review the filter settings and default filters to ensure they reflect the new or removed column.
When removing a column, you may need to rebuild the view’s default filter, as filters on the column are not always removed automatically.
Note that it is possible to filter the view by columns. If a column that has already been included in the view is missing, it is likely filtered out. You can also choose to filter out a column if you want to temporarily remove it from the display.
All columns from the management model can be added for display in the view. If not all columns have been included yet, an "Add" button will be displayed below the column list (1). Click this and select the column you are missing in the view. Then make the desired column settings.
Remove a column from the view by clicking the wrench icon to the left of the column (2).
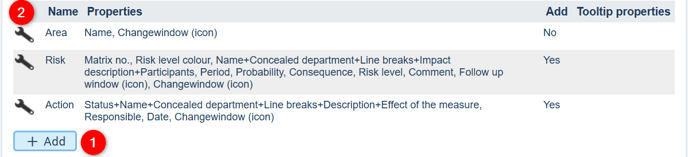
Then select "Delete" at the bottom of the view. The column will not be removed from the management model, but all settings for the column will be deleted. This action cannot be undone.

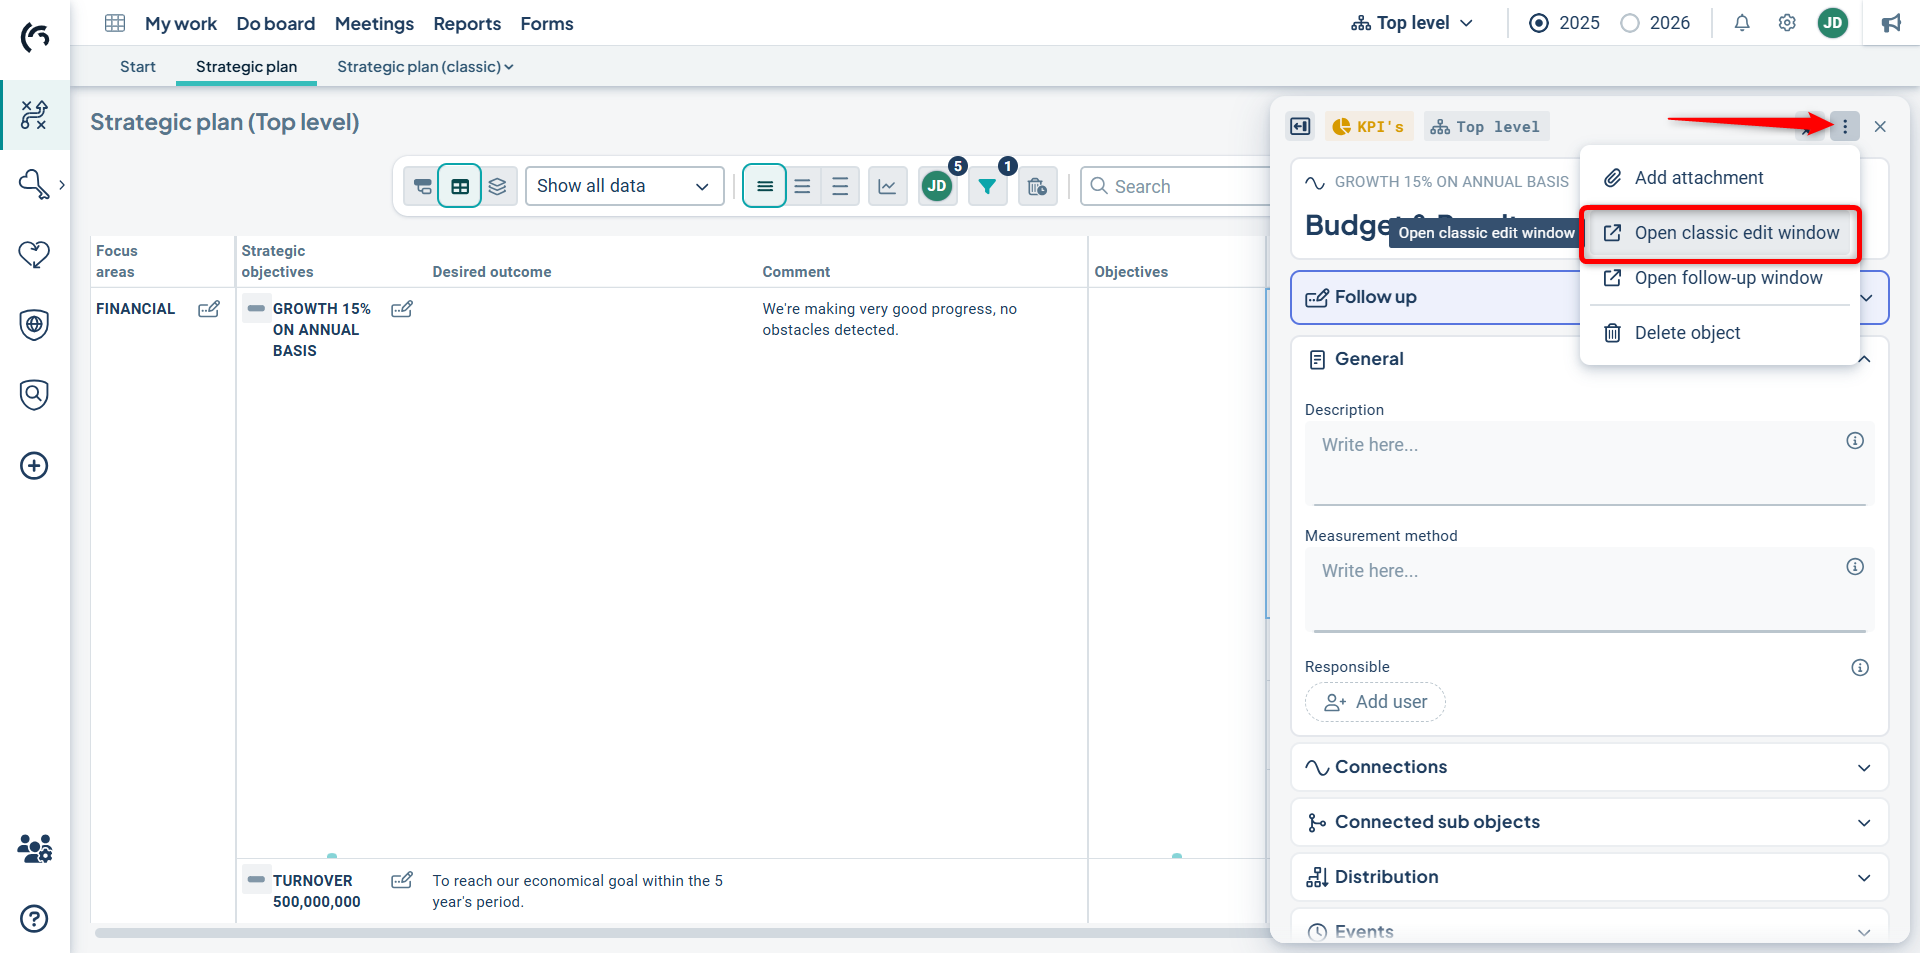
Classic Edit Window
If needed, you can switch to the classic edit window for the view in the new view type.
If you switch to the classic edit window for the new view type, you will access the Edit and Follow-up windows via the context menu (three dots). It is therefore not possible to click directly in the view to open these windows with this setting.
These settings only affect the inclusion of objects via the classic edit window. The settings have no effect when objects are included via the new object window. If you are using the classic window, see the article View Settings for Classic Views.