When the report is activated, the people who are authorized to report can start this.
There are three ways to go into a report:
(1) Via the start page
The reports that the user is a reporter will appear on the home page of the "My Reports" table. By clicking Report You will be directly in the report.
(2) Via Report page
Here you can see a list of all the reports that are found on the unit you are on. Click the Report To start reporting.
(3) Via the horizontalmeny
Administrators can post reports as Ribbon in the menu and if this has been done you can enter the reporting directly via the menu.
When you enter the report, you will see, on the left side of the page, the entire table of contents (see figure below). Under These headings are editable text sections and tables where you can type. All the sections where you can type are marked with this icon:
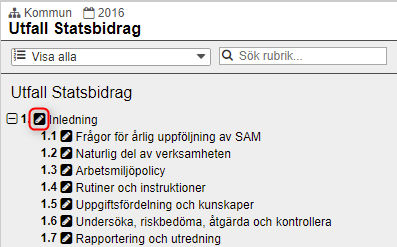
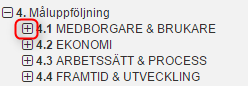
In initial mode, headings are displayed down to the second level, i.e. Header and the first subtitle level. If there are additional heading levels below them, it will be marked with a plus sign in front of the heading. To expand (see all subheadings), click the plus sign.
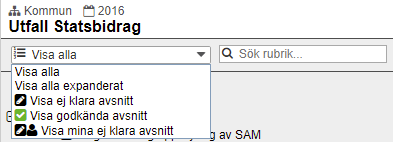
To facilitate the reporting, there is a drop above the content structure. This can be helpful, for example, to find all headings that are not klarmarkerade. You can also search for any heading through the search bar.
In the toolbar, you have a number of features that can help you report:

Genomförandestaplar -displayed through the orange and/or green bars. Shows how many percent of the report is ready and ready to be approved
 Preview -Displays a preview of the report in a new window. See Preview the report.
 PDF -Exports the report to PDF.
 Word -Exports the report to Word. The arrow below the Wordikonen gives you the option to export the report with or without table of contents. If you choose to export without a table of contents, export is much faster.
 Update Update updates everything in the report, including headers.
The headings that have the underlying sections and tables to be filled in (and which are not klarmarkerade) are marked with an icon representing a block and pencil.
Click on such a heading to start editing.
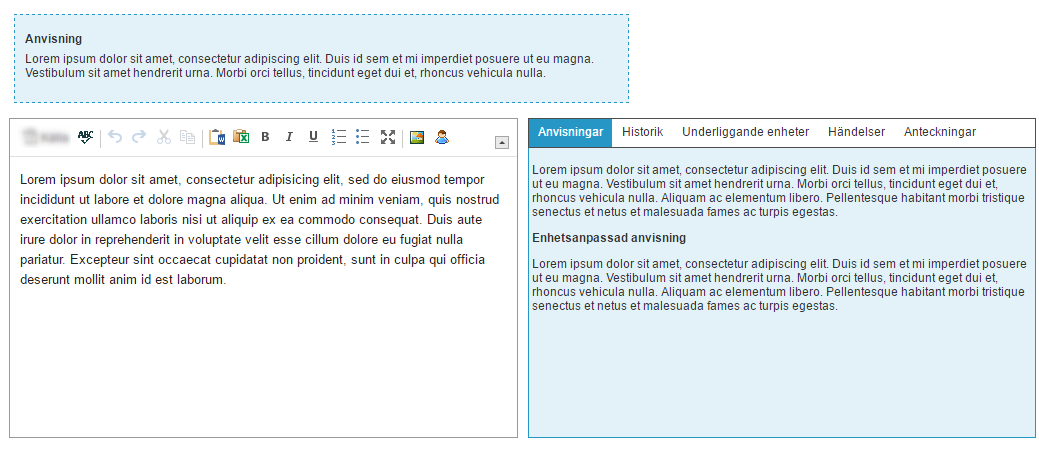
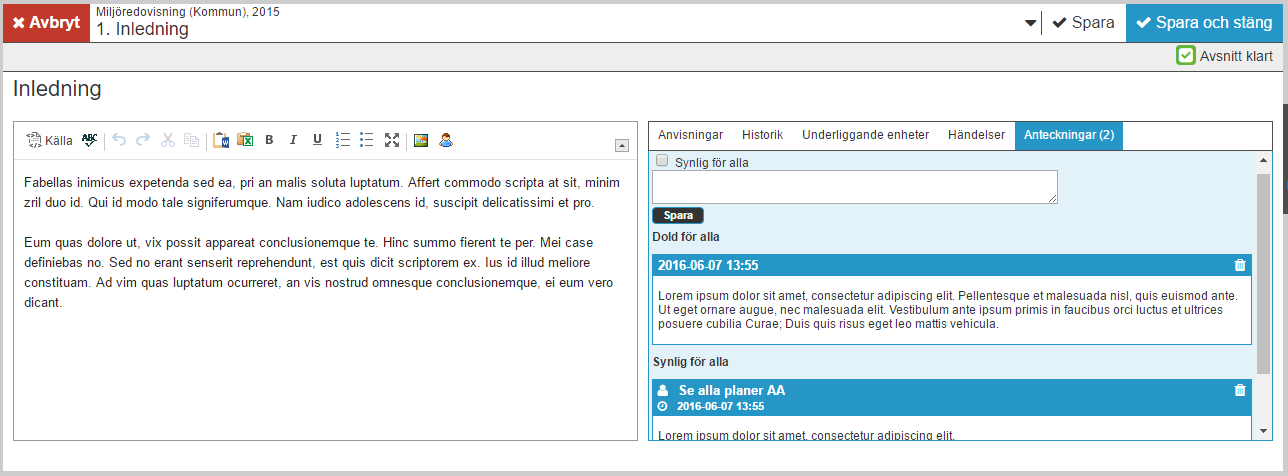
In the right plane you will now see instructions and text that may have already been reported and saved before. Text that has been reported previously is marked with a blue line next to it.
To open and write in the section, click on the button Edit Top. You can't edit in the section while another user is inside and editing. If the section is already opened by another user, the Edit button is not displayed. Instead, you'll see information about who has locked the section and the time it's locked.
After you click the button Edit , the section is automatically locked for other users for two hours. To make it accessible to other users before the time limit has passed, you must either click the button Save or button Cancel.  icon appears. Last edited by... Name, date and time. If you think you need additional time to work with the section, you can always extend the lock by clicking the Save and continue. When the lock time is passed, the system always automatically saves what you have reported.
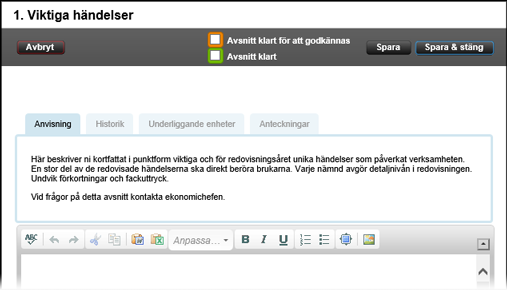
Above each table or text section, you will find three different tabs with assistive units in your work (if you have chosen to click the check box Visa information At the top of the page, the Help information is not displayed).
The information available and intended to help you are:
- Instruction
- History
- Underlying units
- Notes

The purpose of the instructions is to help you report text in a report. There may be both a general instruction for the title but also directed directions to the respective text sections and table below the heading. These directional instructions are located to the right of the text section or table.
To learn how to write instructions in administration and unit customization, see the following links: New title, Ny text, Add a unit specific-instruction.
In the tab to the right of the instructions you have the opportunity to view the history of the report. Here you can go in and read what was written in a previous period of the report. The historical text, you can then choose to copy down the text box and then adjust.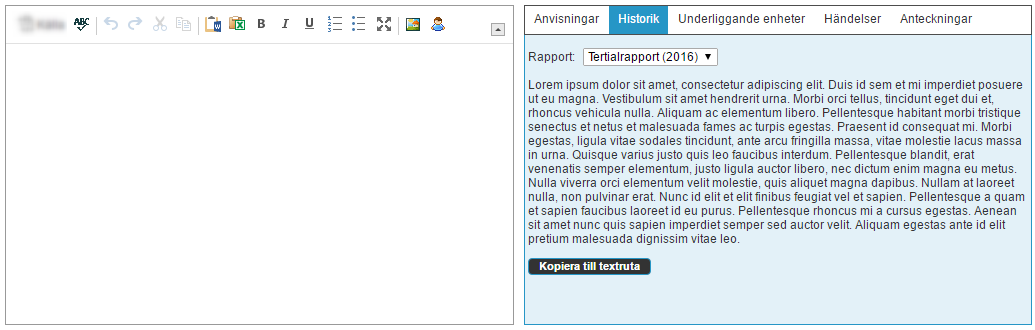
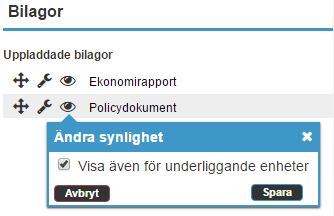
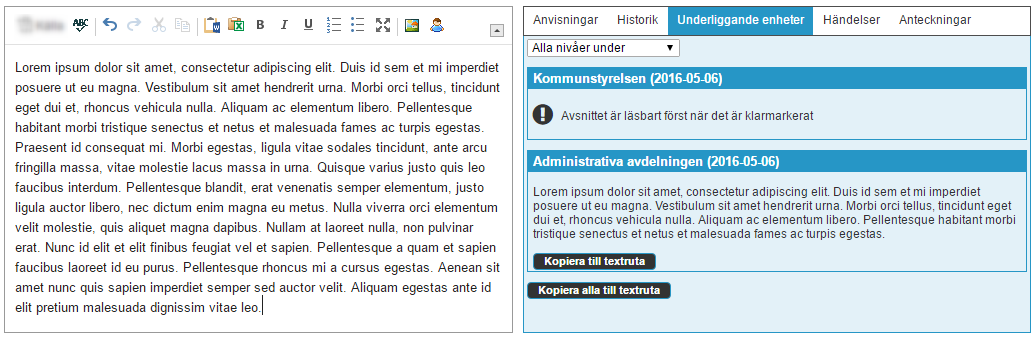
If the report is written at multiple levels in your organization, you can see what is written to the underlying entities in the section. Different reports can have different settings for when information from underlying units should be readable, for example, only after the section on the underlying unit has been klarmarkerat.
Obs! Tab Underlying units Does not reflect on headlines/tables from consolidated nodes. However, this will be supported from version Stratsys 6.3.4.
Here you can write private notes about the section that only you see. Note does not appear in any report or printout. You also have the option to make the note visible to others, and then it will be visible to other users who are authorized to edit in the section. These people can then also respond to your note.
(To read/write/reply to notes, you need to be in edit mode, see picture.)
You can add text through the comment fields, for example, A text node or report. Comment fields have their own toolbar, which you can use to create textures and titles, and more in your text sections. You can also choose to paste from Word and Excel, so we recommend that you use the icons that are available in the Comment field toolbar.

Click the ABC button to enable the spelling control in the Stratsys. When activated, misspelled words will be red as in the exmplet below. If you click the Word, the spelling checker will suggest what the correct word might be.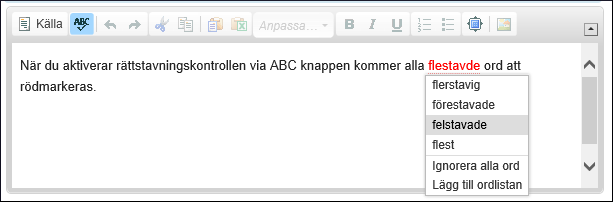
When you type in a comment field, you have the option to use the undo-button to step backwards or forwards in your changes. This is useful if you accidentally, for example, deleted something or want to switch between different comments. You can also use the keyboard shortcut CTRL + Z to undo a deletion.


Obs! To undo something works only until you have chosen to save your changes or choose to cancel to leave the comment field.
Note that you can never paste tables and pieces of text at the same time. If you paste a large section that contains both text and tables, the tables will be cleared and the text only pasted if you selected Paste from Word. The reversed ratio applies if you have selected Paste table from Excel.
Tables can be pasted from both Excel and Word. To do this, use the Word  and Excelikonerna
  On the Text Field toolbar.
Obs! When you paste, graphical formatting is cleared. That is, background colors, text colors, placements, indents, borders, and pictures inside a table. However, cell formatting (such as currency, percentage, date, and so on) remains. The same applies to merged cells in a horizontal direction.
If it is a table you pasted, you will be directly to a dialog box where you can change the appearance and format of the table. If it is a text, format it directly in the story.
Dubelklicka the table to enter edit mode.
You have the option to add or remove rows even in pasted tables.
You can choose whether to insert an image file or to paste something you've copied, such as an Office program as an image. This is used ex... Exceltabeller with advanced formatting. Cannot edit further in Stratsys. Keep in mind that the size should fit in the Wordmallen!
You can upload or paste images from the Clipboard. Here's how to do it:
- Click the Insert Picture.
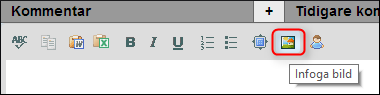
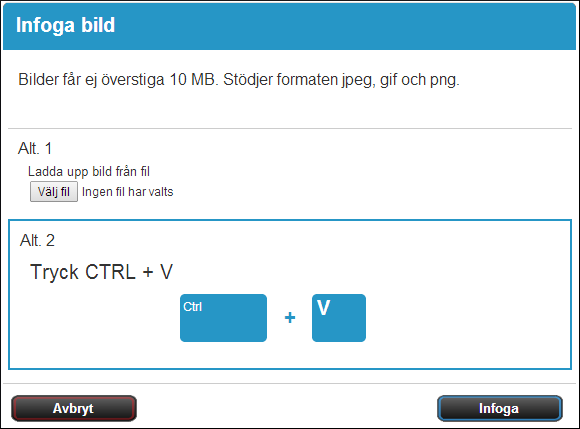
- A window opens where you can insert your image. You can do this by choosing between two options.
Alt 1 -Here you upload your picture by selecting a saved file on your computer.
Select an image in the correct file format (made in your own explorer). The image must have a JPG, GIF, or PNG file format and should not be larger than 10MB. If the image was larger than the edit area of the comment field, it is reduced to fit. If you want the image smaller than the original, you can change the file size of any image editing program before you paste it.
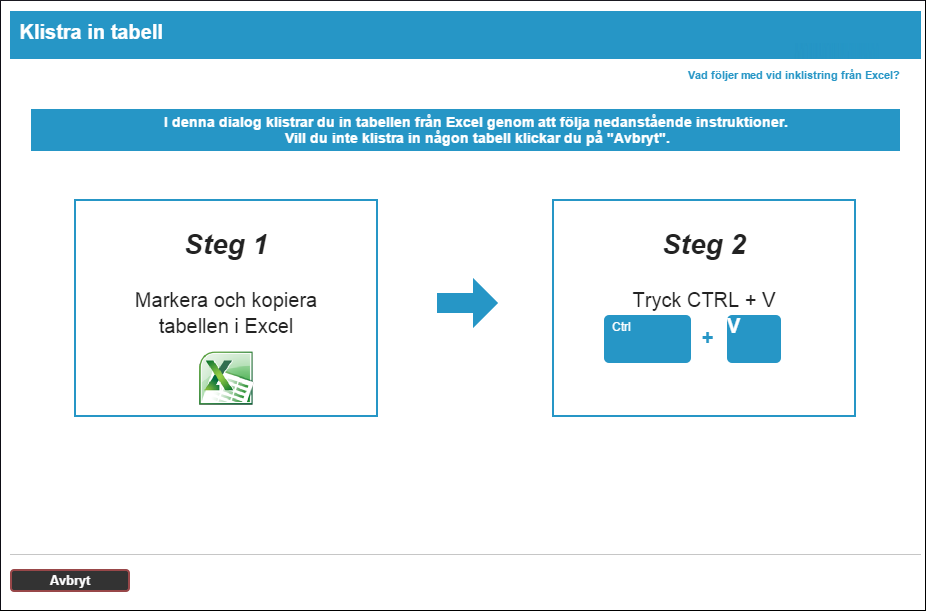
Alt 2 -To paste an image that you have copied (Ctrl + C), press CTRL + V. Depending on whether you have an updated browser or not, the Inklistringsrutan looks equally different.
In this way you get an exact copy of a part of eg. your document or spreadsheet. You can paste images of tables that contain images or other objects, among other things.
Obs!
If you insert cells from Excel in this way, you cannot edit the content because the cells are pasted as a static image. Would you like to be able to edit the table paste it as a table instead.
Remember not to copy areas that are larger than that they fit inside the margins of a normal A4! If you do this, there is a risk that the image will be so small that the content cannot be read. In Excel, if you want to see the size of the area on one A4, you can go to the display mode Sidlayout You can find on the status bar at the bottom of the program window.
If the first time you use this feature, you'll get a security warning: "The digital signature of the application has been verified. Do you want to run the program? " Select Run Or OK. Now start a so-called "Javaapplet" and after a few seconds the button appears Paste.
If you encounter problems when you paste images, it may be because you need to update Java to a newer version on the current computer.
Drag and drop the image where you want it to appear. Exceltabeller pasted from the Clipboard are also saved as an image.
Click on the image and then press the "Delete" key.
If there is a character limit on the section you're editing, you'll see an active countdown to how many characters you have left to use at the bottom of the text box. You can save long texts until the clear section. After the clear selection, the character limit may not be exceeded.
You set the character limit in the Rapportmallsstrukturen for the selected section of the report.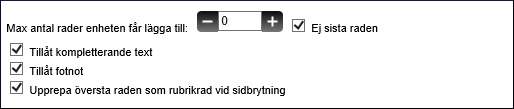
When you're done reporting, it's always important to save. Click the button save and close.
To continue typing but still save what you've typed, click the save.
To leave the section without saving, click the cancel.
If you forget to save and point outside the editable area, you'll see a stop symbol and a tooltip explaining that you need to save or Cancel to continue.
When a bulleted or numbered list is pasted from another document, the formatting of the bullets/numbering will disappear. Therefore, it is best to make bulleted and numbered lists in the comments pane. Select the selected lines and click on the icon for the desired list.![]()
When a lot of text is inserted and formatted, the regular comment box can provide a limited overview. To enlarge the page, you can use the Fullskärmsvy function. You enable it if you click this icon. You need to exit full-screen mode before saving and closing the node. To exit the full-screen mode, click the same icon again.![]()
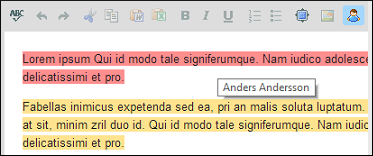
When you report text in nodes and reports in Stratsys, you have the opportunity to see which user has typed what. This is a useful feature in cases where multiple users are working on the same text.
This feature is found in the text columns and has a symbol resembling a "little old Man".

When you click on the icon, each user's text will be highlighted in different colors so that you can see who has written what. You'll also see the name of the user who typed each text if you hover over the text.
In the cells that are empty, you can fill in numbers or text, depending on what is meant. In cases where indicator groups are set up, select an icon from the drop-down list that appears in the cell.
If Malladministratören has set a formula in a cell, you cannot type anything in the cell. The value in the cell is automatically calculated when you save or click the button Update Now.
Obs!
Keep in mind that you don't have your own space as a thousand separator. For thousands of delimitations, the system automatically resets after you save the section.
TIPS!
If you paste table data from tables in Word or Excel, you don't have to cut and paste one cell at a time. It is quite possible to cut multiple cells at once and then set the cursor in the top left cell of the table where you want to paste the data. The cells that you have cut will automatically fold into the corresponding cells in the table in the system. (This is true when pasting in tables-not text sections.
If your template administrator has allowed additional rows to be added to the table, you see that the number of rows that can be added is listed above the table. To add a new line, click plustecknet To the right of the table. There are plus signs next to each table's rows, which is designed to allow you to select exactly between which rows you want to insert a new line.
To delete a row that you added, click the minus sign to the right of the table.
If your template administrator has allowed footnote or complementary text to be added to the subtable, you can add this by clicking Add footnote Or Add complementary text That you find below the table.
The text reported in the footnote falls directly below the table in italics.

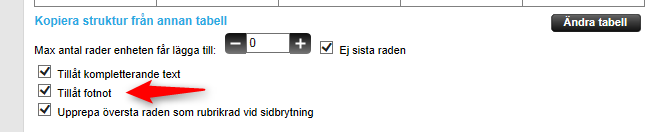
Below is a bid on how the setting looks for the report administrator. Similarly, you can also click a table that is retrieved as a report part and choose whether to display a footnote. This setting is done separately for each table.
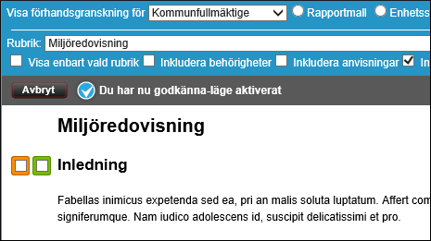
When you feel you have completed a headline, you can use a feature called the clear mark title. This helps to provide an overview of what remains to be completed in the report. You can klarmarkera headers in two different ways. Either you do this directly inside the reporting mode in a text field or you do it in the Klarmarkera and accept in the approve mode. Accept mode is reached by checking the Accept mode check box
If one, two, or no clear selection buttons appear depends on what the root is set to. If you don't see clear selection boxes for you, it may also be because you don't have enough behörgihet in the Stratsys to do this. Contact your admninstratör If you need more privileges.
Note that a Klarmarkerad Rubric can give more users permission to read the text. This is governed by the legibility of the report, see Report. In some cases, headers that are retrieved from the scorecard will klarmarkeras automatically. This is due to a setting on the report and whether there is something that the user can do, or if the comment is clear marked in the control card. The report can also make use of only green checkmark, or green and orangebock or none at all.
Clear mark 
Approve for clear selection. 


If you think the entire section is ready, click the Section ready to be approved Before saving. As a result, users who have permission to approve the section can do so if you klarmarkerar the section, you cannot edit the text retrospectively (unless you also have permission to approve the section).
In order for you to edit the text again, you first need to have someone with higher user privileges (section ready permission to be approved). See User groups.
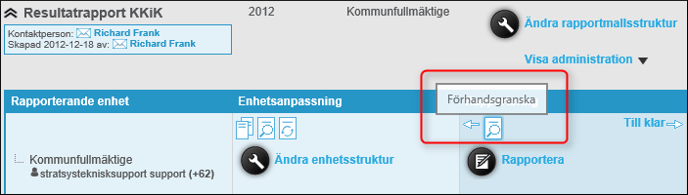
It is possible to approve reports and parts of reports via the Approve-Mode. To access this mode, go to reports and click any report. Here you now select to preview.

You can after you have set yourself in reporting mode for a report, scroll down to the end of the report and there you will find the option to drag and drop files to attach them as attachments.