Create a new report and retrieve the desired data from your reporting.
In Stratsys reports, you build a report structure consisting of headings, texts, and tables.
The report structure can be generated automatically based on information from governance models or built manually using elements you select yourself.
The end result is a report with a cover page, table of contents, and report content.
Contents of this article:
-
Create a new report – or read about how to copy an existing report to the next period.
-
Build and edit the common template (link to another article)
Other settings can be found in the article "Report settings."
There is a clear process for how reporting is carried out:
- A report template is created (new, or copied from the previous reporting period) with a common structure for all units.
- The report is activated for data entry. Responsible users receive reminders to report in their To-do list if reminders are activated.
- Responsible users complete their reporting and mark their sections as ready.
- The report is marked as complete, and can then be exported and later archived.
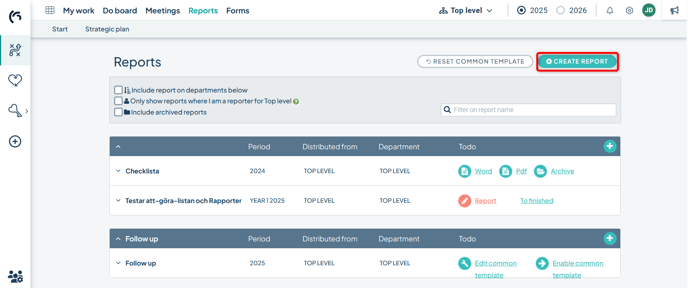
Create a New Report
Go to the reports page and click the "Create report" button in the top right corner.
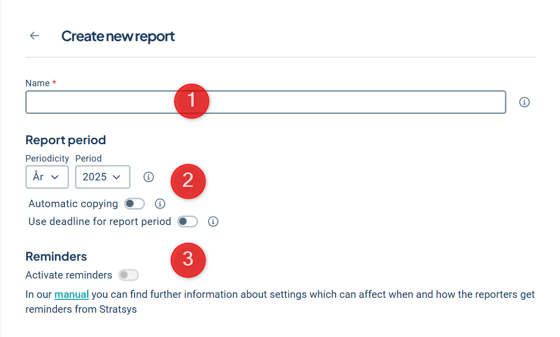
1) Give the report a descriptive name.
2) Specify the period from which the report sections should retrieve data. The report will fetch the most recent outcome or comment from the selected period.
You can choose to have the report automatically copied to the next period. Select whether this should occur when the reporting unit has marked its report as complete, or after a certain number of days following the deadline. Set a reporting deadline if desired.
3) If you have set a deadline, you can also activate reminders for the reporters.
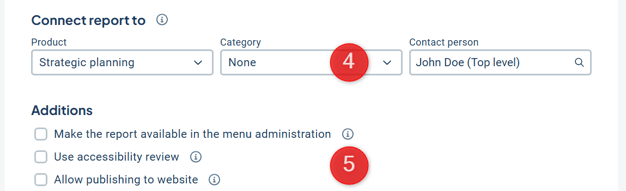
4) Choose to link the report to a product (this option may be unavailable depending on settings). This means the report will only be visible when working within that product.
Select a report category (read more about Report Categories) and specify a contact person if it should not be yourself.
5) Additions: Read more about the available options under Additions by clicking the information icon next to these options.
Advanced Settings
Under Advanced Settings, you can configure the following:
6) Choose whether to use Mark as done for the headings. This provides support for you as the person responsible for the report to see whether all assigned reporters have completed their sections. If you use Completion Marking, you can also enable approval of sections and require that all sections must be completed before the entire report can be marked as complete.
7) Set the Readability for users. Permission to read reports at the unit level is always required, but here you can define more restrictive conditions.

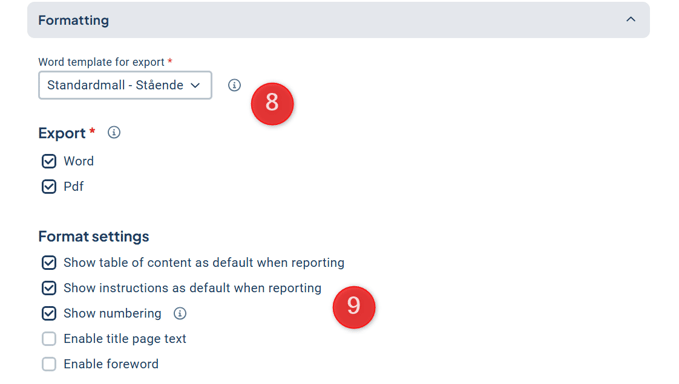
Formatting
Under Formatting, you configure how the report will appear during reporting and export.
8) Select which Word template should be used for export, and whether the report should be exportable to both Word and .pdf formats. The Word template determines the layout of the report when exported to Word, such as font, line spacing, and margins. Read more under Word and Export Settings.
9) Configure formatting during the reporting process in the Format settings.
Choose reporting departments
Finally, choose which units should report for this report. By clicking the context menu (three dots) to the right of a unit, you can make changes at multiple levels simultaneously. Read more about reporting units in Report Settings.
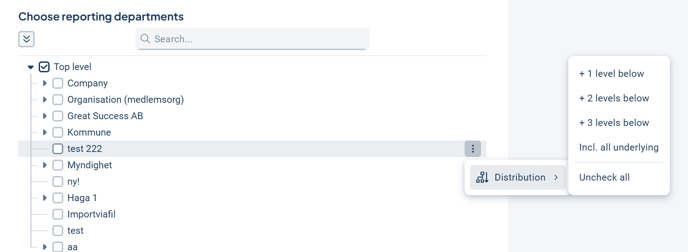
Finish by clicking Create.
Build the Report
Now the report has been created, and it is time to start building the common template to populate the report.
Activate the Report
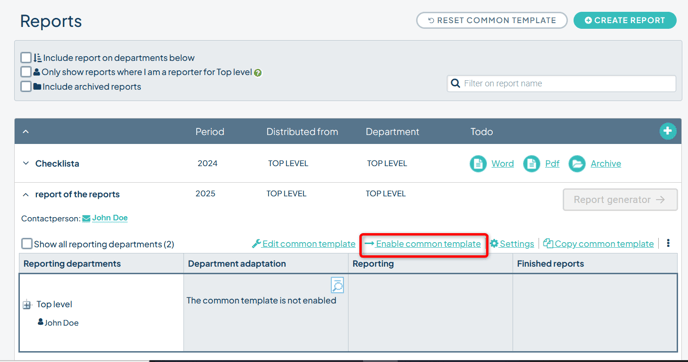
When the report template is complete and you want to activate it for the reporting units, go to the report list (if you are inside the report, you can access the list via the "Back to reports" link found in the upper right corner).
Click on the relevant report in the list and select "Enable common template". Users will now be able to access the report and begin writing.
Once you have done this, you will be given the option to notify those individuals at the units who have permission to administer the unit templates of the report. If you choose to notify, an email will be sent to them with information that the template has been activated for their unit.
Activate for all units directly or activate per unit
If the setting "The common template goes directly to reporting" under Other is enabled, the report will be activated immediately for all units. If it is disabled, you will need to activate the report manually for each unit. If you wish to activate manually, change this setting before activating the report. Read more in Report Settings.
You can still make changes to a report template after it has been activated, but we recommend being cautious with such changes. Any modifications will be reflected in all unit templates, which can easily lead to confusion among unit administrators. You are responsible for informing the unit administrators of any changes made.
Deactivate a Report Template
If you deactivate the report template, it will no longer be available for unit customizations. However, the customizations already made will remain when the report is reactivated. The reporting units will no longer be able to see the report for their unit, as it is no longer activated.
Click the name of the report, then click the three vertical dots on the far right. Select Deactivate. You will now receive a confirmation message where you must click OK to confirm that you want to deactivate the report.
Do you want to delete the report for all units or only for selected units?
Delete the report for selected units
See Report Settings / Reporting Units if you only want to delete the report for one or a few units.
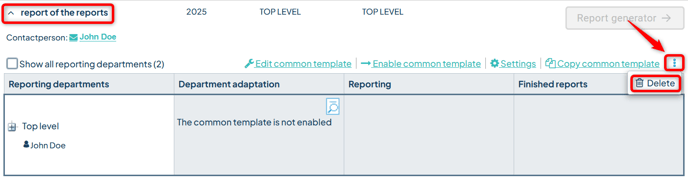
Delete the report for all units
If you want to delete a report, click on the report’s name (so that it expands). Then click the three dots shown on the far right in the image below. Select Delete.
In the administration section, you can restore deleted reports using the "Reset report" setting.
Manage Reporters
Users added as reporters are always granted permission to report in the report. This applies even if the user becomes a reporter for a unit outside their regular permission scope—in such cases, the user will still be able to report in the report.
Add Reporters to a Unit
Click the name of the report to display additional information. Under the unit, a small person icon appears along with the name of the first reporter, and a “+” symbol with a number indicating the total number of reporters.
Click the icon to view all reporters. Click Add reporter (or start typing directly if the cursor is already to the right of the last name) and begin typing the first letters of the name to get suggestions. You can also type the name of a unit to see a list of users associated with that unit. Users highlighted in yellow are designated as default reporters for that unit (see more below).
Remove Reporters from a Unit
To remove reporters, simply click the X next to the user (see above). Changes are saved automatically. You can also remove all reporters at once by clicking Delete all in the upper-right corner of the box.
Default Reporters
Default reporter is a function that automates the assignment of reporting responsibility. Users set as default reporters for a unit automatically become reporters in all new reports (not copied ones) created on units where they are designated as default reporters. Old reports or copied reports are not automatically affected by changes to the unit’s default reporter.
What permissions are required to modify reporters?
The user must either be a reporter for the report on the reporting unit or have permission to administer unit templates or report templates.