Delete and restore deleted users
Log on to a user account for support purposes
Here you can see a list of all current and past users in the system. Either the user who is added through this interface or they can be synced from e.g. Your Active Directory. The settings you can make with your users depend on the way they're added.
If users are added directly to Stratsys, you can add new and modify existing users on this page. You can also use the search function to search for a selection of users. You can log on as a different user to facilitate support or remove a user who is no longer active.
Obs! Keep in mind that if you have multiple users with the same name, only 10pcs will appear when selecting eg. User to responsibility role
Tab: General
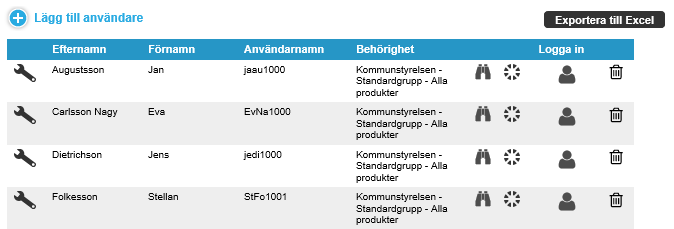
Here you can search for and edit different users in the system. The matches are shown as in the picture example below. For each user, you can see what he/she has for the user name, which User groups they belong to and what license level the user has.
Changes in the license level can only be made by Stratsysanställda. Please contact your consultant if you have any questions about this.
Search Users
I rullgardinslistorna Organization And Behörighetsgrupp , you can specify different search options to provide a more limited selection of users. If you don't know where a user belongs in your organization, you can choose to Include underlying units and search all the way from the top level of the organization tree.

To search for a list of all users belonging to a particular unit, leave the Name Site. You can search on both the user's name and email address.
Press the button Search To complete the search.
Deleted users
If you enable  Show only deleted users You can also search among these. When a user is removed, the extra characters is added after the user name. This causes the Användarnamet to be different than it was when the user was active.
Users who cannot sign in
If your consultant has helped you to enable the ability to add new users directly to the responsible field in nodes, the option is visible Show only users who can't sign in. It gives you the ability to filter out users who doing this cannot log into the system.
Export to Excel
Click the button Export to Excel The list is exported as it is currently filtered. All hits come with the export, even if only 10 are shown on each page of the list.
Add user
Start by clicking  Add user And then fill in the following:
General
First and last names are required fields.
Language
If you already know that the user wants to use the tool in a language other than the default language. Users have the ability to change language afterwards. You can do this in the account settings that you find in the upper-right corner next to the green question mark in the Stratsys.
Contact
Email address is a required field when it is used for reminder mail from the system.
Setting Local contact person Used if you want the user and its contact details to be visible to the other users on the unit page for Contacts. We recommend that all upper levels of your organizational tree have at least one local contact person that users can turn to with their organizational questions. Questions about distributed reports and targets that are visible in the organisation. These users can in turn bring technical issues to your full administrators for EV. Contact with Stratsys support.
Login
Follow your respective rules for how to set up a user name. You have the option to force the user to change the password on first logon. See Password settings For password security rules.
See Also Single Sign On and AD Synk.
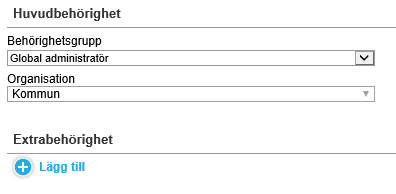
Main premission
Select the permission set that you want the user to belong to and which part of the organization the permission will apply to. If the user needs additional privileges, add it as Extrabehörighet. If the user has multiple permissions and one of the Extrabehörigheterna gives higher privileges than the main permission, the user has the higher privileges.
Obs! It can be difficult to get an overview of a user's eligibility if he/she has too many extra permissions so we recommend some restriction. Please contact your consultant if you want tips on convenient privilege sets.
Administrator for scorecards
Add the name of the scorecard to which you want this person to have administrator permissions. Click an empty line, and then type a few letters from the scorecard name to perform a search. The user is given the ability to change settings in that particular scorecard and access it through a list that is displayed directly hen has entered the administration.

Units where user is the default reporter (Reports)
Select which unit or units the user will be the default reporter for. See Standard contributors and standard entities For a more detailed explanation of the functionality.
Units in which the user is the default manager (nodes)
Specify the unit and the responsibility roles to which the user is to Automatgenereras. Se Standard contributors and standard entities For a more detailed explanation of the functionality.
Budget
If you use view type is Aktivitetsbudgeteringsmatris, a field for Budget for users. In this field you fill in the number of budgeted hours per person. In the Matrix view, it will then be displayed if it is scheduled for more person days than the budgeted for the user.
To display this option, it is also necessary to have the option Enable the ability to set budget per user in user administration is enabled. This can only be done by your consultant. See Contacts.
Information to the new user
Once you've added a new user, it will automatically send an email with login details to the email address you provided.
Add many users at the same time
It is also possible to create a very large number of users at the same time by uploading a excel. Contact your consultant for help with this. See Contacts.
View and edit users
To view and edit a specific user, click  Wrench To the left of the current user's name. You will then get to the page Edit User Where you can view and change the settings that the user has. See Add user Information about the various settings.
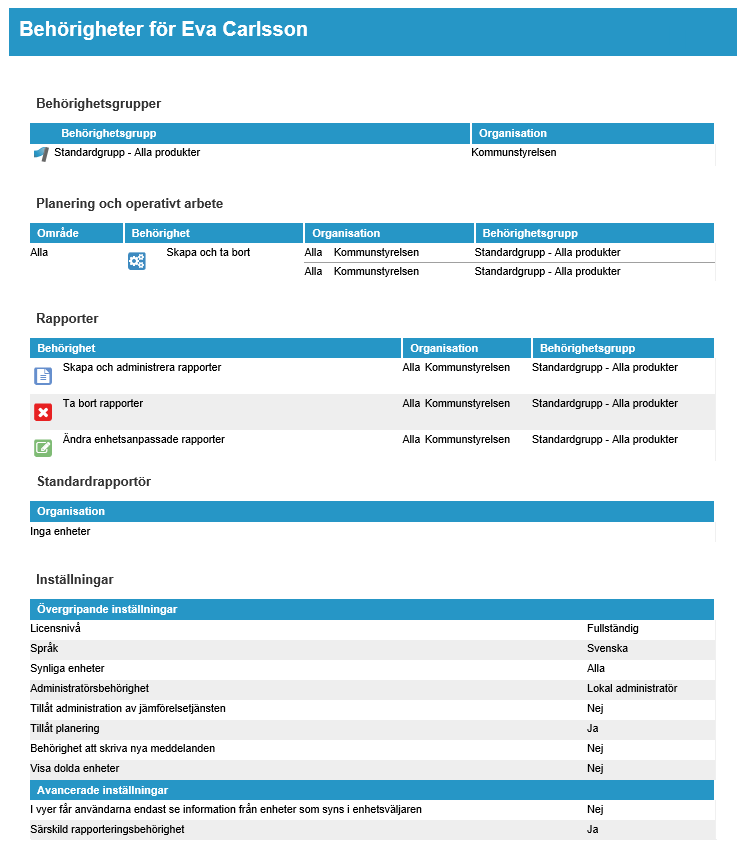
View detailed permissions per user
Click the  Binoculars For a specific user, you get a detailed list of permissions that are included in that person's permission sets.

Delete and restore deleted users
Locate the user you want to remove, and then click  Dust bin to the right. Confirm by clicking OK In the box that opens.
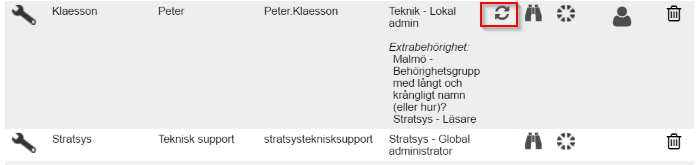
In the text/measurement/aktivitetsnoden, the removed user will remain in charge and appear with a Specialikon, as shown in the following illustration.
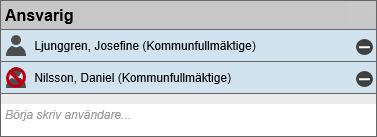
Obs! It is possible to restore deleted users in retrospect. Enable View deleted Users, click the Wrench In front of the right person and scroll to the bottom of the page where you can click the button Restore deleted User. The user will again be responsible for their previous measures (unless you have actively changed the dimensions and added new managers), but you need to give the user A New user Name Before she/he can continue her work.
Change manager
If a user stops and is to be replaced by another, we can tell if Change manager Where the new user will automatically be responsible for all nodes for which the first user was responsible.
Log on to a user account for support purposes
As an administrator, you can log in to a user account without having to enter a password, which aims to facilitate support. By accessing a specific user account, you get a better overview of what the user sees based on her/his permissions, and it becomes easier to provide support. Administrators only have permission to log on as users who have the same or lesser privileges than they themselves have. If you do not have the sign-in button on any user, it is because it has no permissions that you do not have.
Instruction:
- Locate the right user. See Search users.
- Click the
 Användarikonen In the column Log. You will now be on the home page of the user you selected. You see everything in the application exactly as the user sees it.
- To get back to your own user account, you must log out and log in with your own details again.
Lost Password management
If a user forgot their password, follow these steps to give the user a new one:
- Go to Administration/user and find the user.
- Click the Wrench To enter edit mode.
- Click the Reset Password During logon.
- Two fields are now opened: Password And Confirm password. Enter a new password for the user.
- You also get the opportunity to Force the user to change the password at logon. After saving, an email will be sent to the user with information about the new information.
Letting users reset passwords themselves
Please contact your consultant to enable this setting to allow users to reset their password from the login page. See Contacts.
Users who are locked due to repeated failed logon attempts
If a user has been locked due to too many login attempts, Adminsitratören must unlock the user by changing the password. Valid only if you have specified the number of acceptable incorrect login attempts during Password settings.
Administration of users at AD Sync
Se information under AD Synk.
TAB: Licenses
Select which part of the organization you want to filter out license usage for. For example, to see the entire organization's license usage, select the top level in the unit tree and Include underlying units.
Export License List to Excel
You can export a list of all users to Excel by clicking  Exportikonen.
Obs! If licenses count for a smaller part of the organization and then are aggregated together, the sum may exceed the sum from a license bill for a larger part of the organization. This is because each individual export verifies that users are only counted once if they have extra premissions on another unit that is included in the same license export.
Read users who are responsible for goals/measures/activities
Click the Binoculars To view the EV. Users who are only licensed to read but who have yet been placed as managers in goals, measures or activities.
Flik: Anonymization
Allows you to in line with GDPR anonymize desired users in Stratsys, the tab is only visible to you who is the system administrator.
Lap: Contact persons
Here you go if you want to manage contact people in a convenient way. You'll see contact persons based on your permissions. In the organization list, choose from units that you have permission to, and add or remove people in the table.
Contact persons are displayed in Help center under Contacts. You'll also see your admins. See General.
