Description
Periodicity is used for all Node type settings in Stratsys and is a central part of the Basic Settings. With the right Perodicities and Deadlines for nodes and the report, you ensure that follow-up takes place on time and that the correct data is found in the Reports. Perodicities and Deadlines also control what is displayed in the Views of scorecards and is also used for filtering.
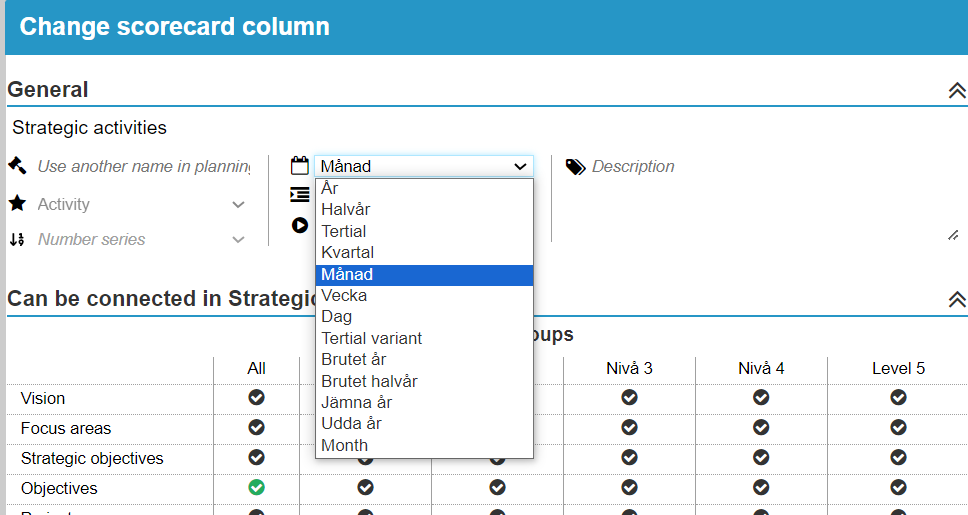
Common Perodicities and Deadlines are Year, Half-year, Third of a year, Quarter, and Month.
For the Perodicities and Deadlines, you can set different Deadlines to get reminders on time at different levels to perform Report and follow-up.
Note: Perodicities is a complex part of the system and is influenced by several different factors. Reported data and commenting can be lost if the Perodicities is changed. If you are unsure, contact your contact person at Stratsys.
Accessing the settings:
You can find Perodicities and Deadlines as an administrator in the admin menu via the cogwheel.
Here you can:
-
Add a new periodicity
-
Edit an existing one
-
Change the Deadline settings.
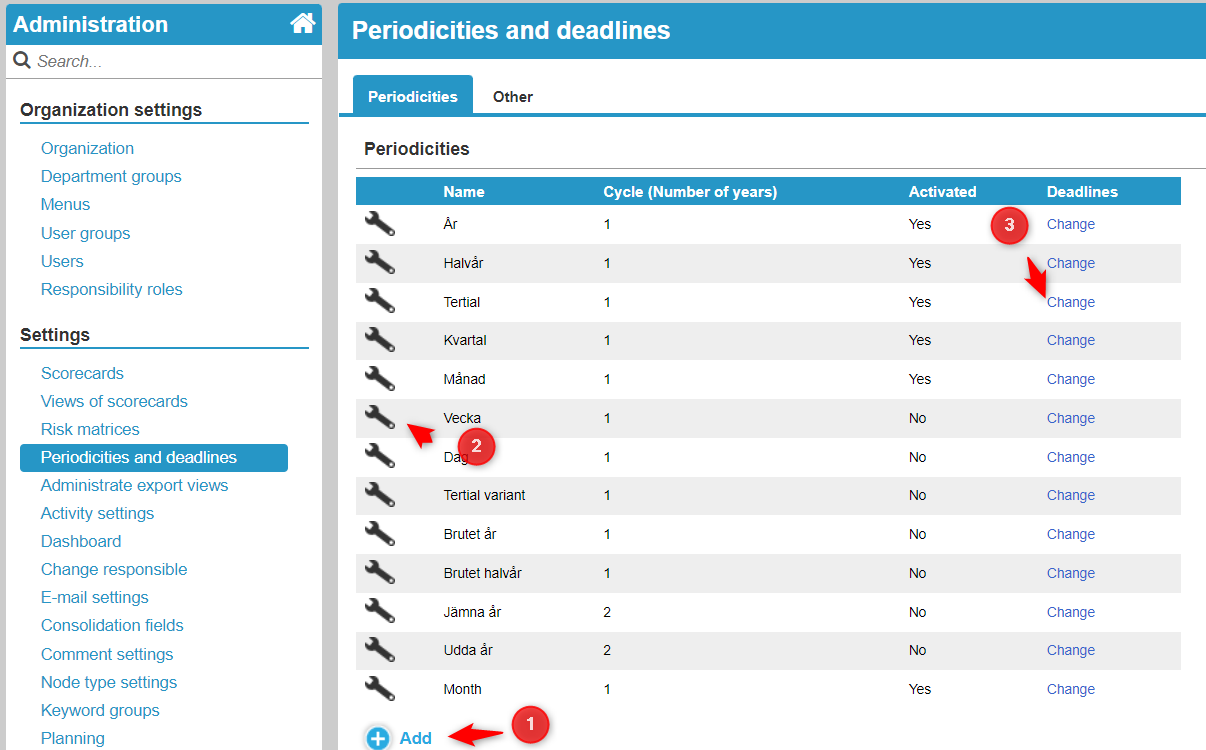
Add a periodicity.
Note: Once you have started using a periodicity, it cannot be removed if you use it for KPIs. There are many properties that cannot be changed for a created periodicity. Therefore, make sure all properties are correct for your new periodicity before using it.
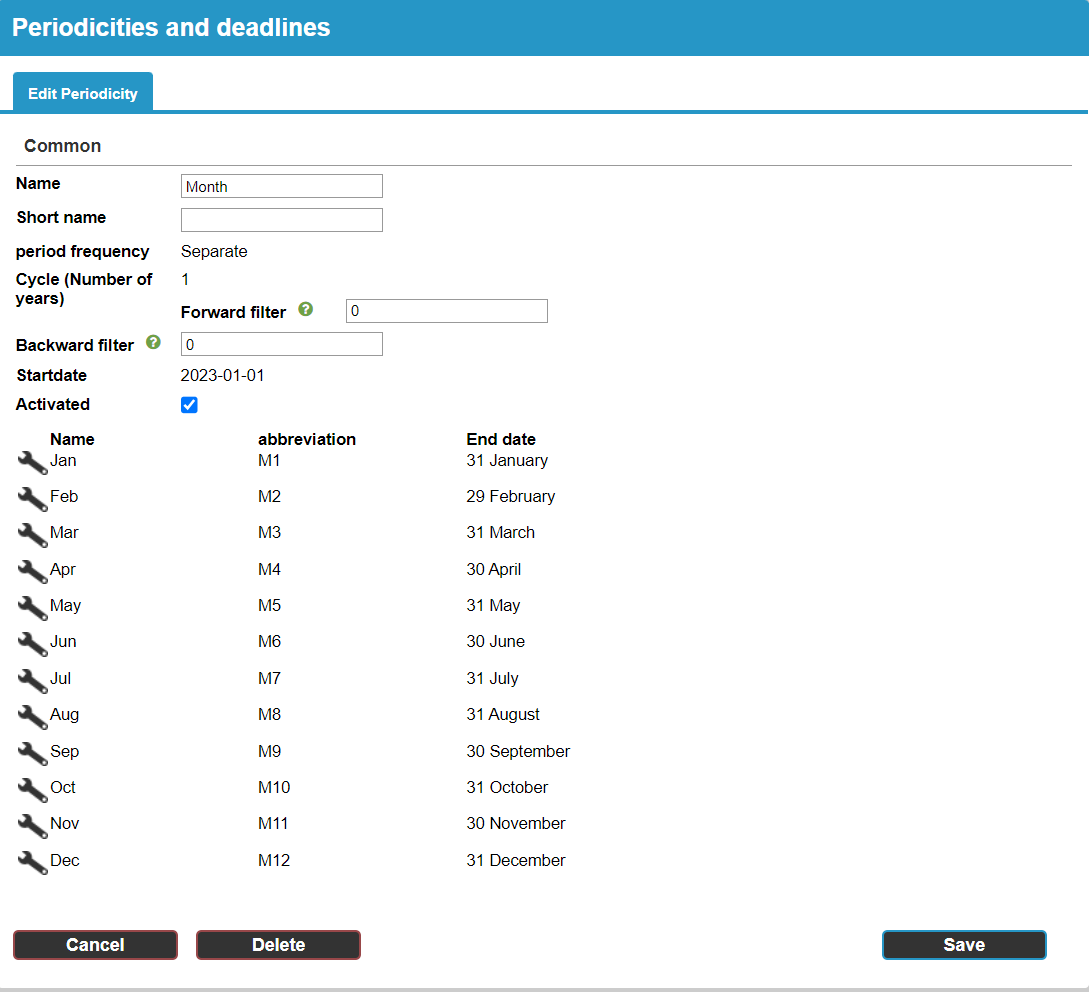
Give the periodicity a descriptive name and a short name if you wish.
In period frequency, you can choose "Day" or "Week" to facilitate the creation for these, which of course contain many periods. The default choice is "Custom", and then you define your periods at the bottom of the dialogue.
Determine the cycle, that is, how many years the periodicity runs over. The standard is one year, but you can also create longer cycles for reporting every third year, or to collect data over a longer period in a report.
Forward and backward filters control how many periods forward/backward in time that users will have the opportunity to choose from in dropdown lists in the tool where you choose the period, for example, when following up on nodes
Set the start date you want. Based on this, periods are created both forward and backward in time.
Activate the periodicity to be able to use it in the system.
Then create/edit the periods. You can edit the name, abbreviation, and end date of each period. You cannot have any gaps in the period - the start date is always the day after the end date of the previous period. Therefore, the last end date in the last period must also be the last date of the cycle.
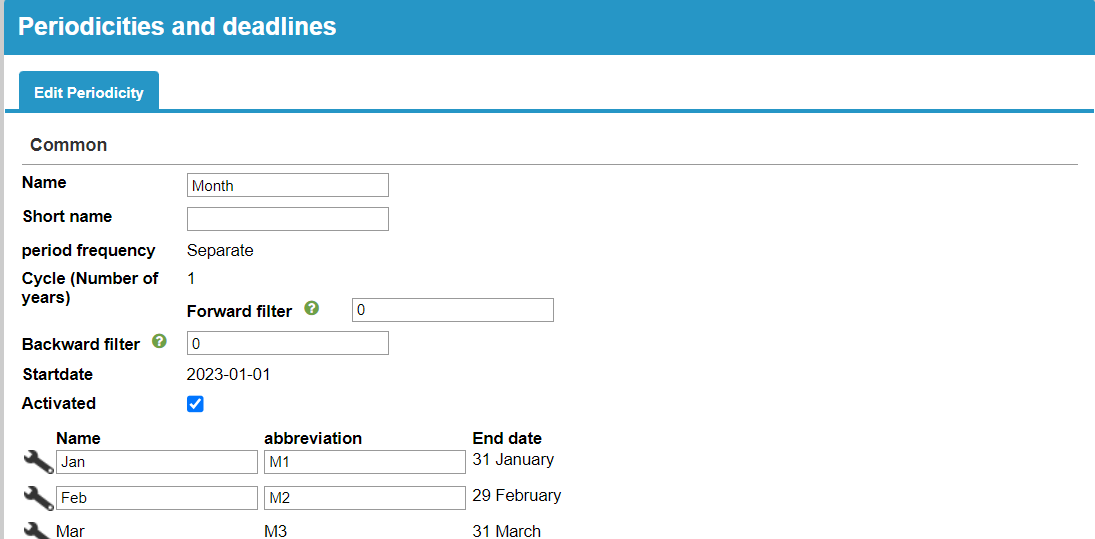
Edit a periodicity
There are very limited opportunities to change a created periodicity. If you cannot change the property you wish, you will have to create a new periodicity.
You can change the following properties:
Name and short name, forward and backward filters, and name and abbreviation of the periods.
Thus, no dates can be changed.
You can deactivate the periodicity if you no longer wish to use it. It will then no longer be selectable in the system for new scorecards and nodes, but it will continue to be used where it is already in use.
Remove a periodicity
You cannot remove a periodicity if it is used for one or more KPIs.
If you remove a periodicity, it remains in the places where it was previously used, but it is deleted from the list of Perodicities and Deadlines and you have no opportunity to change its settings or select it again. It is also not displayed in the settings, making it difficult to determine which periodicity is being used.
Therefore, we recommend that you do not remove Perodicities that are already in use, but instead deactivate them as described above. Feel free to change their names, for example, "Quarter (no longer used)".
Deadlines
Deadlines determine when a responsible person must report for each period at the latest. You set these by clicking on "Change" on the far right for each period.

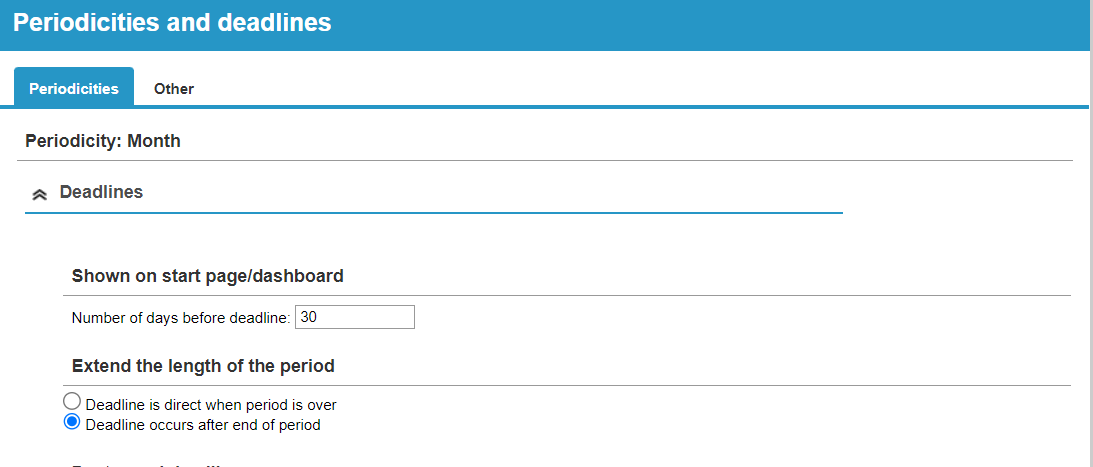
Displayed on homepage/Dashboard
This setting applies to the older homepage in the old Dashboard. Enter the number of days before the Deadline that it should be visible on the homepage and be reportable.
Extend the period's length
Here you set whether the Deadline should fall right after a period ends or if users should have a certain number of days to comment from the time the period ends. The Deadline can be shifted by different numbers of days based on the Department level or Department group.
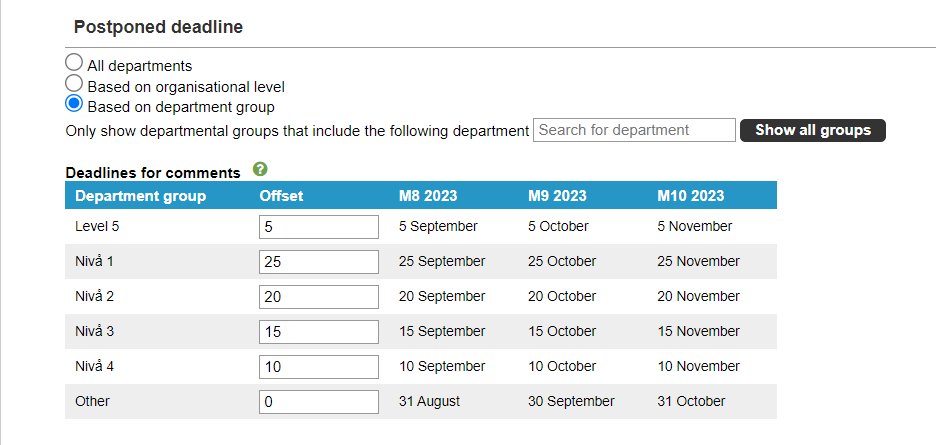
Shifted Deadline
If you choose "Deadline occurs after the period ends", you also have the opportunity to set a shifted Deadline. You can choose whether the shift should apply to all Departments or only for each Organization level or Department group.
Deadlines for commenting
Shifts the Deadline for comments for all Node type settings (goals, KPIs, and activities) that use the current periodicity. The setting takes immediate effect in Views of scorecards and on the homepage.
Deadlines for KPI data
Gives the user the specified number of extra days to report KPI data, e.g., outcomes, goals, etc. The setting also affects KPI comments if you have chosen in the "Other" tab that KPI comments should follow the KPI's own periodicity.
Deadlines for reporting
When new Reports are copied or created with the chosen periodicity, they will receive a shifted Deadline according to the values you have reported, provided that the Report uses automatic Deadline.
Note: Changes in shifted Deadline do not affect already created Reports. To update the Deadline, you need to Reset report under the administration for a report. It is also possible for reporters to adjust the Deadline for the report on the report page through "Administrate Deadlines" on the report page.
Other settings
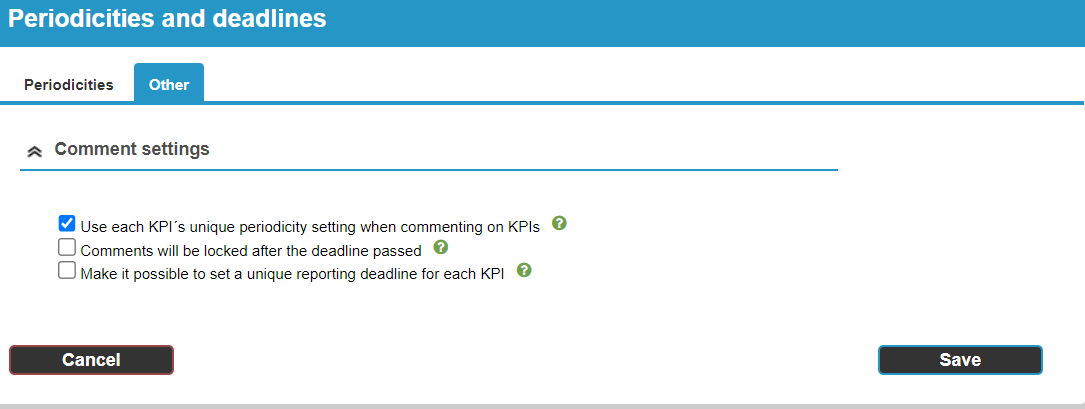
Comment settings:
Use the KPI's own periodicity for KPI comments
Here you set that comments for KPI nodes should always have the same periodicity as the KPI data. The setting applies to all Measurements columns in the system. If the option is deactivated, the KPI's comments will have the same periodicity as the Scorecard columns.
The comment is locked after the passed Deadline
Comments cannot be written or changed after the Deadline has passed.
Make it possible to set the Deadline for KPI reporting per KPI
Without this setting, all KPIs with the same periodicity have a Deadline at the same time. The Deadline is then set in the Perodicities and Deadlines setting and cannot be influenced in the individual KPI.
With this setting, you make it possible to set different KPIs with the same periodicity to have different Deadlines. In each KPI, the standard shift is displayed, but there is also the possibility to specify a custom shift which is then added after the period's Deadline. It is also possible to specify a negative number to advance the Deadline by the specified number of days, e.g., "-10" to then advance the Deadline by 10 days.