Section headers/ Column headers
Both views and report parts retrieve their content from a Scorecards. Using the Egenskapsväljaren Specify which parts of the Scorecard are relevant to display to users in this particular View or this Recport section. For example, if you are talking about a measure column, you might choose to display the measure's name, the value that is specified in the bleed column, and perhaps which period the value is derived from. If it is an activity column, you may choose the name, status, and end date or, for example, who is responsible for reporting the activity. The settings you make in the Node properties control how the View or report part looks for all units, but it is possible to restrict contains for example a Special unit group using Standard filter So that information that is not relevant to them is hidden.
The property selector may look a little different depending on how you have taken you here. If you are creating a report part or view, you have the option to select Properties for all the Scorecard columns you have chosen to add to a list where, for example, Text columns, measure columns, and task columns line up beneath each other. If you make changes to an existing report part or view, you see only the property selector for a Scorecard column at a time. This article displays sample images for a Scorecard column at a time.
This article primarily addresses functions that are common to both view and report part administration. If you are looking for settings that are not discussed here, you will probably find them in the article Add a View or article New report part.
To find the Unit selector: Change a column in a view And Change scorecard columns in report part.
Add a new property
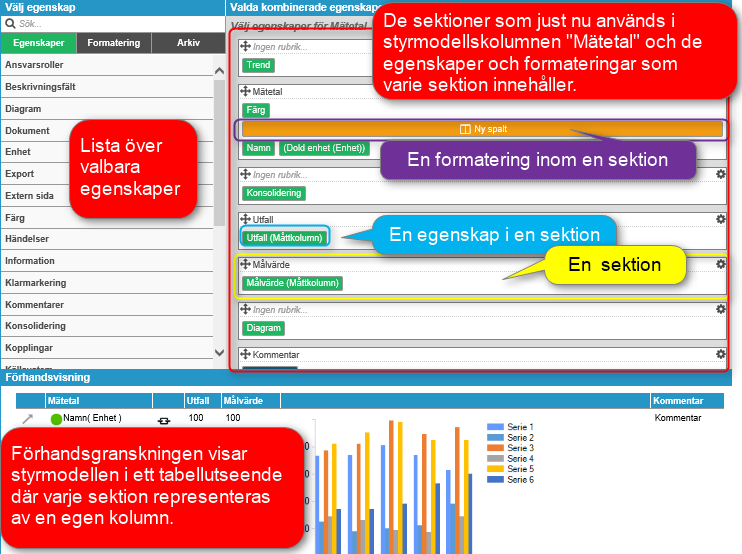
In Unit selector Left side, you can see a list of all properties that are current in the Scorecard column you are just administering. At the top you have the option to search for properties and can then select it directly from a hit list.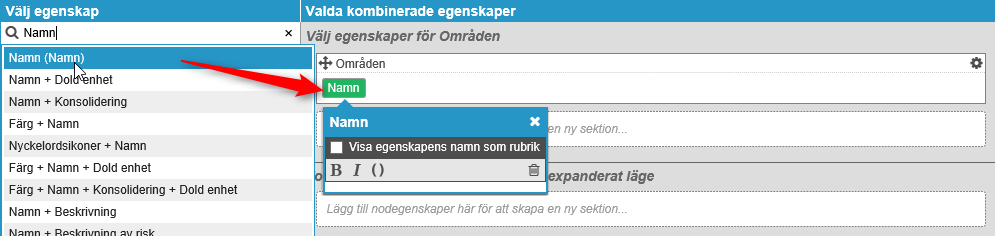
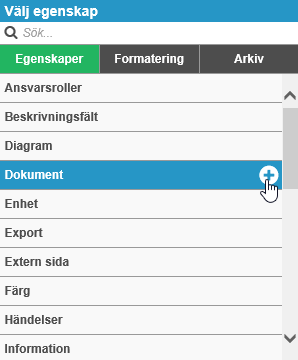
You can also double-click directly on the property you want or point to it, and then click the Plus icon in the picture to the right. All of these ways create a new section for the new property.
Is Node properties For a description of how the different properties work and are used.
Obs! It is important to be aware that the properties you select will be displayed directly in the view or report part. If you select too many properties in a view, it might be perceived as cluttered or so wide that users need to scroll sideways to see all content. In a report part, the columns in the table can be so narrow that words wrap in unwanted places. See the headline below Composite properties For tips on how to avoid this.
Add a new section (column)
There is always an empty section ready at the bottom of the list on the right. If you drag a property, you automatically get a new section. See also the above paragraph for other ways to add a new section.

Delete a property
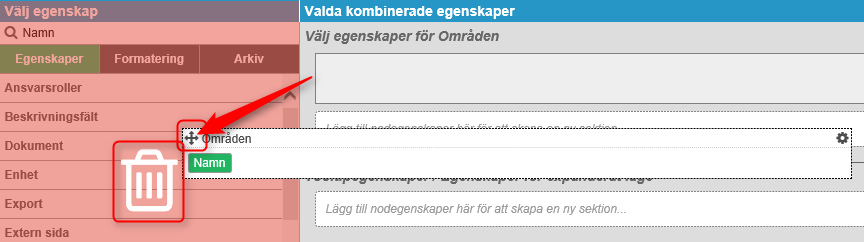
Drag the property back into the property sheet on the right, or click it and then click  Dust bin.
Delete a section
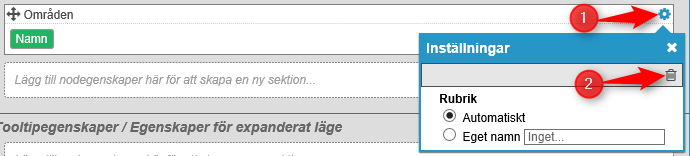
Point to the icon in the upper-left corner of the section and drag the entire section to the property sheet. Drop it when you see the Recycle Bin in the image below.
You can also click  Gear wheel And then on Trash.
Move a section
Tap the icon in the upper-left corner of the section and drag the entire section to the position you want.
Customizing a property
Most properties can be customized. Once added, you'll see the customization options you have in a box below the property. See examples in the picture above. In the property Name , you can choose whether to display the name in bold, italic, or parentheses. You can also choose whether the name of the property (in this case, "name") should appear as a heading above the name of the node itself. The customization options available depend on the property you are using.
If you click a Green property, the customization bar opens.
Obs! If a node property is displayed in dark blue, it means that it is added to an older version of the Stratsys and that you need to replace it with a new node property with the same name to make changes to it. If you are satisfied with the settings it has previously made, you do not need to replace it.
Create a composite property
For example, if you want to save the space in your table or view, you have the option to place multiple properties in the same section. This is done using drag n drop. Grasp the property you want to move and drag it to the desired position in the second section. You can drag properties between different sections or drag a new property directly from the property sheet on the left.
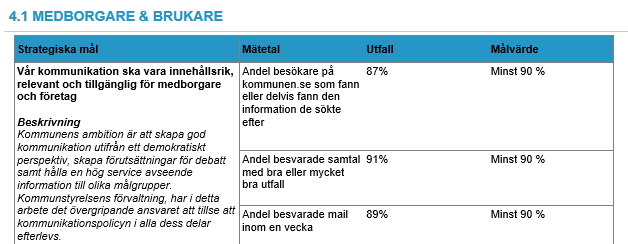
The following example shows a rappordel with three scorecard columns. Areas should be shown as heading and under the heading, a common table should be presented for the strategic objectives and measure ETA.

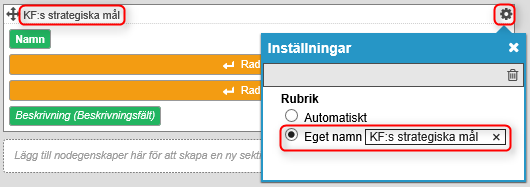
In the following illustration, you see that the strategic objectives were compressed into a column/section where both the name and description are displayed in the same column.
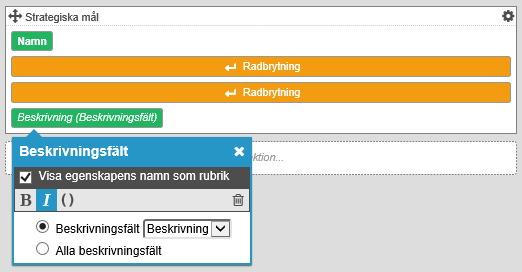
In the Node properties selector, the settings for the strategic objectives look like below. Name should appear at the top of the column. Then there will be two line breaks before the Description field. In the Description field's settings, you'll see that it should be formatted in italics (I = italic) and that the property's name should appear as a heading inside the section.
Section headers/ Column headers
The sections automatically receive a name that is then printed as a title in that column. The name appears at the top of each section and in the preview. If the section contains the Name property, the column will automatically control the model column name as the title. Example, "activity".
To deviate from the auto title, click Gear wheel In the upper-right corner of the section and indicate that you want to use a friendly name. You can also choose Own name And then leave it blank if you don't want the column to have a title.
Archive
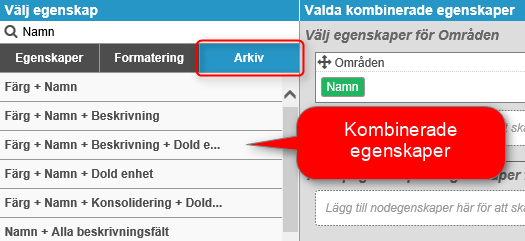
Composite properties are saved so that you can easily reuse them in other views or report parts. You can either select them from the Archive Or select them directly from the hit list when you search for a property (see example Image under the heading "Add a new property").
Formatting
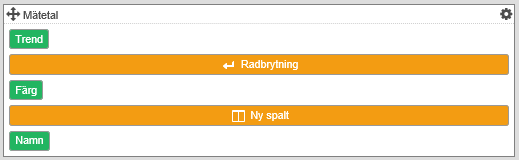
There are two elements you can use in a section other than properties. We call these Formaterings And you can find them on the tab with the same name. You drag these formatting in the same way you do with the properties. Line breakers creates a new line and New column Divides the contents of the section into several columns/columns. You can combine both of these formats within the same section.
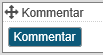
The following example shows a section that contains three properties. Trend And Color displayed on its own lines and Name displayed in its own column beside them.

OBS1! Is Add a View For information about ToolTip or expanded mode properties.
OBS2! Is New report part For additional information under tables and properties under headings etc.