Create new views to support new or updated processes.
Tip: Don’t recognize the images? You might be working in our new view type. In that case, refer to the following article: New View Type.
Feel free to read the article Introduction to Views if you want to learn more about how a view works!
Add a New View – Standard Method
Description
It's easy to create a copy of an existing view to experiment with. Once you're satisfied, you can add the view to a menu—only then will it become accessible to your users.
Access View Administration
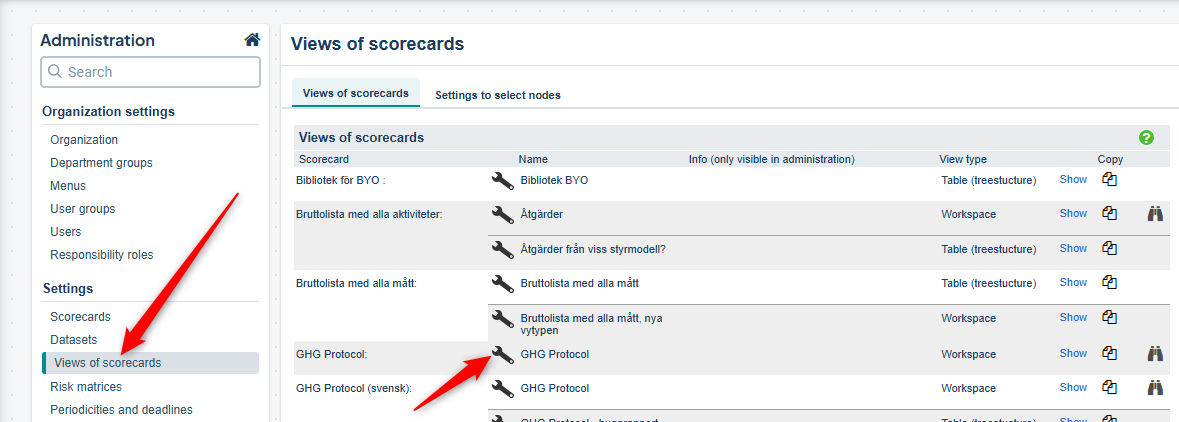
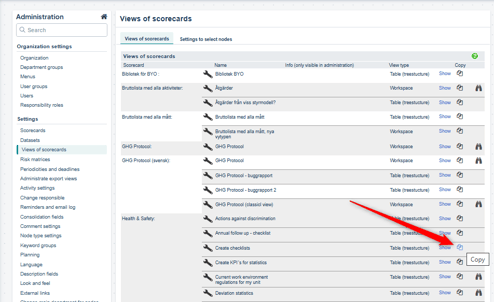
To modify, copy, or add a view from the administration area, go to the Views of Scorecards menu. The views are sorted alphabetically by scorecard.
To change the settings for a specific view, click the wrench icon next to it —here you can read more about view settings.
 Add or Copy a View
Scroll to the bottom of the Views of Scorecards page to add a new view. Click the “Add” button (1) or “Quick Generation” (1) to create a brand-new view from scratch.
If you want to base a new view on an existing one, you can copy it by clicking the double paper icon on the right (2). The copy will inherit all the settings from the original view.
You can also add a view from the Scorecards administration.

Add a New View – Standard Method
After adding a view, you can adjust its properties in the view settings.
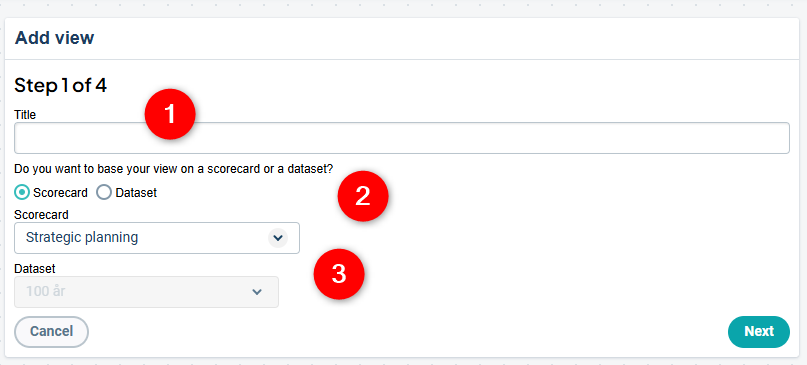
Step 1:
Give the view a descriptive name (1),
choose whether to base the view on a scorecard or a dataset (in development) (2),
and select which scorecard or dataset the view should be based on (3):
Step 2:
Select the view type (also called display mode). The most common types are Tree and Table with Tree Structure.
You can change the view type/display mode later.

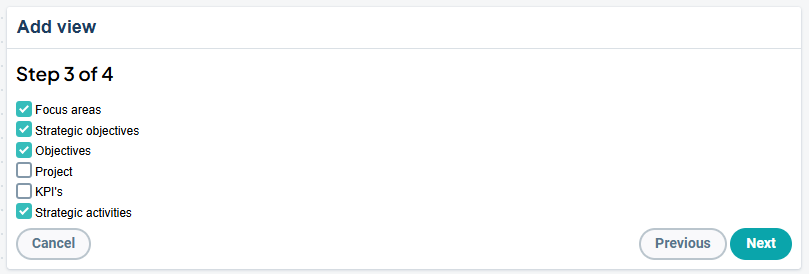
Step 3:
Select which columns from the scorecard you want to display in the view.
You can add or remove view columns later.
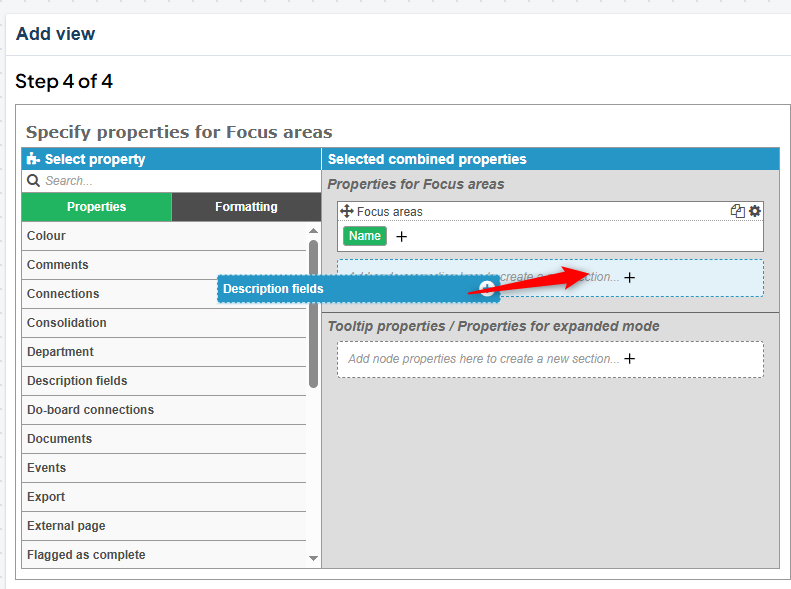
Step 4:
Choose which information to display in the view by adding node properties. “Name” is selected by default, but nothing else.
You can change what is displayed later, and also make changes directly from the view.
Learn more about node properties here.
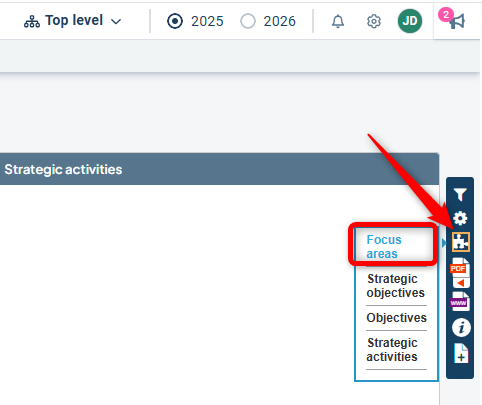
Once you've created your view, you'll be taken to the view itself, where you can continue working with its properties. You can continue adjusting the node properties using the puzzle piece icon and selecting the relevant column.
As long as the view has not been added to a menu, your users will not be able to see it, so you can work on it at your own pace.
Once you're satisfied, add the view to an appropriate menu.
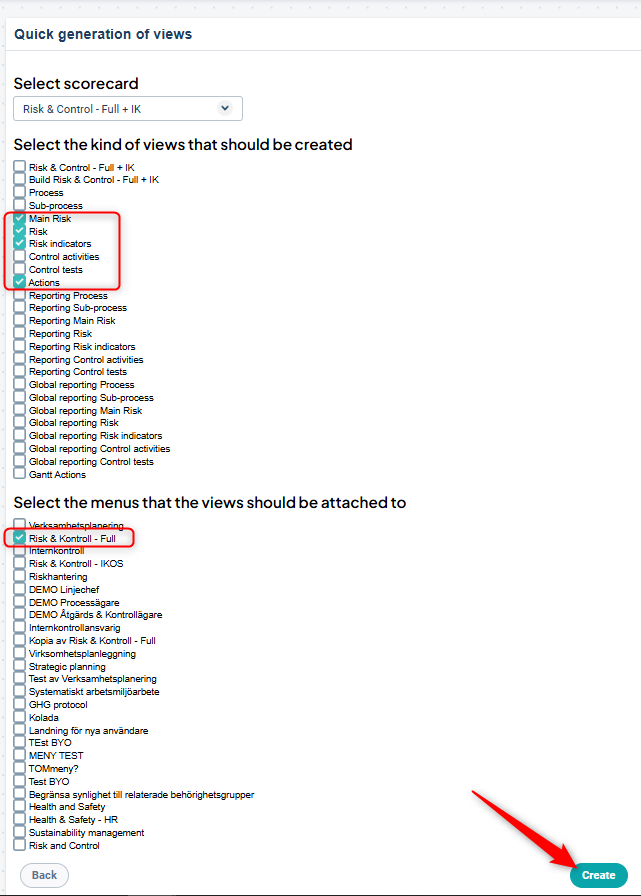
Add via Quick Generation
With Quick Generation, you are offered a selection of standard views commonly used by our customers. These come with a predefined set of properties.
You select the scorecard, choose one or more views you want to generate, and decide whether to add them to a menu immediately. Then click Create. You can later adjust the view properties through the various view settings.
Finally, add the view to a menu once you're satisfied.
If you want a view similar to one you already have, or if you'd like to test adjustments to an existing view without affecting users, you can copy an existing view.
Click the icon to copy the desired view. Confirm and select Copy View. Enter the name for the copy and confirm by clicking the Copy button.
You can later modify the properties of the view through the various view settings.
Add the View to a Menu
Once you are satisfied with your new view, you can add it to an appropriate menu so your users can start using it.
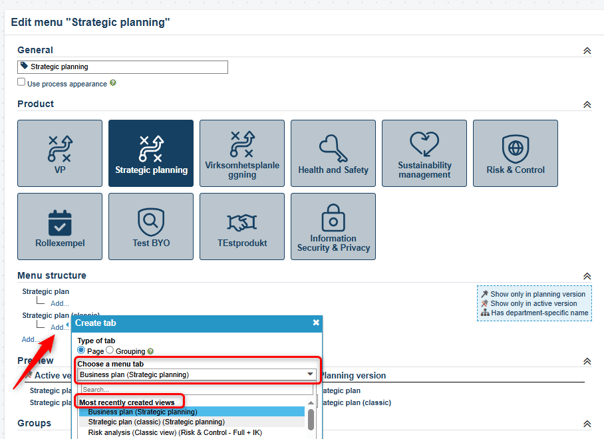
Go to the administration area and select Menus under Organization settings. Click the wrench icon to the left of the menu where you want to add the view.
Tip: The menu currently selected is marked with a flag.

In the "Edit Menu" dialog, click "Add" at the appropriate spot in the existing structure. You can rearrange the order later if needed.
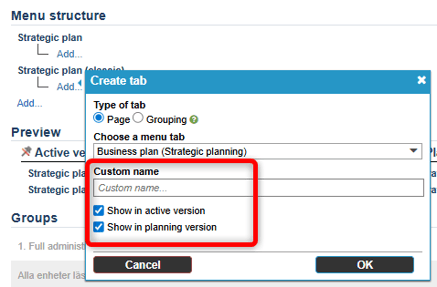
Select "Page" as the "tab type", then choose Menu Tab. Your newly created view will appear at the top of the dropdown list under "Recently Created Views"—select it.
Tip: Check how the other menu tabs are configured for consistency.
Click OK to confirm.
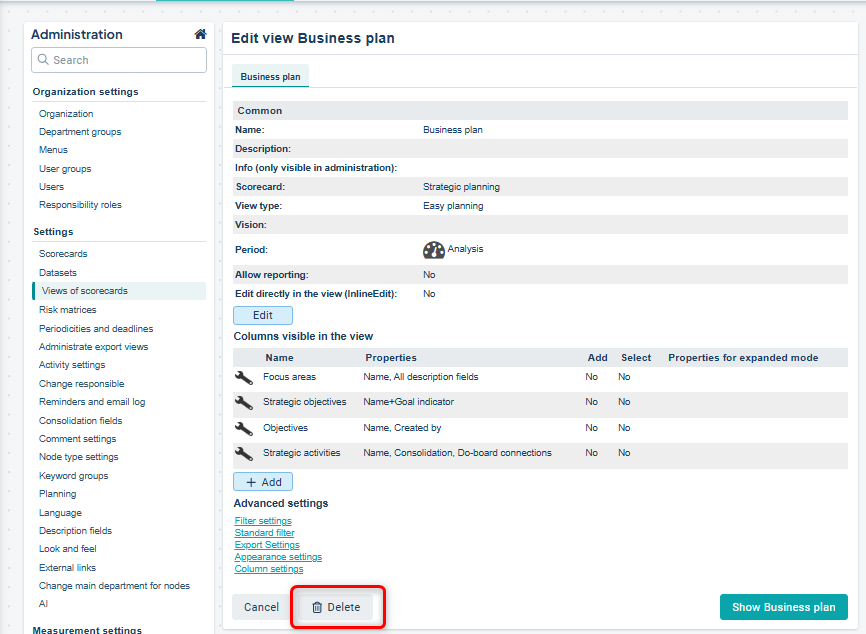
Delete the view by clicking “Delete” and then confirming the deletion.
Deleting a view does not remove any underlying information such as nodes, comments, or metric data—only the specific configuration of how information is displayed in that particular view.
However, deletion cannot be undone, so you would need to recreate the view from scratch if needed.
The view will be removed from all menus where it was previously displayed.