Guide: Create and manage Forms checklists effectively
Allow creation of actions and risks as Underlying objects
Prerequisites
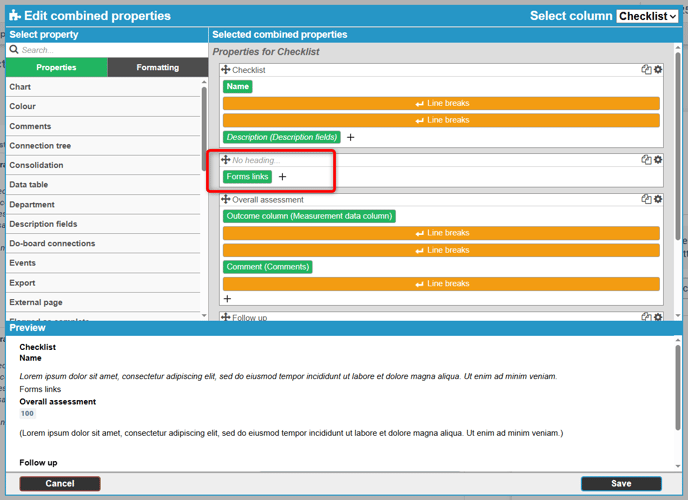
Before you begin, ensure that the checklist object in your view has the node property "Formskopplingar". This is necessary in order to add and follow up on Forms checklists.
Create a checklist
To add a new Forms checklist to your object, click the plus icon to create a link to the desired form template. A dialog will open on the right where you can select the checklist template you want.
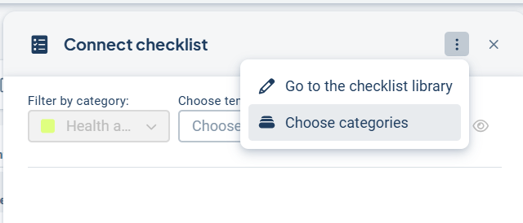
If you want to browse available templates first, there is a shortcut to the template library in the three-dot menu. There is also a shortcut to configure which categories of templates should be shown for this link via "Select categories."
Watch the short video below to learn how to add a checklist and read more about the settings further down.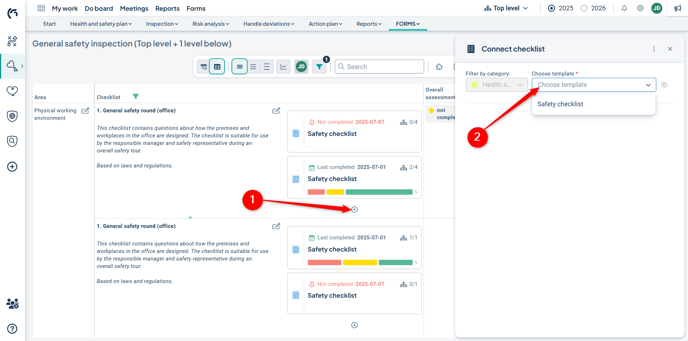
Settings
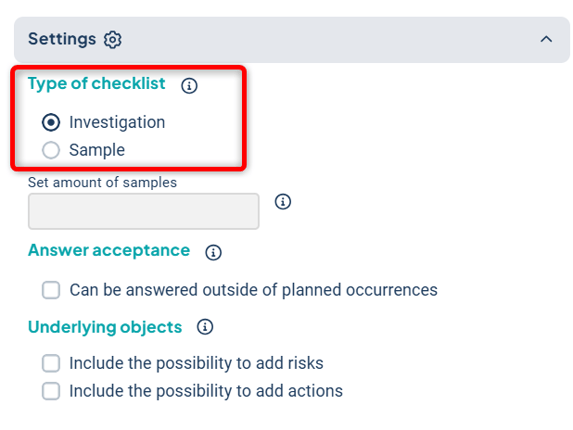
Type of checklist
In the settings, select whether the checklist should be a investigation or a sampling. For this guide, we assume it is a investigation – follow the link to read more about the sampling checklist type.
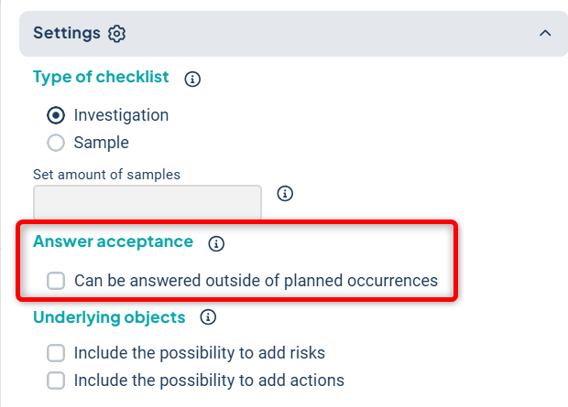
Answer acceptance
Choose whether the checklist can be answered outside of scheduled occurrences.
The recommendation is to not allow this.
If you do allow it, the checklist can be answered as extra occurrences. These are not included in the aggregated results and are only visible for the department that completed them. Results from extra occurrences also cannot be included in reports.
Allow creation of actions and risks as Underlying objects
If you want users completing the checklist to be able to create actions and risks linked to the questions, enable the option to add underlying objects.

If the options for risks and actions are not selectable, it means the scorecard settings do not allow it. Read more about how to configure the system to enable the creation of risks and actions.
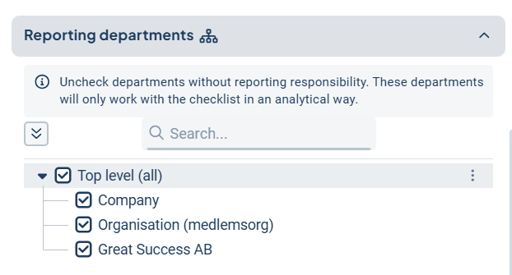
Reporting departments
The reporting departments for the checklist are automatically set to match the department distribution of the linked object. If you want to limit which departments should receive the checklist, you can deselect the departments that should not have it.
You can also select all underlying departments by clicking the three dots on the right.
The responsible user [LINK] for each department is also assigned automatically based on the configuration of the linked object. To change this responsibility distribution, you need to modify the linked object itself.
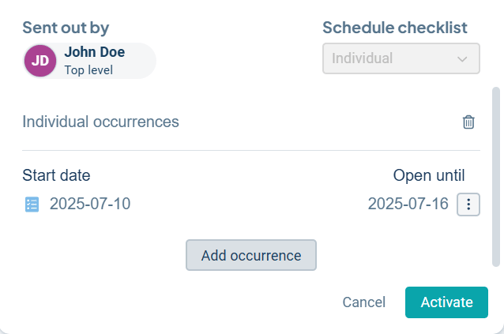
Schedule checklist
In the final step, configure when the checklist should be carried out. You can set it up for individual occurrences or repeated occurrences.
Individual occurrences
- Select "Individual occurrences" and enter the start date.
- Specify how many days the checklist should be open for responses. Confirm by clicking the checkmark.
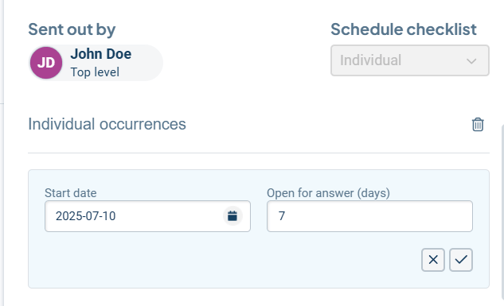
You can add more occurrences or edit/delete existing ones by using the three-dot menu next to the created occurrence.
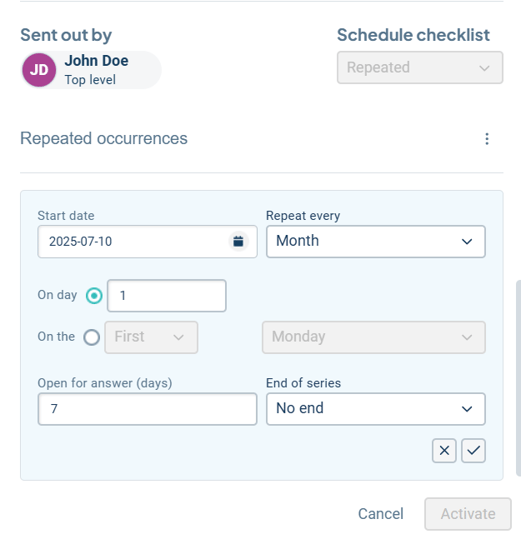
Repeated occurrences
- Enter the start date and how often the checklist should be followed up (from weekly to yearly).
- Select the first day of the week.
- Specify how many days the checklist should remain open and how long the repeated series should continue.
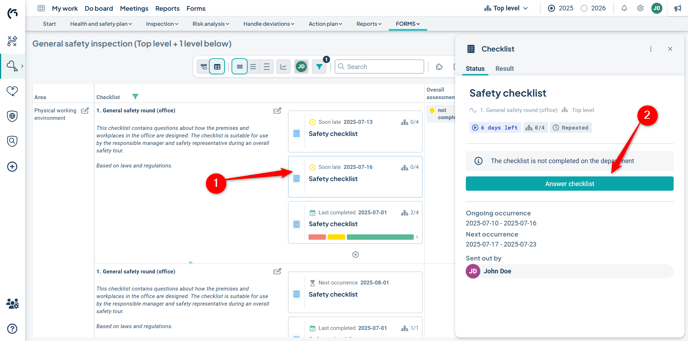
Once you have finished creating your Forms checklist, activate it to make it visible in your object and view.
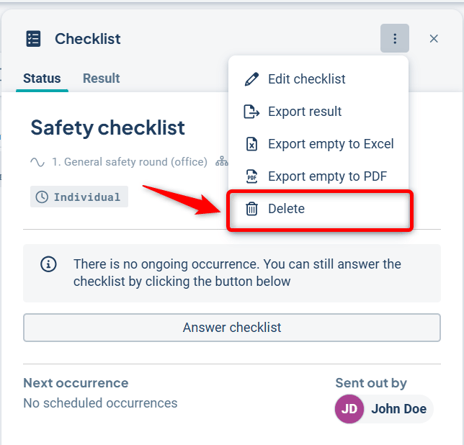
Delete a Forms checklist
-
Open the checklist in question.
-
Click the context menu (the three dots).
-
Select the "Delete" option.
Observe: If you choose to delete a checklist, it cannot be restored.