Here you will find answers to the most common filter questions.
Tips: In these articles, you can read more about how filters work:
Filter functions covered
- How do I make common filters visible in the view?
- Can I save common filters?
- How do I filter objects and comments from Subdepartments?
- How do I search for any text in the view?
- How do I filter by a specific keyword?
- Filters for responsible
- Colors and Status
- How do I filter so that only rows with an activity linked to them are shown?
- Activities in the Planning Version
- Filter Objects for a Time Interval
- Filter out objects marked for deletion in the view
- Get an overview of the number of measures or activities with a specific color or status
How do I make common filters visible in the view?
For the new view type, click the filter funnel (1) to filter by period, column, keyword, or other properties. These selections will then remain in the view for you until you remove the filter.
The free text filter (2) and the filter for own responsibility in the view (3) are always available in the toolbar regardless of settings.

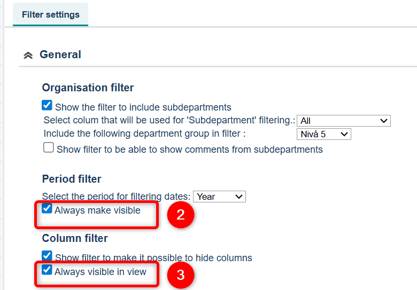
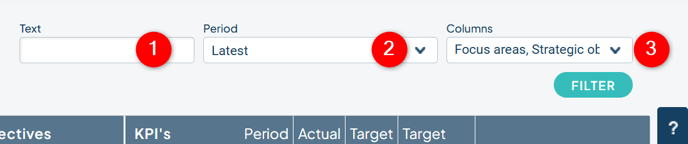
For classic views, you can choose to display the Free text filter (1), Period filter (2), and Column filtering (3) directly in the view via settings in the filter settings.
Can I save common filters?
In the new view type, your current personal filtering is saved even when you reload the page, make changes to objects, or switch back and forth to another view, to name a few examples. Therefore, in the new view type, there is less need to save filters, as the filtering is more consistent.
In the classic view type, you can create and save your own filters. Read how to do it here: Save filters you use often.
How do I filter objects and comments from Subdepartments?
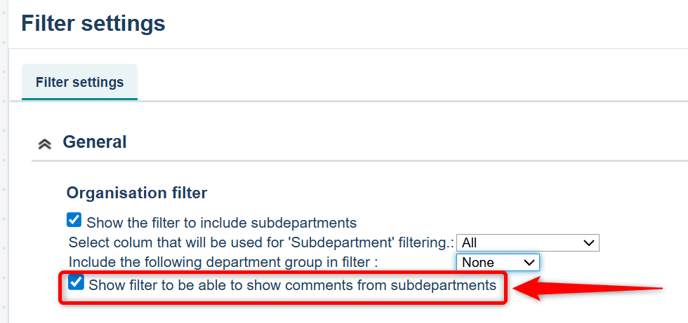
Under Organization filter, you have the option to enable filters to display subdepartments and their comments.
By default, this applies to all columns in the view, but you can choose to limit it to a specific column.
You can also choose to have the subdepartment filtering include a specific Department group, which means that objects from the departments in that specific group will be filtered and shown in the view.
To filter subdepartment comments, check that option. You will then be able to configure a subdepartment filter for the comments related to subdepartment nodes in the Standard filter.
Observe: If you filter "Include subdepartments," it may result in a large amount of information being requested, which can lead to long response times.
From a user perspective, the view may feel slow or may not be able to present any results at all, so use this functionality sparingly.
How do I search for any text in the view?
In the new view type, the built-in free text filter works on most of the content displayed in the view. This search filter is always accessible regardless of the settings in the filter settings.

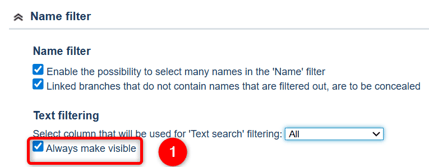
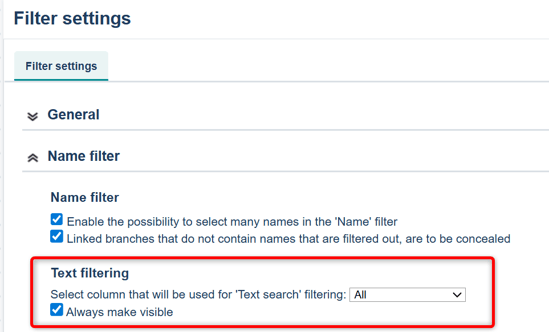
In the classic view types, you can activate the free text filter in the filter settings under the Name filter section. You can also choose to have the free text filter always visible in the view.
In the drop-down menu afterward, you select whether the filter should apply to all columns or a single column – here we strongly recommend selecting "all," as it will otherwise be difficult for the user to understand how it works.
We also recommend using your browser’s internal search function, accessible via "Ctrl+F", to quickly search within the view for classic views (in the new view type, "Ctrl+F" does not work as not all content is loaded immediately).
How do I filter by a specific keyword?
Keywords function as tags for objects, allowing you to filter based on certain properties. It is also possible to group objects based on tagging.
You enable the filter in the Keyword filter section of the filter settings. There are several different variants of the filter – read more about all available settings here: Keyword filter.
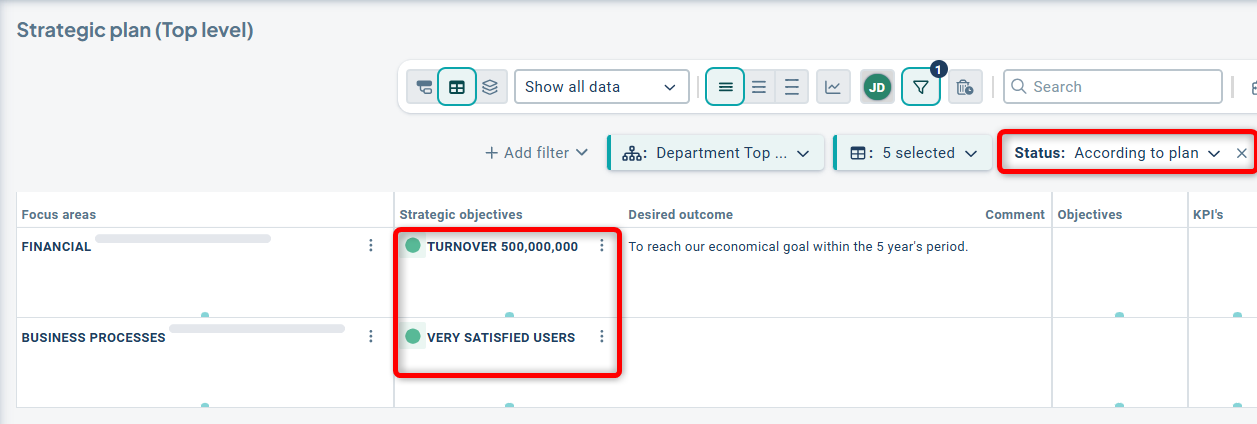
By configuring a default filter with a keyword, you can create specific views for particular purposes, such as only displaying focus areas with associated measures and activities that are politically decided.
In the displayed filter, strategic objectives with the status "According to plan" are shown in the view.
How do I see the objects I am responsible for in the view?
In the new view type, there is a filter for the objects you are responsible for that is always available. You’ll find it to the left of the filter funnel. The number indicates how many objects you are responsible for with the current filtering. Click the button with your picture (or your initials) to filter out your objects, which will then be highlighted in a distinct color.
If you want to filter by other users’ responsibilities, see the section below for classic views.

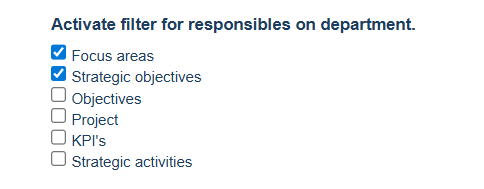
For classic views, you need to activate the responsibility filter in the filter settings. Select which responsibility roles should be filterable for each column in the view.
You can also choose to enable the option for own filtering, meaning the nodes for which you yourself are responsible in any responsibility role.
Example of filtering by responsibility for another user in the new view type:

There are many variations of responsibility role filtering. Read more here: Filter settings – Responsibility roles.
How do I filter by color and status?
To filter by color and status, activate the settings under the "Colors and statuses" section in the filter settings. Here, you also configure filters for risk color/risk level.

If you want to filter by activity status in the new view types, you can do so as usual from the filter funnel, but also directly from the activity column.
Hover over the column name until the filter funnel appears:

Click the column's filter funnel to select the desired status. You can choose one or more options.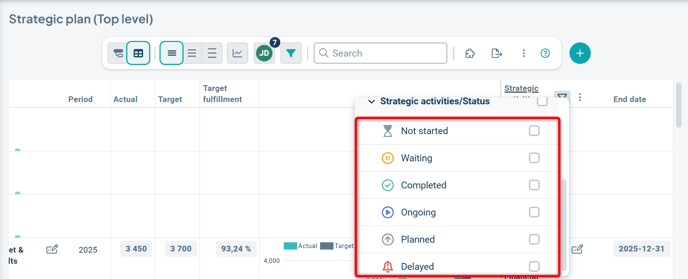
You can also use the view’s general filter funnel, which is also the method used for classic views.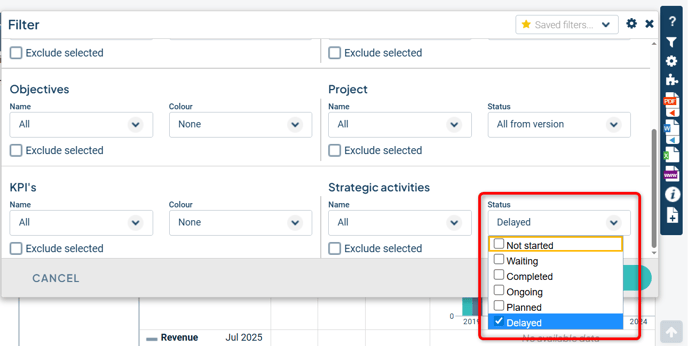
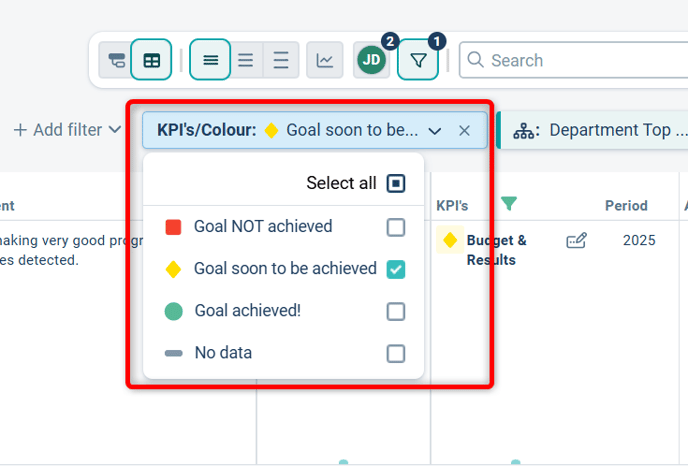
To filter by color for measure or text objects, follow a similar process. Enable the filtering option in the filter settings and activate the filter for the desired column, either directly in the view or via the Standard filter.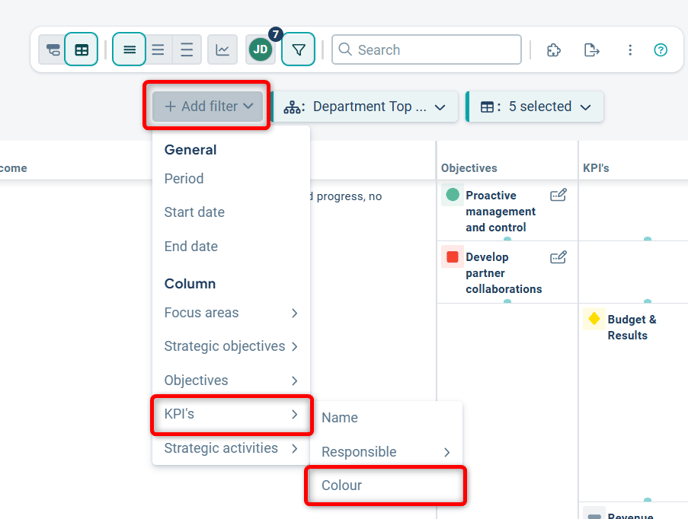
How do I filter so that only rows with an activity linked to them are shown?
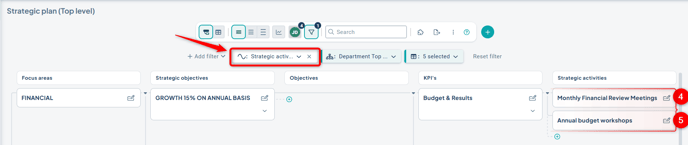
If you want to focus on a specific object column, you can use the filter to require that there must be an object of that type for the linking branch/row to be displayed.
This filter is called connection focus.
In the image example, we do not want to display rows 1, 2 and 3 as they lack linked activities:

We can then configure the connection focus to be on Activities.
The result is that only the branches with an activity will be displayed – in this case, rows 4 and 5. This is a useful filter for removing unwanted information.
How do I display all activities in the planning version?
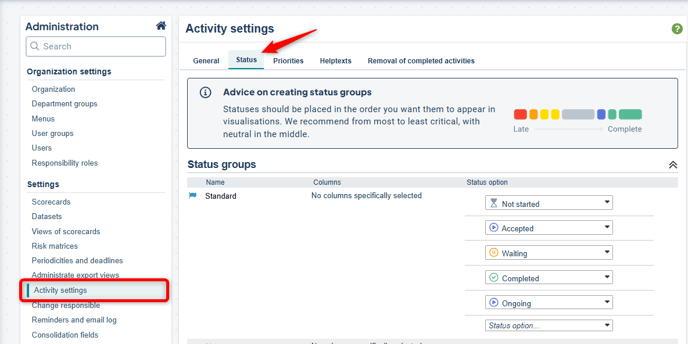
In the Planning version, all activities that have been completed in the current version are filtered out by default. If you still want to view these activities, you need to go to "Activity Settings" in the administration. Click the heading "Status" and scroll to the bottom. Select "All" in the Default filter instead of "All from the version."

Objects of the type Activities can be filtered by their time interval—start and end dates. Other object types do not have this kind of attribute. For example, you cannot filter by "objects created in 2025."
Activate the date filter in the Activity filter section of the filter settings. You specify which column the search should apply to—or all columns—as well as the Start and/or End date.
You can also include activities that cross the selected dates, thereby allowing you to "capture" activities relevant to a specific period.
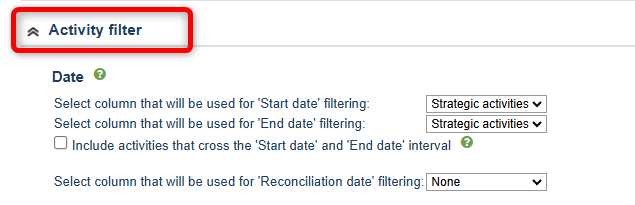
You configure the date filter via the general filter funnel for the view, or in the Standard filter.
Filter out objects marked for deletion in the view
In the planning version, you can mark objects for deletion. These are then removed during version management. Once an object is marked for deletion, it will be highlighted in red in the view. Since it draws attention, it can be helpful to filter these out, which you can do by enabling this filter function.
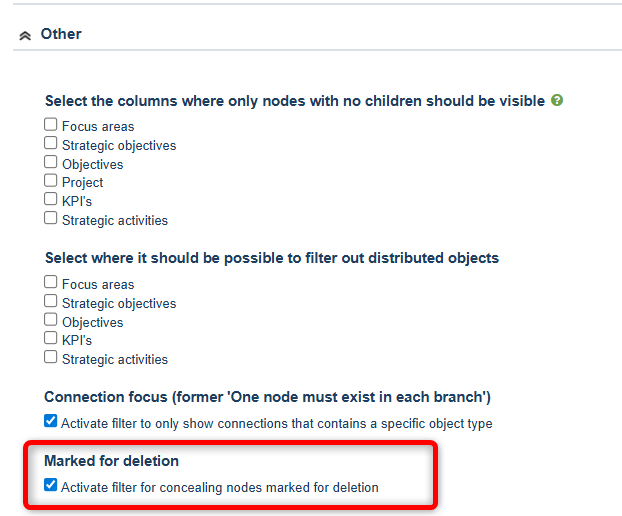
The option will then appear in the filter funnel and in the default filter: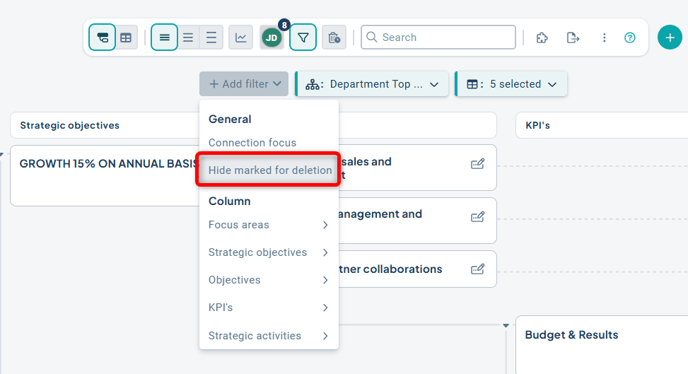
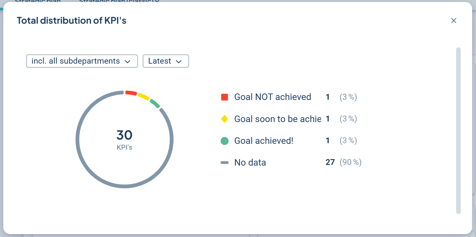
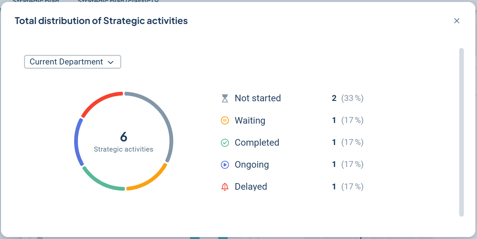
How many objects in the view have a certain color or status?
In the new view type, you can use the view gadget "Total distribution" to see the distribution of color and status for goals, measures, and activities.
Another option is to create a grouping and add distribution bars as overview elements. This allows you to see color and status by area for your measures and activities.
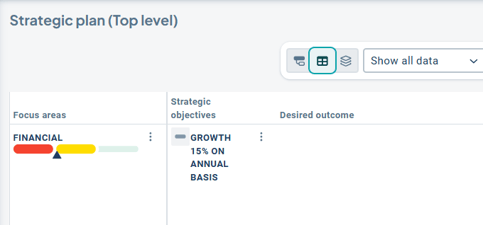
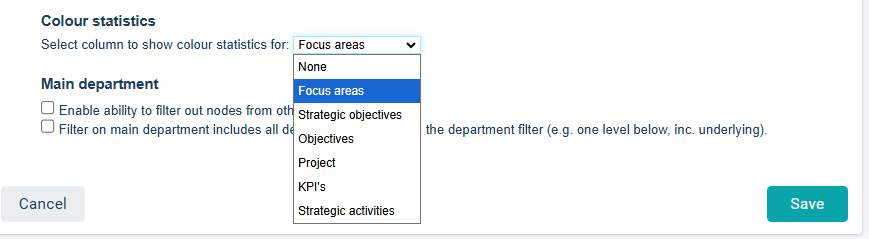
In classic view types, you use the color filter and color statistics. The filter is displayed in the view under the view title and allows you to click on each status/color to filter and display nodes with the selected status/color. Additionally, you can of course also see how many nodes of each status/color are present in the view.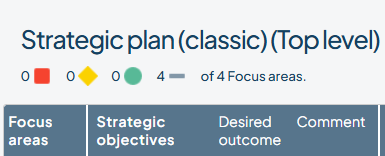
For the filter, you can select a Scorecard column, and depending on the node type, the filter will display:
Measure – Color
Activity – Status
Text – Color
You’ll find this setting in the filter settings under Other.