![Stratsys-logo-deep-blue.png]](https://www.stratsys.com/hs-fs/hubfs/Stratsys%20Logos/Stratsys-logo-deep-blue.png?height=27&name=Stratsys-logo-deep-blue.png)
Description
With the "Edit several measurements" function, you can apply selected properties from a specific measurement template to selected measurements.
The normal scenario is that you first update your measurement template with the changes you want and then use the same template to update the measurements. However, you can also switch to properties from another measurement template - in this case, you can also choose to reassign the measurement to the new measurement template.
Changing multiple measurements is a powerful feature. Please read through the entire article before using it to avoid losing data.
Limitations
You can change properties from the measurement template's settings tab, but you cannot update the consolidation formula for the measurements. This is for security reasons, as a change in consolidation formulas risks data loss.
Selection of Measurements
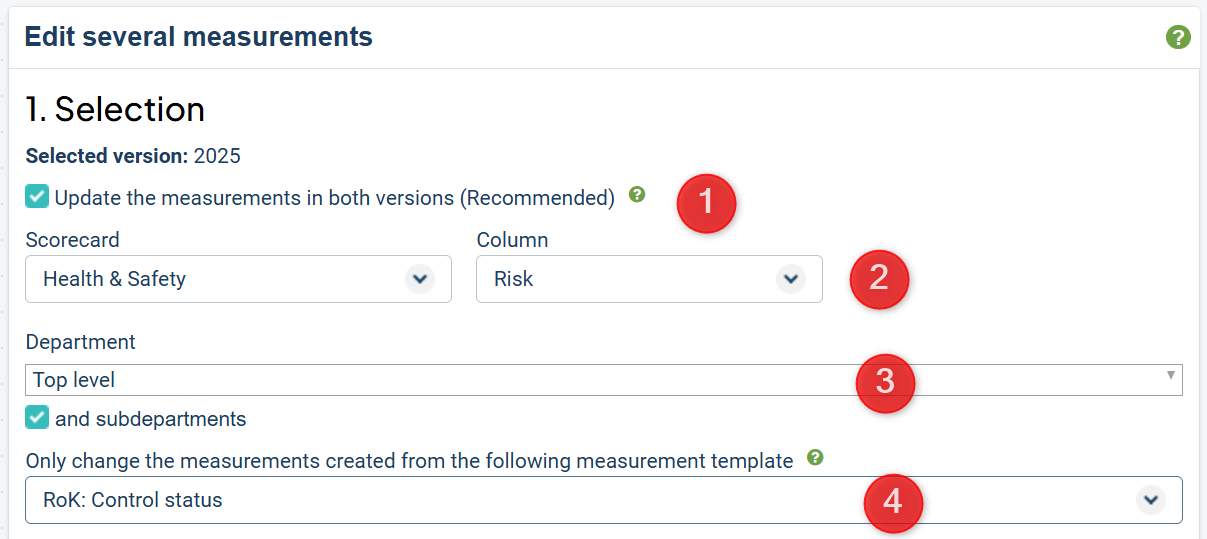
1) Choose whether you want to update the measurements in both versions. The normal scenario is to update in both versions - this way, measurements with broken connections and new measurements in the planning will also be updated.
If you want to update only in the planning version, you first need to switch to the planning version in the version selector. Then, only nodes that exist in the planning will change, and the measurements affected by the change will receive a broken connection to the current version if they also exist there.
If you only update in the current version, the changes will still be applied to the planning version for all measurements that do not have a broken connection.
2) Select the Scorecard and Scorecard Column where the measurements are located.
3) Choose for which departments the update should apply. It is common to position yourself at the top of the organizational tree and select "and and subdepartments". You need to change the unit in the organization selector at the top right. If you change the unit, the page will reload, and you will need to start over from step 1).
Measurements that have their top level at the unit you choose will be updated, including all distributions for this measurement. This applies even if you do not check "and subdepartments"
If you select "and and subdepartments", the measurements that have their top level at any of the subordinate units for the selected unit will also be updated.
4) Select which measurements should be included in the selection by choosing "Change only measurements created from the following measurement template" - the measurements linked to the selected measurement template will be updated. If you do not make a selection, changes will apply to all measurements.
Tip: If you do not know which measurement template has been used for the measurements you want to change, or if you are unsure, you can temporarily add the node property "Measurement Template" to a view that displays all your current measurements.
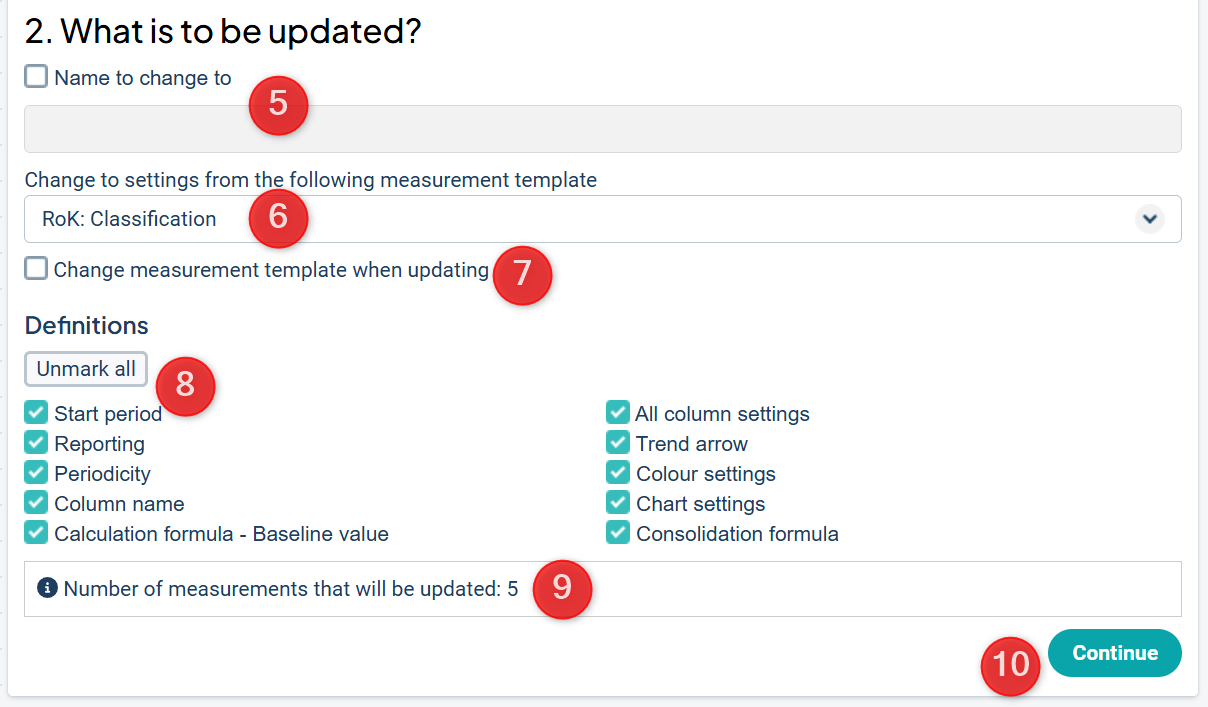
5) Name to Change To: If you want to rename the measurements, check the checkbox and enter the new name here. The most common scenario is to not rename the measurements.
6) Change to Settings from the Following Measurement Template: Here, select the measurement template that has the settings you want the measurements to be updated with - usually the same template used when the measurement was created.
7) Change Measurement Template During Update: Choose whether you want to switch to the new measurement template if you are updating to a new measurement template.
8) Definitions: Select the settings that you want to be updated from the selected measurement template.
9) Check How Many Measurements Will Be Updated: Ensure that this aligns with your expectations. In the measurement counter, "one measurement including distributed measurements" is counted as one measurement.
10) Press Continue to Proceed to the Analysis Step.
Analysis
Warning: Analyze the change carefully, as historical data and previous measurement definitions may be lost. Contact us at Stratsys for consultation assistance if you are unsure.
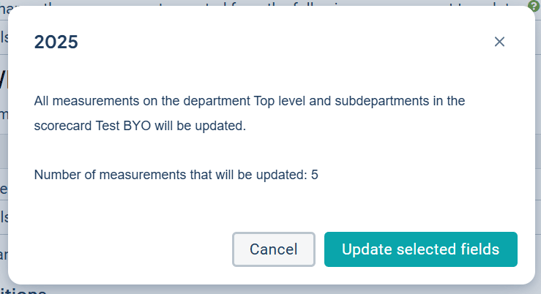
If a dialog box appears with the button "Update selected fields," no changes that alter your data will occur. Check how many measurements will be updated to ensure it aligns with your expectations. In the measurement counter, "one measurement including distributed measurements" is counted as one measurement.
Press Update to implement the change, or Cancel to adjust your settings.
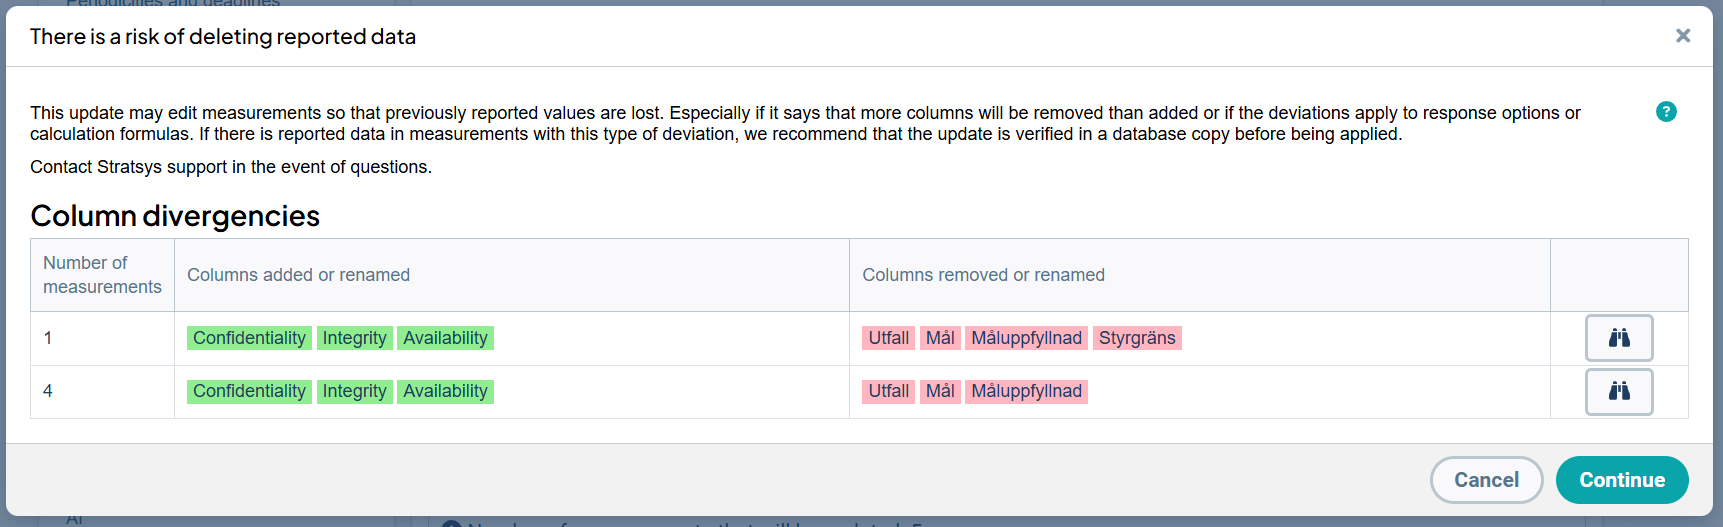
If anything in the update risks altering data, a view will appear where you can analyze changes in the measurement data columns if one of them is renamed, added, or removed.
Warning: You need to determine whether a column is being removed or just renamed. If the column is only renamed, the data is retained, but if the measurement data column is actually removed, it disappears along with its data.
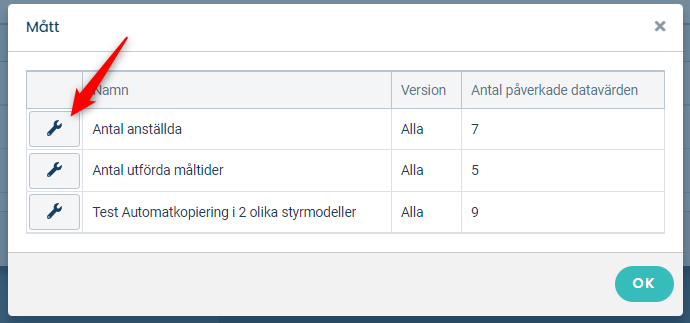
You can click on the magnifying glass icon in the rows on the far right to see which measurements are affected and how many data values are impacted.
If you then click on the wrench icon, you will open the measurement in question at the top level - however, affected data values are reported from the entire tracking chain:
When you are satisfied with the analysis, click Continue. You will then receive a confirmation dialog before you choose to update your measurements.