General
Using Automatic status, the status of the activity changes automatically depending on which date it is in relation to the start and end dates.
You configure automatic status in the Activity settings, and then in the scorecard column.
Status option
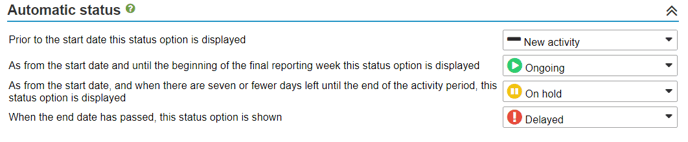
There is support for four different status options for the automatic status: Before the start date, between the start and end dates, close to the end date and after the end date, for example as shown in the image below:
If you don't want to use the third status On hold, set it to the same option as the second option, e.g. Ongoing, then you only get three different statuses in practice:

Start using automatic status
To start using automatic status in a scorecard column, do this. If you want to change from manual status to automatic status for existing activities, see the next section.
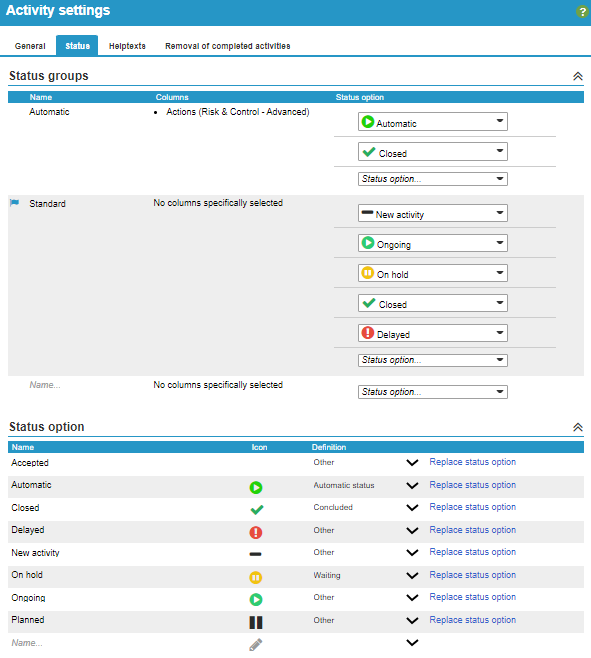
1. Make sure there is the right status option for automatic status - if not, then create one and save - name this to indicate that it is automatic:
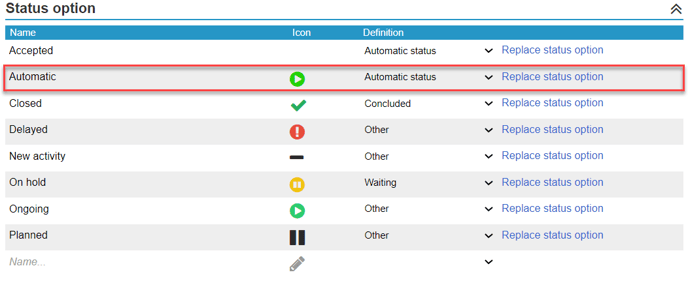
2. Make sure that the automatic status has the right status options, e.g. see below:
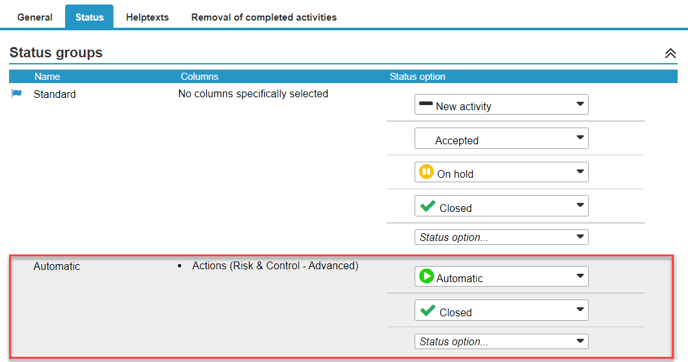
3. Create a new status group for Automatic status and select the scorecard columns that should get access to it. Add status options, at least On going and Closed - you can also add On
hold, if you want to be able to pause the activity. Save.
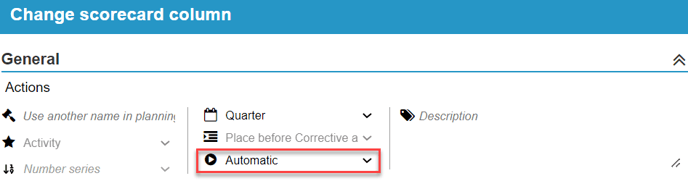
 4. Then choose your new status option in the right scorecard column.
When you now create new activities in this column, the status will be displayed based on the current date, until you select the status Closed or possibly On hold.
Change manual status to automatic status for an existing status group
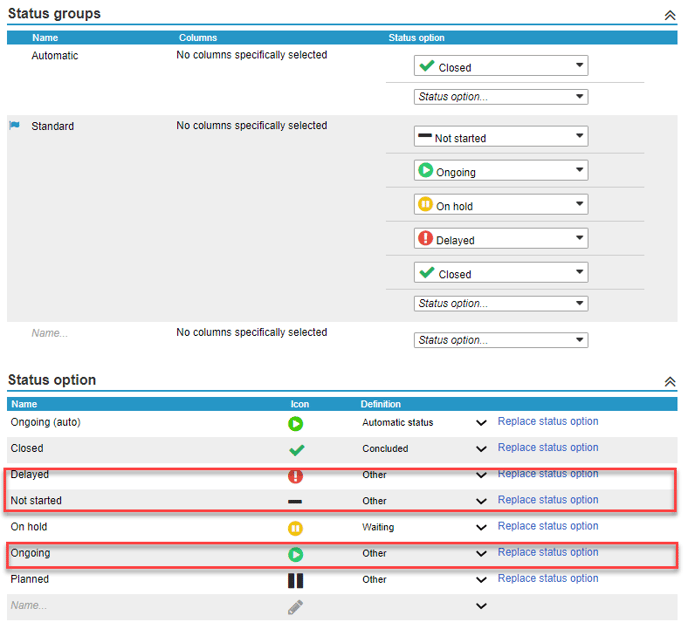
If you have manual status on your activities, but want to switch to automatic status, here is an example of how to do it. The example assumes that you have the following initial state, and in the example we change the Standard group to use automatic status.
1) Make sure you have a status option meaning Automatic Status, in this case the status named Automatic (automatic status). Should you use the same name as on a manual status, e.g. On going, change the name of the automatic status so you can see the difference while switching.
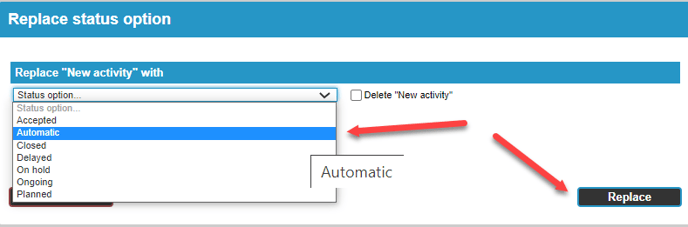
2) Then select Replace Status Options for the Ongoing, On hold and Closed options. You replace all three of these with Automatic status:
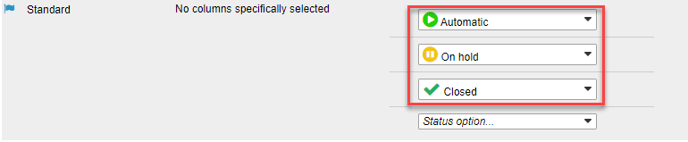
3) Save. Now all existing activities using the standard group will have automatic status.
4) Remove the options New activity and delayed. This prevents them from getting a status other than the automatic one:
5) Save. Now the automatic statuses' icons and names will appear in views and reports. This is until an active selection is made to a status option that does not have this meaning, in this example Concluded or Waiting. Where status options are selected for the activity itself, the name of the status option itself with the meaning "Automatic Status" will appear first, and whatever automatic status appears after in parentheses.