Create, modify, and delete objects in the planning version. Reassign objects that are to be retained.
When the planning version is activated and made available for work, you can begin planning the next year's activities in the new workspace.
Tip: Want to learn more about what the planning version entails? Read here:
Planning Version and Version Management
In this article, we go through the most common work tasks when working in the planning version, based on the new workspace and object window.
Add objects in the planning version
Edit an object in the planning version (break link)
Mark for deletion and delete objects
Filter out objects marked for deletion
Delete objects in the planning version
Relink objects that should be retained
Switch between versions
You usually switch versions using the version selector, which is located to the right of the organization selector (1). Click on the current version (here 2025) or the planning version (here 2026) to switch.
Sometimes, however, the version switches automatically when you select a menu. You can see from the purple indicator on the left that you are now in the planning version (2).
When you open an object, you will also see in the object window that you are now working in the planning version (3).
Add objects in the planning version
If you want to add goals, measures, activities, or other objects that only apply to the new year, you do this in the planning version.
Objects created in the planning version will not be available in the current version, but will automatically carry forward. You can think of it as an object starting in a certain version and then continuing through future versions until it is removed.
You create new objects in the planning version in the same way as in the current version: Create new objects.
You will see an indication that you are in the planning version when creating your object.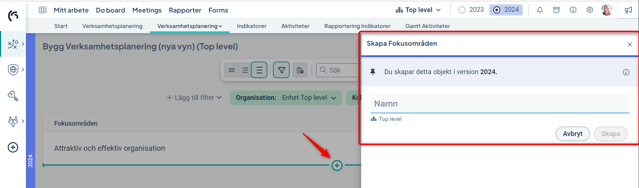
When your object is added, a pushpin icon in both the view and the object window indicates that this object has been added in the planning version.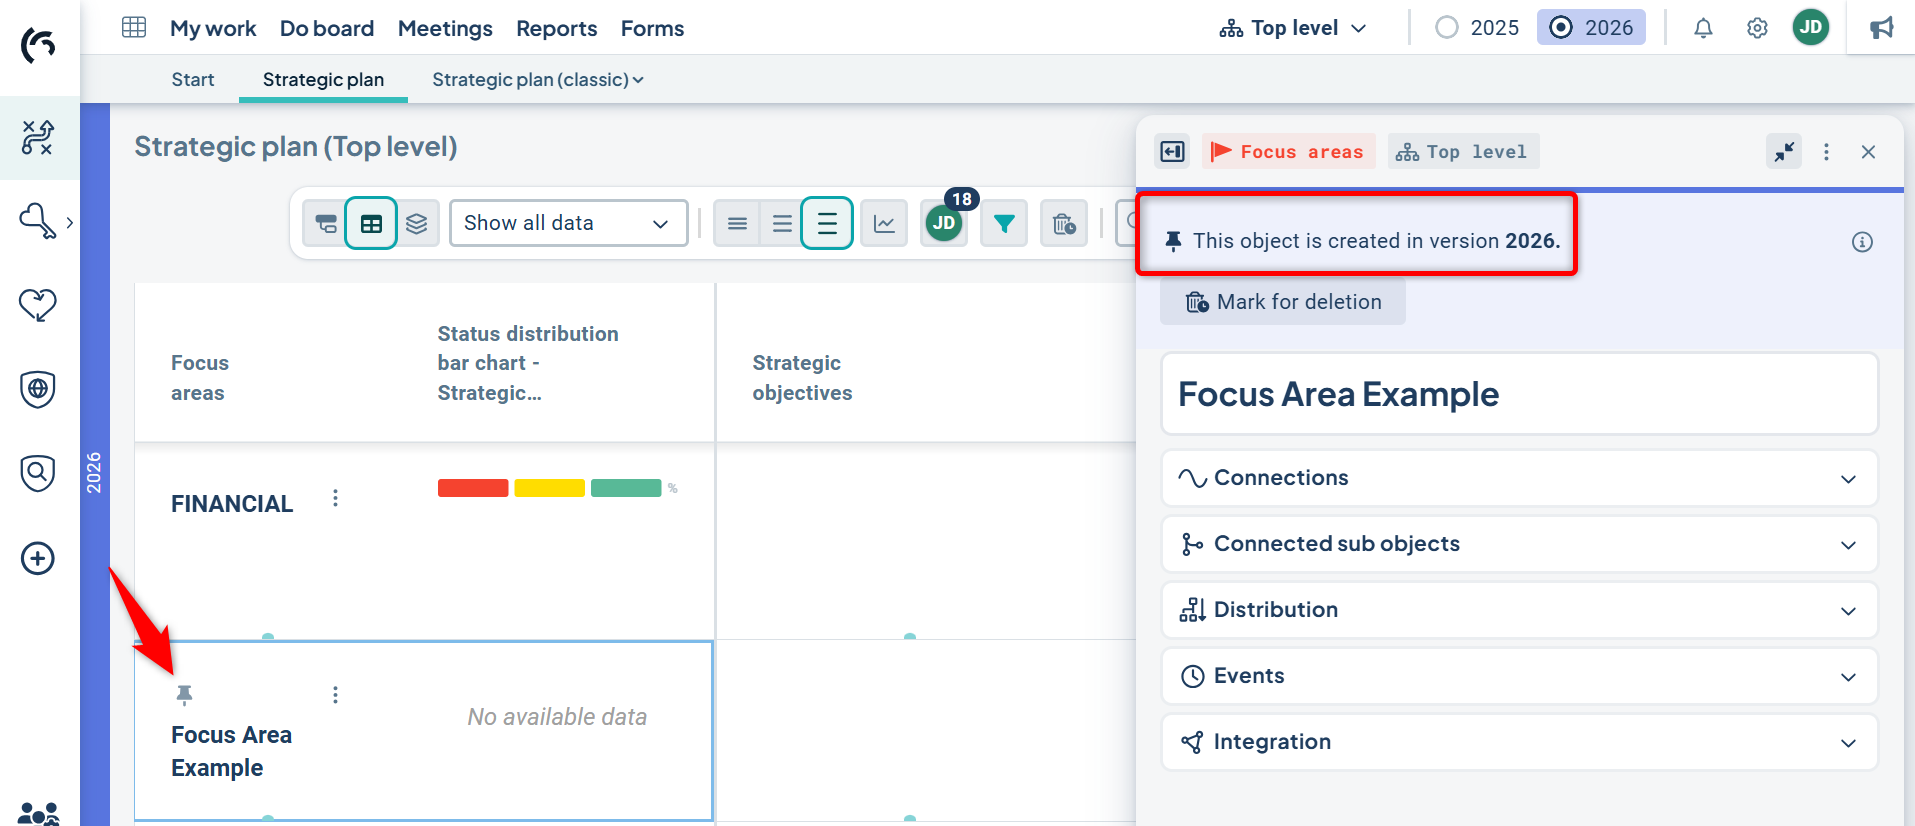
Edit an object in the planning version (break link)
When you want to modify an existing object to better align with the planning for the new year, you first need to break the link for the object.
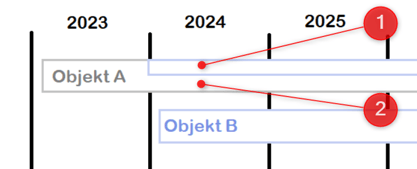
This means that certain properties of the object will differ between the versions, such as names and descriptions (1), while other properties will continue to be shared across versions, such as comments and measure data (2).
Read more here: Edit object in planning version.
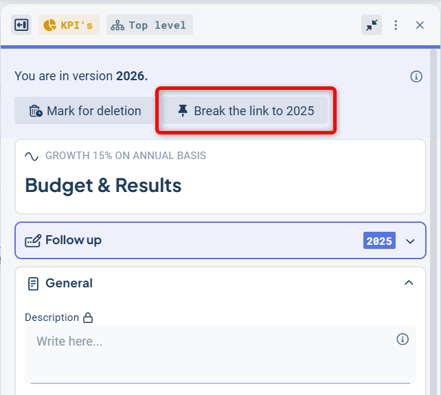
To edit an object in the planning version, click on the object. Then select "Break link to...".
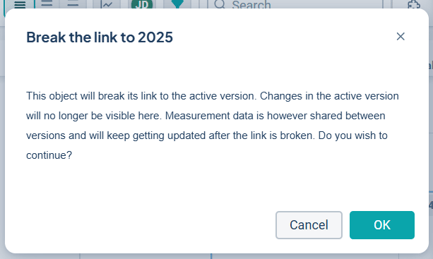
Then confirm in the confirmation dialog. The unlinking cannot be undone, but usually it is not a problem if an object has been unlinked by mistake.
Tip: If the change should also apply to the current version, switch to that version and make the change there – then you do not need to break the link.
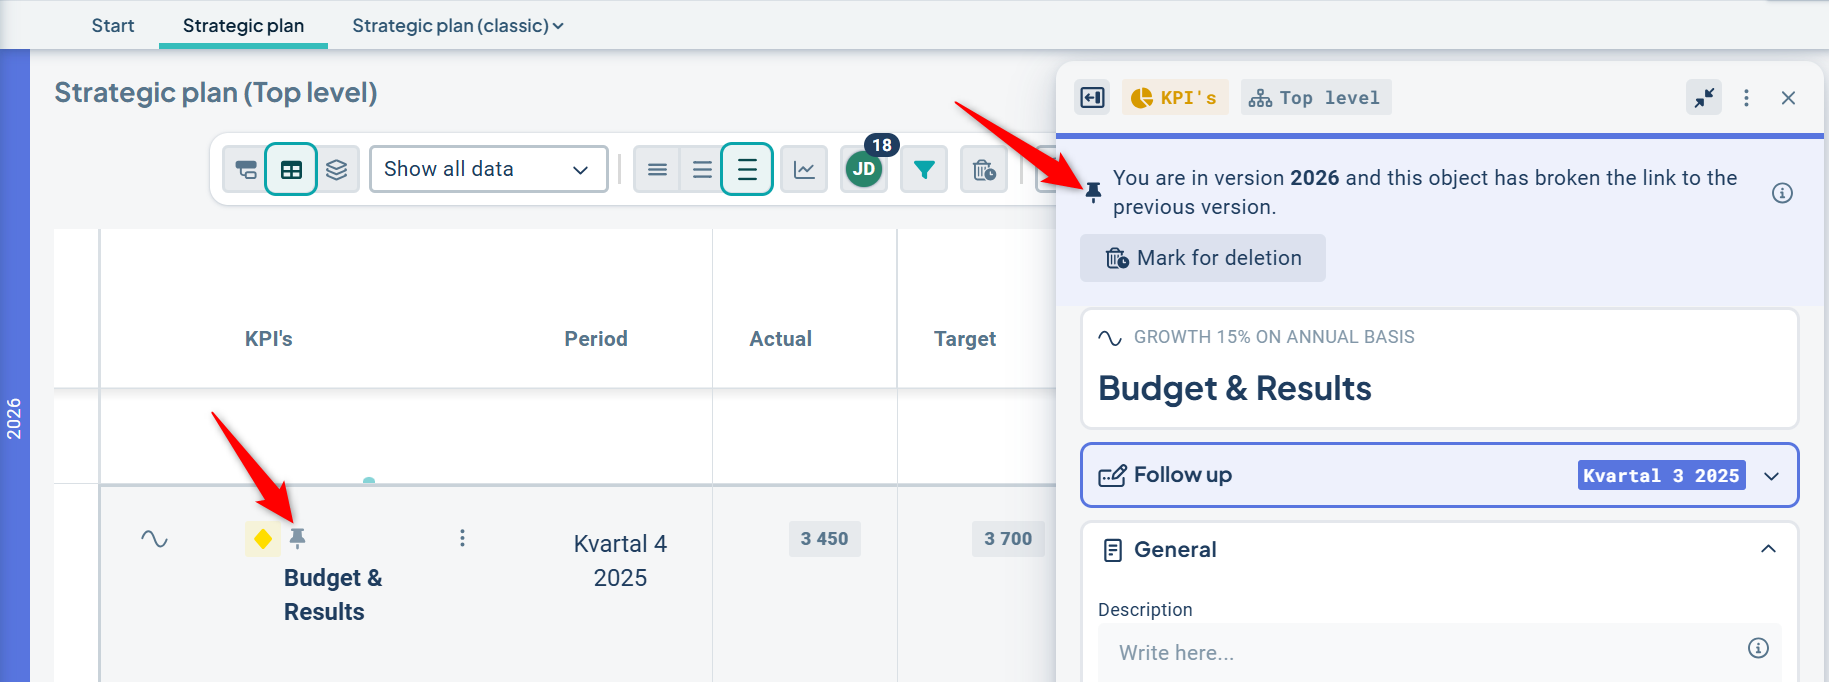
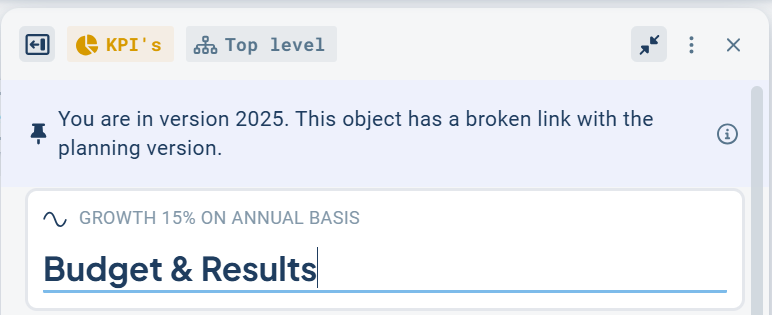
After breaking the link, you can make the desired changes to your object. The object is marked with a pushpin icon both in the view and in the object window, indicating that it now has a broken link to the current version.
What happens in the current version when the link is broken?
When you open the same object in the current version, you will also see an indication that the link is broken, but only when you open the object to edit it.
For example, if you change the name or description of such an object, these changes will not carry over to the planning version. If you want the change to appear in the planning version as well, you must switch versions and make the change there too.
Mark for deletion and delete objects
Objects that you no longer wish to work with next year can be removed in the planning version. You can either mark the object for deletion or delete it directly.
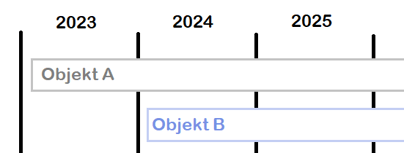
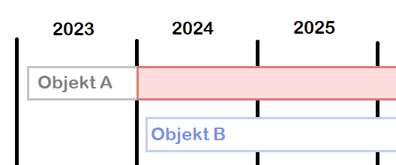
When you mark an object for deletion, it—here "Object A"—is displayed in a different color in the planning version and will only be removed during version management.
When you delete, the object—here "Object A"—disappears immediately from the planning version but remains in the current version.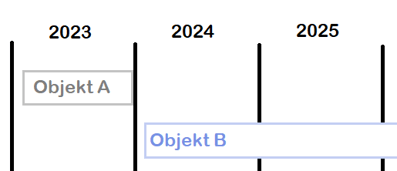
Mark for deletion
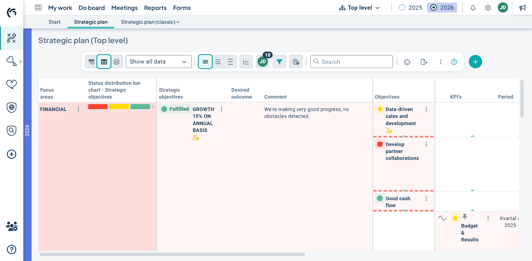
When you mark an object for deletion, that object and the objects linked to it are marked with a distinct pink color.
In the example below, the Focus Area on the far left has been marked for deletion, and the linked objects to the right are then indirectly marked for deletion.
Objects marked for deletion remain until versioning is performed, and until then, the marking can also be undone.
The advantage is that users can notice objects that are about to be deleted, which might still need to be retained. These can then be relinked to another object that is not being deleted before versioning, or the marking can be undone.
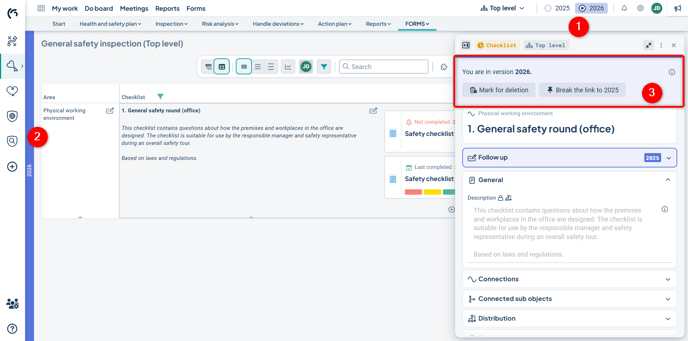
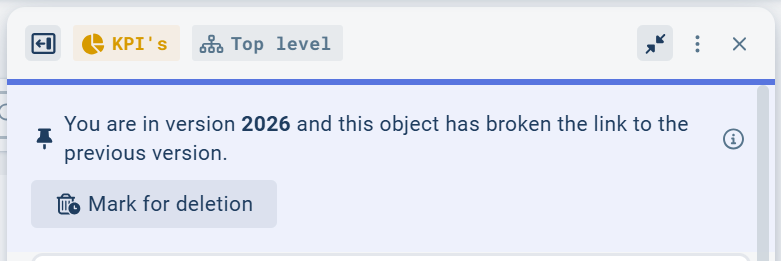
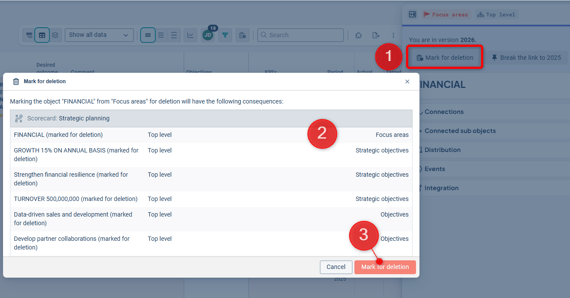
To mark for deletion, open the object for editing and select "Mark for deletion" (1).
Review the consequences in the confirmation dialog (2) and then confirm the marking (3).
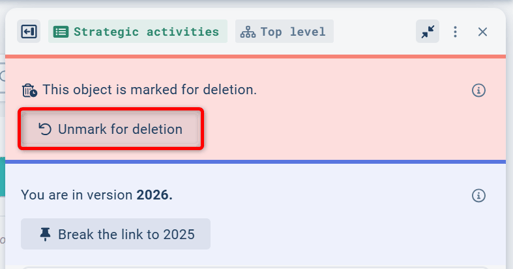
Undo deletion marking
You undo the deletion marking in the edit dialog. All objects linked to the right will also be unmarked.
If it concerns a subordinate object that is indirectly marked for deletion, you can either:
-Find the object causing the indirect deletion and undo the deletion there, or
-relink this object to one that is not marked for deletion.
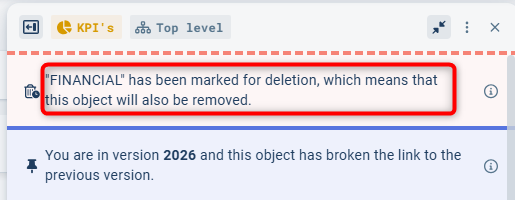
You can see which object is causing the deletion marking in the object window:
Filter out objects marked for deletion
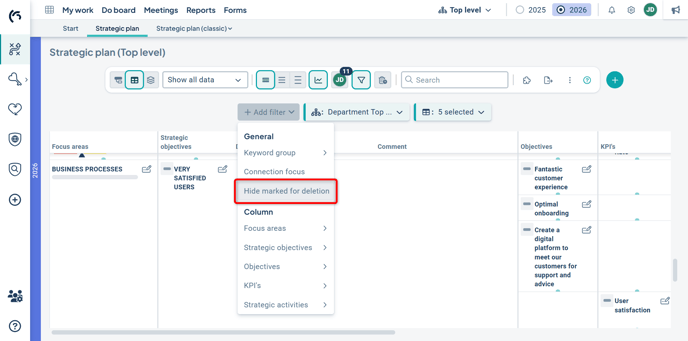
In the planning function, you have the option to filter out objects that are marked for deletion to get a cleaner view, showing only the objects you intend to work with in the coming year.
Select the filter "Hide marked for deletion" in "Add filter":
The result is shown in the image below. You can bring up the marked objects again at any time by removing the filter.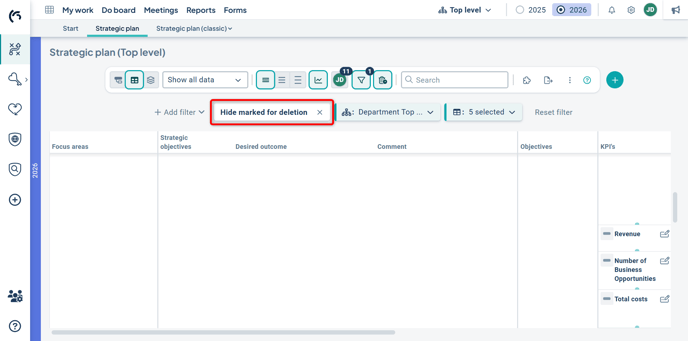
Delete objects in the planning version
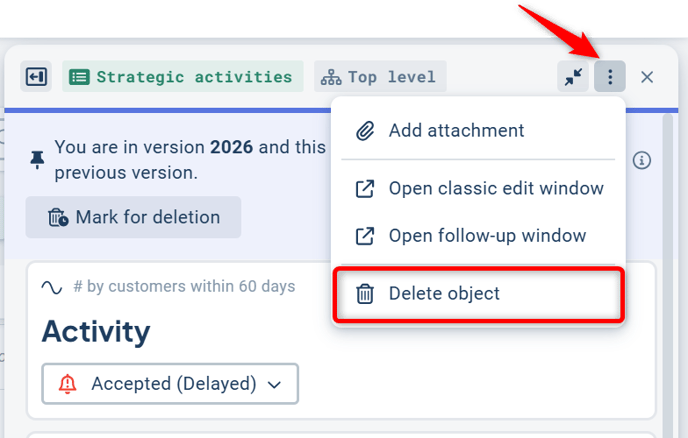
If you want to delete an object directly, do so from the three-dot menu in the same way as in the current version. If the object has already broken links, or only exists in the planning version, you can delete it directly – review the consequences and confirm. The object/linked objects will only be deleted in the planning version.
If the object also exists in the current version, you first need to break the link. "Delete object" will then be greyed out.

If you want to delete the object in the current version as well, first switch to that version and delete it there instead.
Relink objects that should be retained
When objects have been marked for deletion, but you want to retain certain linked objects, you can relink them to an object that will remain.
See connections in the article about the new object window.