Text objects are one of the three object types in Stratsys and are used to store text information. Text objects can, for example, represent different types of goals, processes, or serve as a way to categorize information into various areas.
This article describes how to add, edit, and delete text objects via the object window and within a view of the type New Table – Tree Structure view.
Please note! Text objects may have different names in our products. Common column names for text objects include: goals, perspectives, success factors, sub-goals, focus areas, processes, work environment areas, etc.
A text object stores text. An example is goal levels of various kinds based on strategic planning.
Text objects are usually followed up using a manual color and comment. However, this may vary depending on how your product is set up. In some cases, text objects are more of a way to group information, and no follow-up is typically done for that specific text object.
Please note! The ability to add, edit, and delete objects is controlled by the permissions you have as a user. There are also settings within the product itself that may control whether or not you have the right to add, edit, or delete information at certain levels. If you're unsure about the expectations for your role, please contact your administrator.
Add a text object
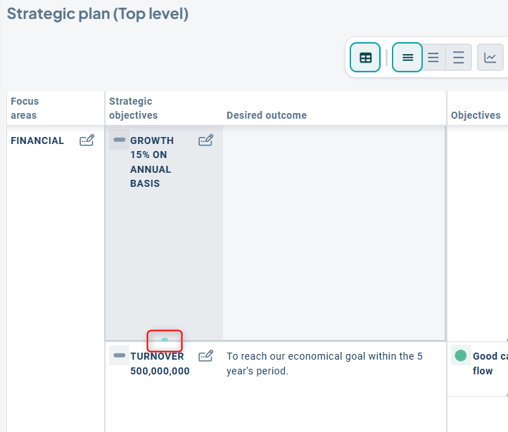
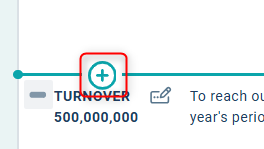
To add a new text object, click the plus sign that appears in the view when the mouse pointer hovers over the crescent icon. Once you've clicked the plus sign, the Object Window will automatically open on the right side of the view:
When you hover the mouse pointer over:
Object window:
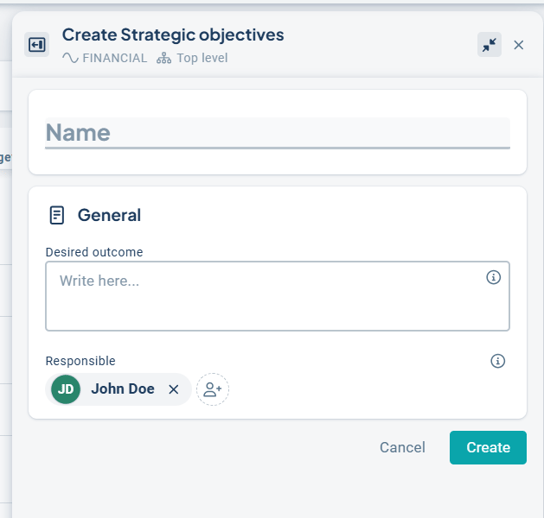
In the object window, all settings are displayed on a single page, so you don't need to switch tabs to access any settings. Instead, the window is divided into sections. The first section, "General", contains the name of the object and usually a number of description fields related to the type of text object you wish to add. Examples of description fields could be description, clarification, elaboration, etc., depending on the type of object. If you're working with responsible persons, the section will also define who is responsible.
The person responsible will, provided the to-do list is configured that way, receive a reminder during follow-up and will then need to assign a color to the object and sometimes also write a comment. The exact requirements for follow-up depend on how your product is configured. Some text objects are purely informational and have neither a responsible person nor any follow-up requirements. This depends entirely on the product and the type of text information in question.
For certain text nodes, it's desirable to work with keywords. Keywords can help group text nodes and serve as sorting criteria in views and reports. You may want to tag goals with, for example, Agenda 2030 or other frameworks, or to signal priorities, etc.
Tip! If you're unsure about what a setting means, you can click the info button to read more and get help. Don’t forget to also make use of the view's help text!
Click "Create" to make the text object visible in the view. If you wish to distribute the object to additional units or add more connections, several sections will become visible in the object window as soon as you click "Create".
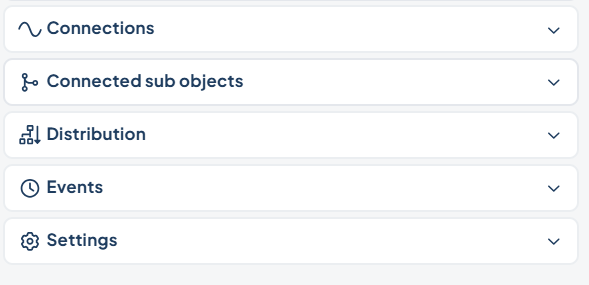
Connections
The connections show how information in Stratsys is linked together and are governed by the connection rules set up for the product. As a user, you cannot alter the connection rules, but you need to adhere to them when you want to link or re-link information.
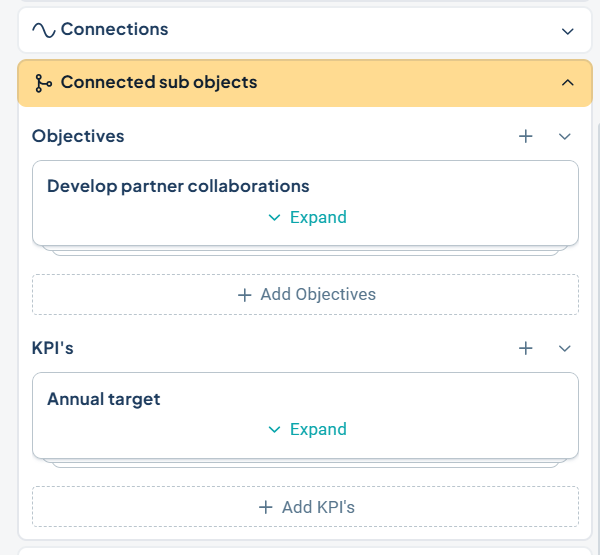
Connected sub objects
If the view is set up in a way that allows it, you can directly create linked sub objects in the object window. You can also see which sub objects are already linked.
In the image below, there is the possibility to create objects in the columns for Objectives and KPI's. If you have AI enabled, it’s also possible to generate suggestions for appropriate activities using the AI.
Distribution
Text nodes can, if desired, be made visible to other units, which will then also be able to view them, report colors, and write comments from their respective levels.
Text nodes do not become separate copies on other units as activities and measures do, but are only made visible where they are distributed. This means that you do not need to adhere to the “red thread” (logical structure) in the same way when distributing text nodes. You can therefore choose to distribute the node to any units in the tree, regardless of their position in relation to your own unit. This also means that, for example, text nodes cannot contain different information in the same description field across different units.
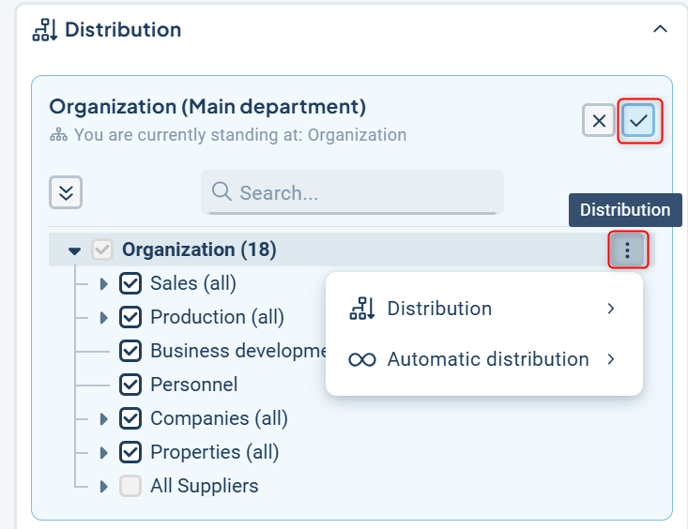
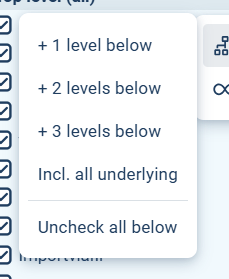
Distribution – Here, you can quickly select distribution based on preset options, such as "+1 level below." You can also deselect all selected levels to remove the object from them.
Keep in mind that if subordinate units have created other objects linked to the text object, these will be deleted if you remove the distribution.
Automatic Distribution – This means that if new units are added to the organizational tree at levels below yours, they will automatically be assigned the text node. This can be useful for text objects that are common to an entire branch of the organization or the entire organization.
You can choose automatic distribution based on a group, e.g., "+1 level below," or for all subordinate levels.
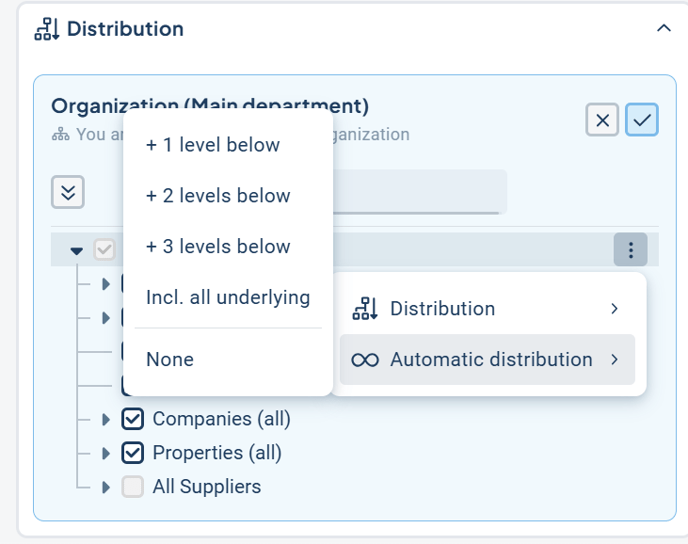
Once you have made your desired distribution and enabled automatic distribution, you need to confirm it by clicking the button with a checkmark.
Events
Displays the most recent activities related to the object, such as when the object was created and whether any changes have occurred.
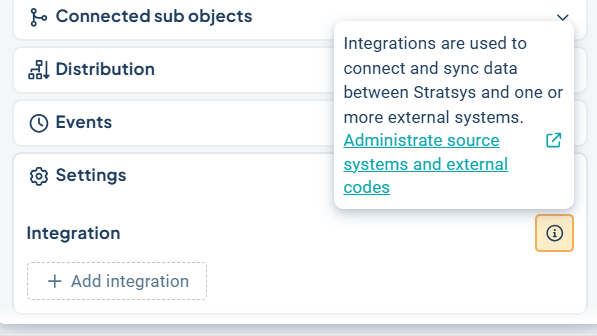
Settings
Under settings, you have the option to add integrations based on available source systems. This could, for example, include processes from a process management tool.
The Text Object is Saved Automatically
There is no need to click a save button. Once you're satisfied with your settings, simply closing the object window will save the information. After you close the window, a dialog will appear notifying you that your information has been saved.
You can close the object window by clicking the "X" in the top-right corner.

Edit and delete a text object
You can edit a text object by clicking on the object in the view. When you do this, the object window will reopen.
Make your desired changes in the object window, and then close it to automatically save your changes.
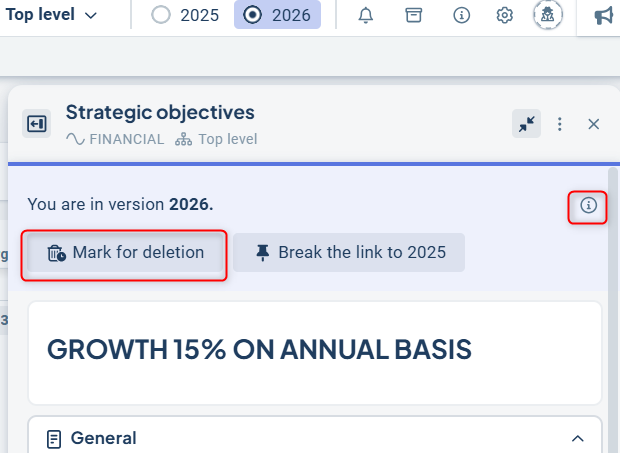
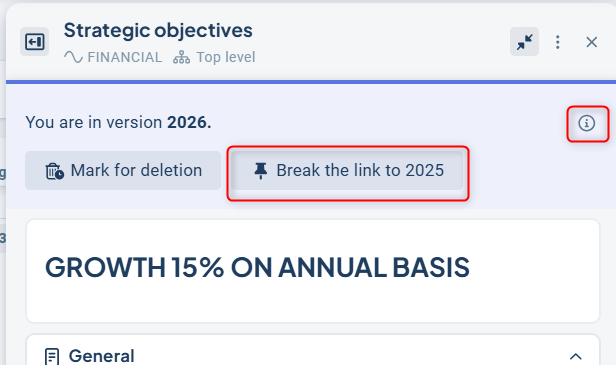
If you want to make changes to your object in the planning version, you first need to break the link. The changes you make will then only affect the planning version, not the current version. This can be useful if, for example, you want to slightly modify an objective statement in the planning version while keeping it intact in the current version.
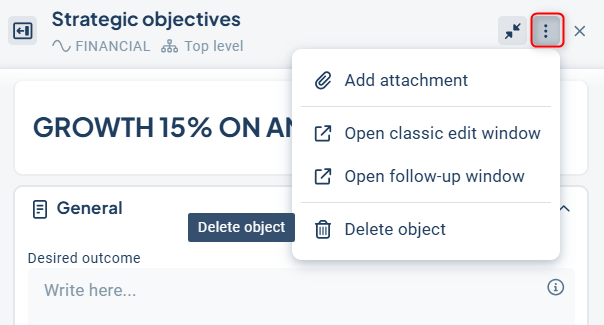
If you wish to delete a text object, you can do so via the three-dot menu in the top-right corner of the object window. This is also where you can add attachments to the object.
You will then receive a summary of the consequences of the deletion. To permanently delete the object, you need to click on "Remove All", as shown in the image below.
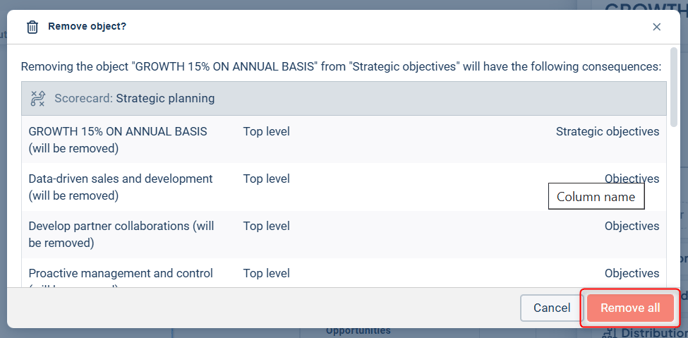
Please note! If there are other nodes linked to the node you wish to delete, everything connected to that node will also be deleted. In the dialog box, you will see information about everything that will be removed, so be sure to pay attention to avoid deleting any information you want to keep.
If you are working in the planning version, you will first be given the option to mark the text object for deletion. Objects marked for deletion will automatically be removed during version management. If you wish to delete a text object immediately, rather than waiting for version management, you can, after marking the object for deletion, reopen it and delete it via the three-dot menu as described above. The object will then disappear from the planning version but will remain in the current version.
Click on the information icon for more details about your options.