![Stratsys-logo-deep-blue.png]](https://www.stratsys.com/hs-fs/hubfs/Stratsys%20Logos/Stratsys-logo-deep-blue.png?height=27&name=Stratsys-logo-deep-blue.png)
Workflow gives you one operational view of supplier progress. You can see which suppliers are in scope, how far each workflow has progressed, which step is next, and where action is needed.
You can access the view by selecting Workflow in the left-hand menu.
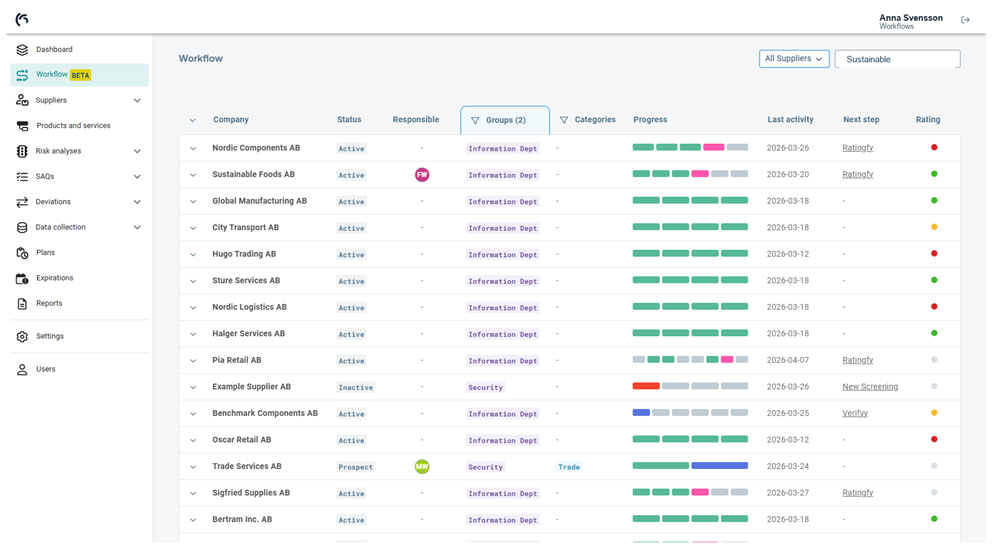
Screenshot: Workflow navigation and page overview.
Workflow overview
The Workflow page lists suppliers and their active workflow status. Use it as a daily follow-up view when you need to understand what has been completed, what is planned, and what needs attention next.
The top of the page contains the page title, the Visibility menu, and the search field. The main table shows supplier rows. Each supplier can be expanded to show the workflow steps connected to that supplier.
Screenshot: Workflow navigation and page overview.
Visibility and search
Use Visibility to choose which suppliers should be shown in the Workflow list.
- My Suppliers: Shows suppliers where you are responsible or included in the relevant ownership view.
- All Suppliers: Shows all suppliers you have access to.
- Filter page: Use the search field to filter the list by supplier information shown on the page.
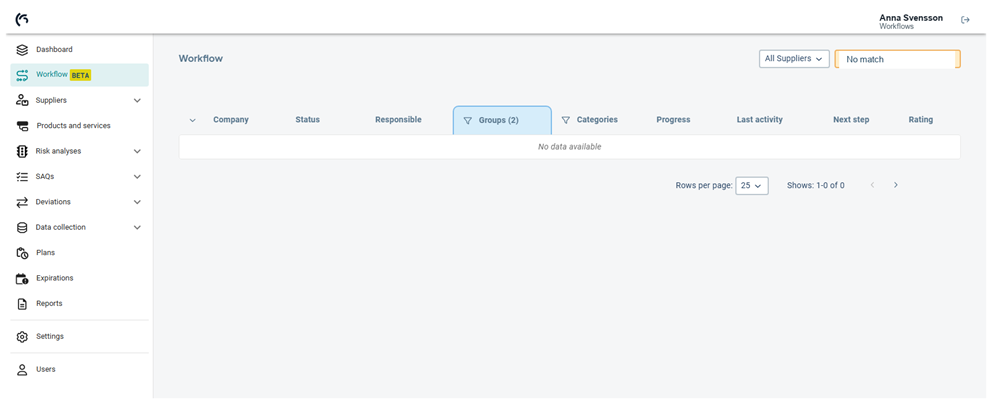
If the selected view or search does not return any suppliers, the table shows a no-data state. Clear the search or change Visibility to broaden the list.
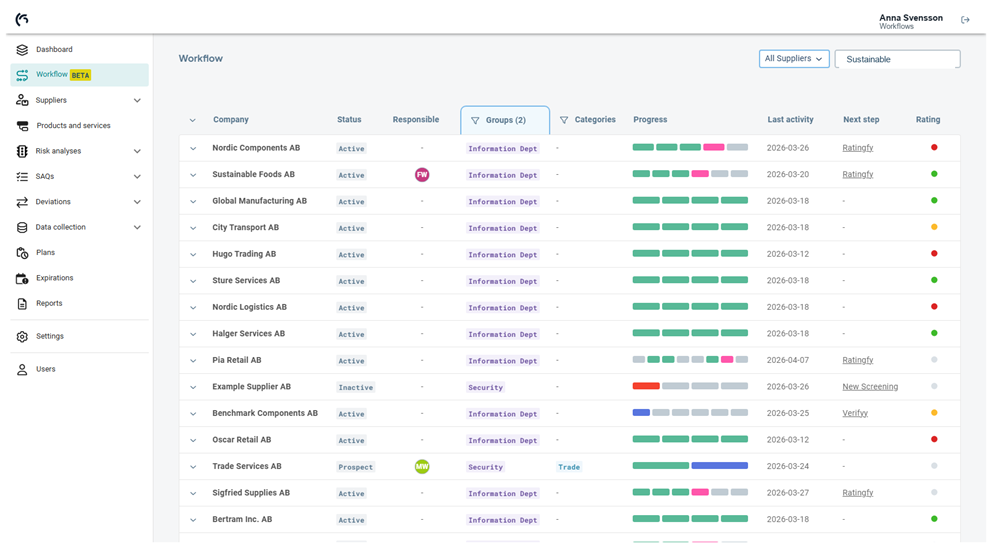
Screenshot: Visibility menu and search field.
Workflow list
The table gives a structured overview of each supplier and its current workflow position. Click a sortable column heading to change the table order.
| Column | What it shows |
|---|---|
| Company | The supplier name. |
| Status | The supplier status, such as Active or Prospect. |
| Responsible | The person responsible for the supplier. |
| Groups | Groups connected to the supplier. The filter icon can be used to narrow the list. |
| Categories | Categories connected to the supplier. The filter icon can be used to narrow the list. |
| Progress | How far the current workflow has progressed. |
| Last activity | The latest completed or updated workflow activity date. |
| Next step | The next workflow step that should be handled. |
| Rating | The current supplier rating, when available. |
Filtering, sorting, and pagination
The Workflow table can be narrowed and organized without leaving the page.
- Sort: Click a sortable column heading, such as Company, Status, Responsible, Progress, Last activity, or Rating.
- Filter Groups or Categories: Use the filter icon in the column heading to select which values should be included.
- Reset: Clear search terms or remove filters when you want to return to a broader list.
- Rows per page: Use the pagination controls at the bottom of the table to change how many suppliers are shown.
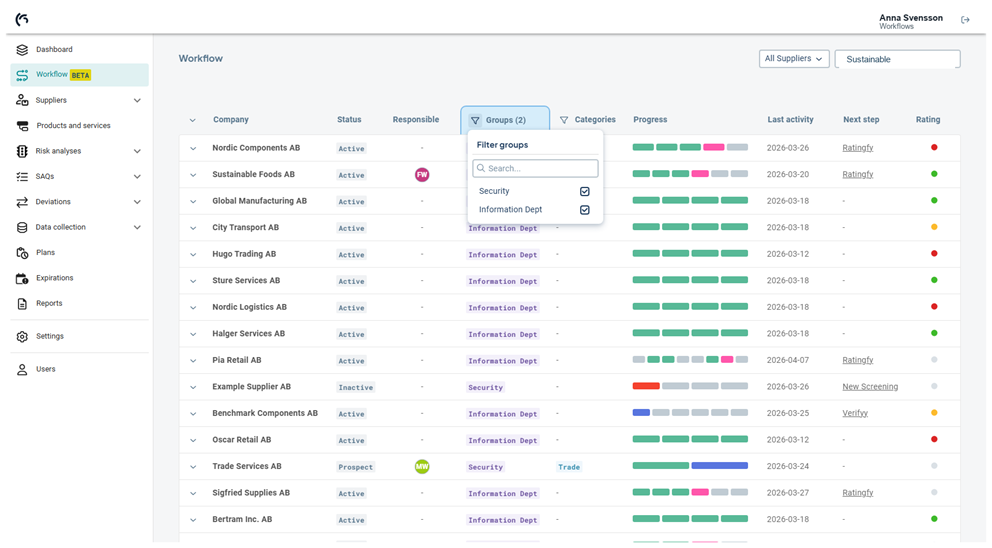
Screenshot: Groups and Categories filters.
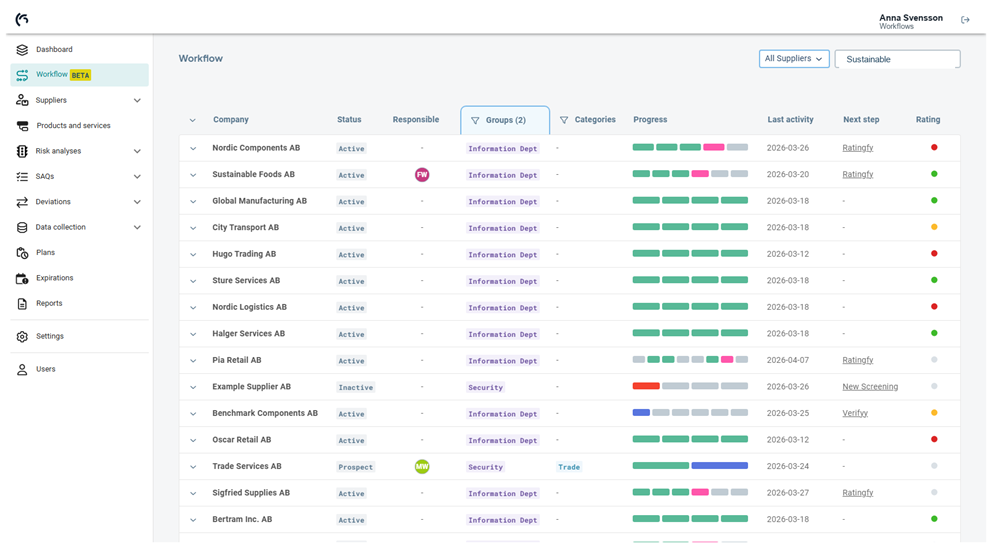
Screenshot: Rows per page and pagination.
Expand suppliers
Expand a supplier row to see the workflow steps for that supplier. Use Expand all to open all visible supplier rows, and Collapse all to close them again.
The expanded area shows the selected workflow instance and the step table. This is where you can review activity states, results, dates, users, comments, and available actions.
- Open one supplier: Click the expand arrow on the supplier row.
- Open all suppliers: Click Expand all in the first table column.
- Close rows: Click the supplier arrow again or use Collapse all.
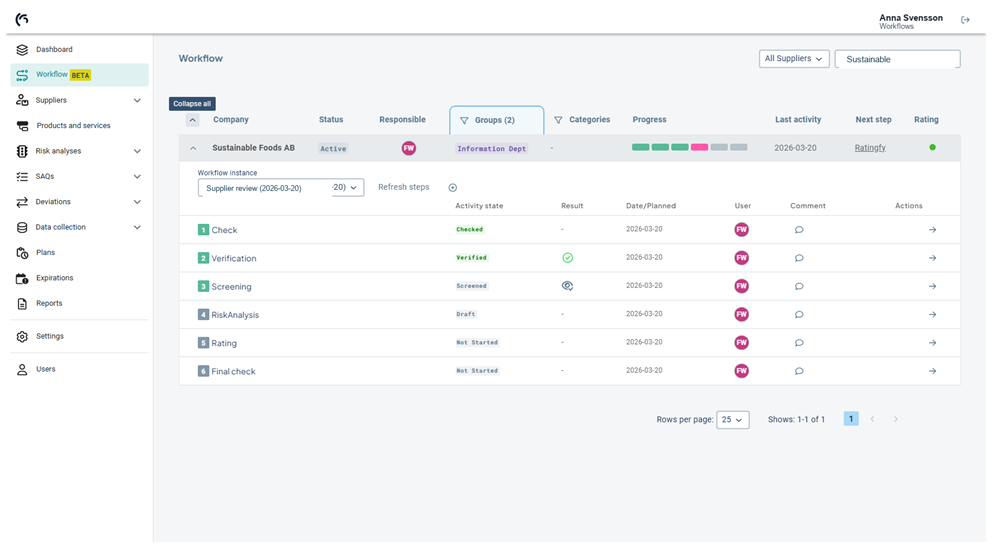
Screenshot: Expanded supplier row.
Workflow instances
A supplier can have one or more workflow instances. The Workflow instance selector controls which instance is shown in the expanded step table.
Use the selector when you need to compare previous and current workflow runs for the same supplier. The selected instance determines which steps, dates, results, and comments are displayed.
- Open the supplier row: Expand the supplier you want to review.
- Open Workflow instance: Use the selector above the step table.
- Select an instance: Choose the workflow instance you want to inspect.
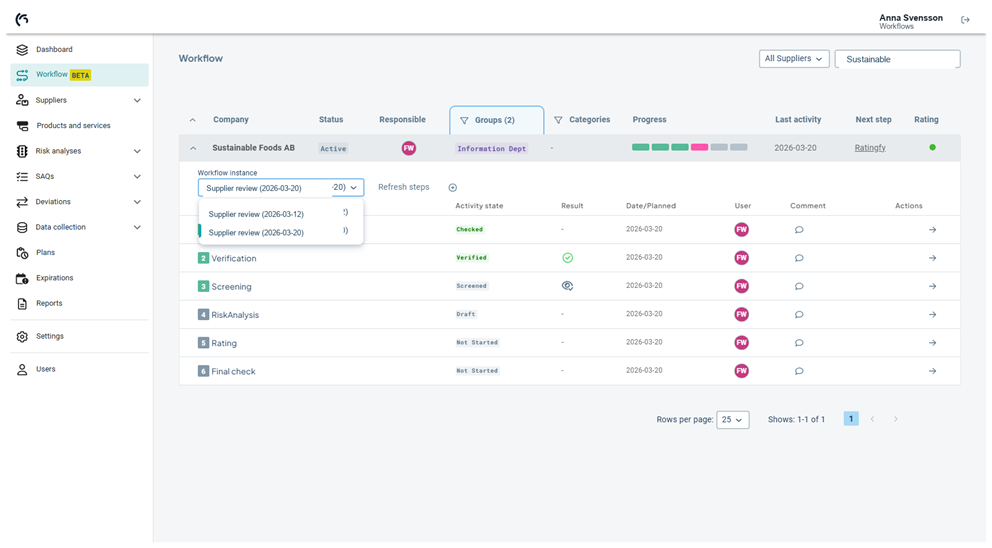
Screenshot: Workflow instance selector.
Refresh steps
Use Refresh steps when you want to update the displayed workflow step data for the expanded supplier.
Refreshing updates the information shown in the step table. It does not replace the workflow instance, and it is not the same as creating a new instance.
- Expand a supplier: Open the supplier row where you want to refresh the step information.
- Click Refresh steps: Wait for the step table to update.
- Review the result: Check the activity states, dates, comments, and actions after the refresh completes.
Screenshot: Refresh steps.
Create a new workflow instance
Use Create new instance when a supplier should start a new workflow run. The dialog lets you choose which workflow to create for the supplier.
Only create a new instance when a new workflow run is needed. Existing workflow instances remain available through the Workflow instance selector.
- Expand the supplier: Open the supplier row.
- Click Create new instance: A dialog opens.
- Select Workflow: Choose the workflow that should be started.
- Create: Click Create to add the new workflow instance, or Cancel to close the dialog without changes.
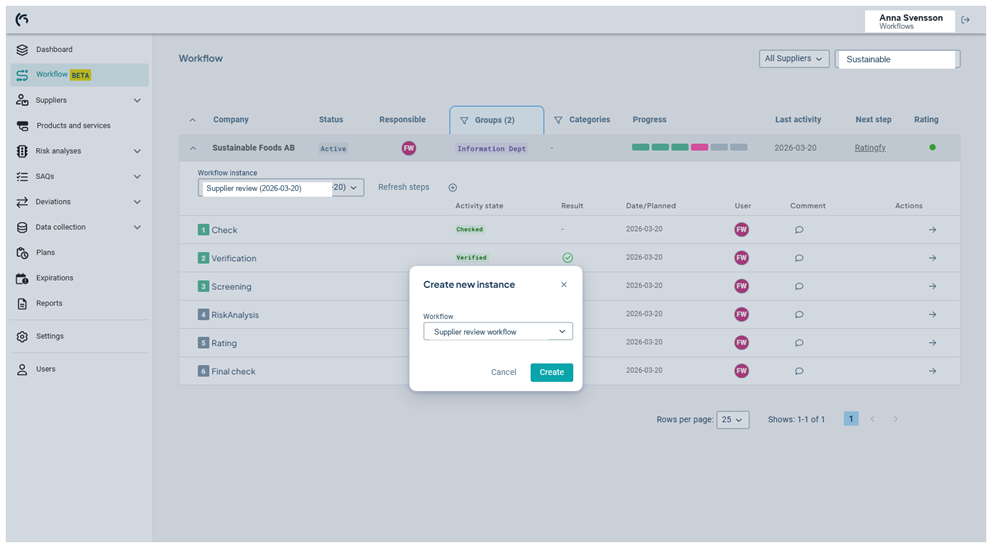
Screenshot: Create new instance dialog.
Step table
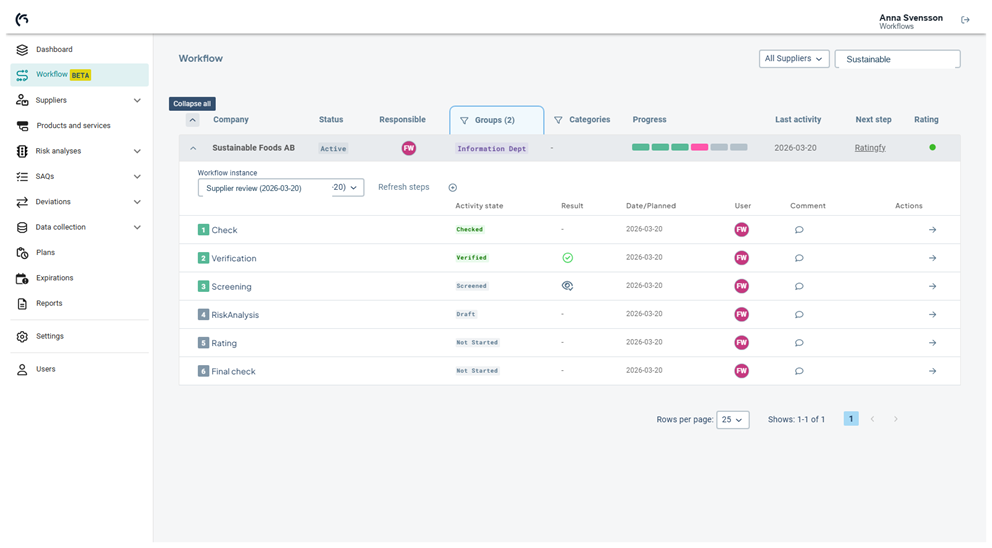
The step table shows the activities in the selected workflow instance. The columns help you understand what has happened and what can be done next.
| Column | What it shows |
|---|---|
| Activity state | The workflow step name and its order in the workflow. |
| Result | The outcome of the step, such as completed, rated, failed, or no result yet. |
| Date/Planned | The date connected to the step. This can be a completed date or a planned date. |
| User | The user connected to the latest activity, when available. |
| Comment | A comment action or the latest comment connected to the step. |
| Actions | Available actions for the step, such as Comment, Go to, Continue, or retry. |
Step states and results
Workflow steps can show different states depending on what has happened in the due diligence process.
- Completed: The step has been completed and usually shows a completed activity state or result.
- Planned: The step is waiting for a planned date or future activity.
- Awaiting confirmation: The step requires manual confirmation before the workflow can continue.
- Failed: The step could not be completed automatically and may show a retry action.
- No result: A dash is shown when no result is available yet.
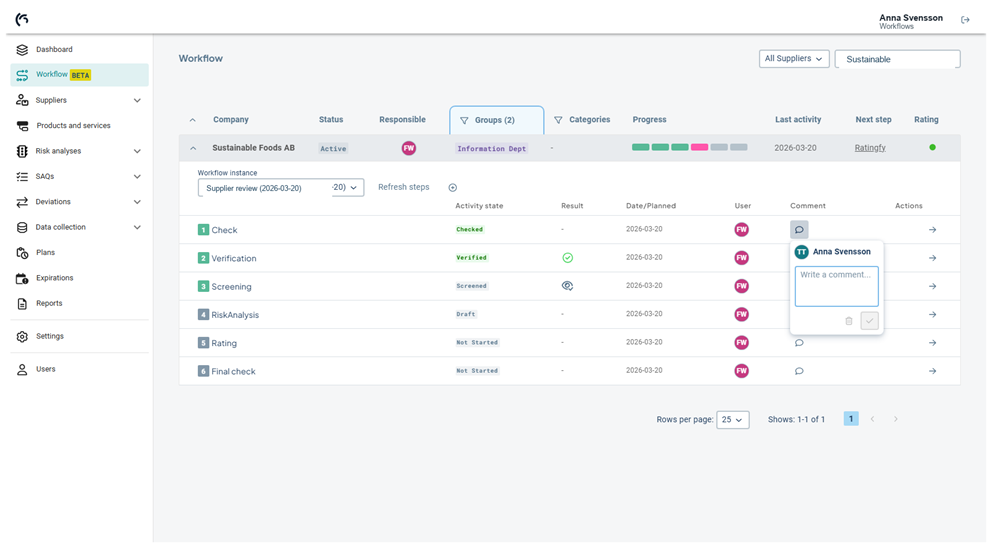
Screenshot: Step states and result examples.
Comments
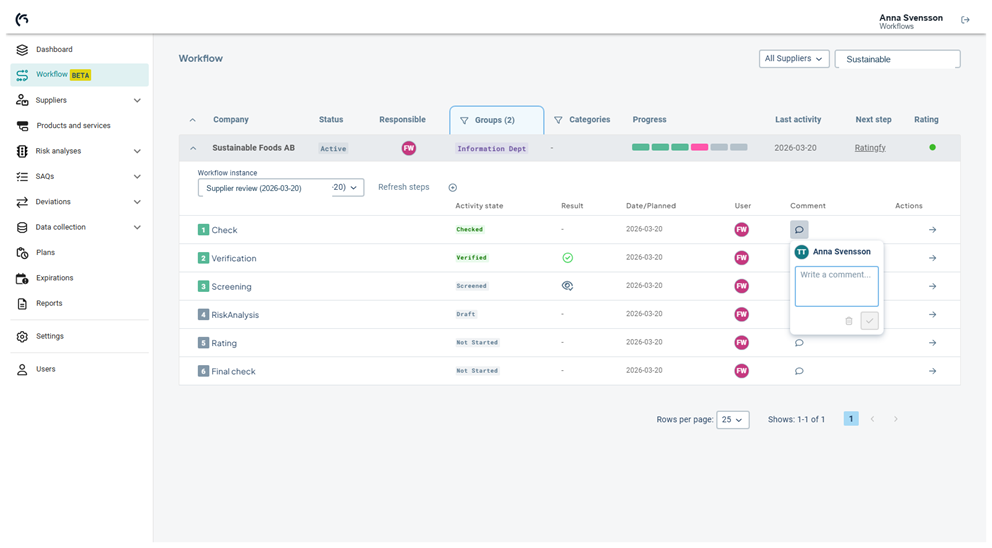
Use Comment to add or review context for a workflow step. Comments help explain why a step was handled in a certain way or what needs to happen next.
- Click Comment: Open the comment panel for the step.
- Write or review the comment: Add short, relevant context for the activity.
- Save: Save the comment when you want it to be stored on the step.
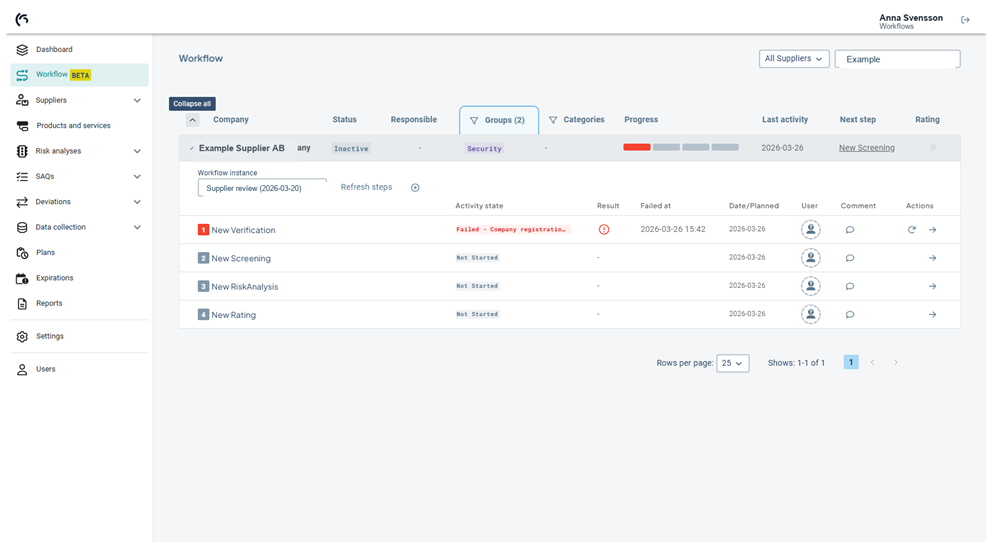
Screenshot: Comment panel.
Actions
The Actions column changes depending on the step type and state. Only actions that are relevant for the current step are shown.
- Go to: Opens the connected part of Due Diligence, such as a supplier activity, assessment, or related workflow area.
- Continue: Confirms a manual check step so the workflow can continue.
- Retry: Runs a failed automatic step again when retry is available.
- Comment: Opens the comment panel for the step.
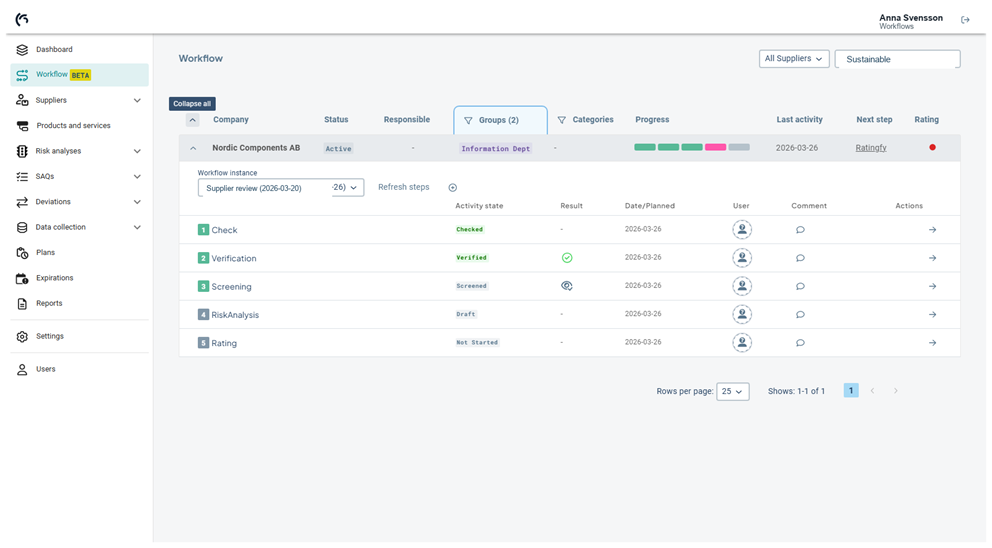
Screenshot: Continue action.
Screenshot: Failed step and retry action.
Empty states and no data
If there are no suppliers or no workflow steps to show, the page displays an empty or no-data state. This can happen when filters are too narrow, when My Suppliers does not include any suppliers, or when the supplier does not yet have a workflow instance.
- Check search: Clear the Filter page search field.
- Check Visibility: Switch between My Suppliers and All Suppliers.
- Check filters: Remove Groups or Categories filters if they are active.
- Create an instance: If the supplier has no workflow instance and you need one, use Create new instance.
I can also turn this into a cleaner HubSpot-ready version with simplified heading levels and screenshot placeholders kept in place.