Gadget: External page
Create and manage gadgets
Obs! To add a Gadget On the dashboard, you must belong to a User group which are Global Administrator. That Local Administrator You can only change the existing gadgets.
Click the button Add gadget Displays all selectable gadgets that can be added to the home screen. Click the Add Under the gadgets you want to add, then just click on Clear you'll see your new gadgets on the dashboard and you can start customizing them to suit your needs.
Administer in gadget
Each gadget Has a gear in the top right corner. With this Gear You can minimize a gadget, Update it, modify and delete it. If you click Change, you will enter the administration gadgeten.
Gadgetarna Free text, Activity flow, Submenu, Annual wheel And To-do List Can be displayed in three different sizes: 1/3, 2/3 and 3/3 of the width of the page. To select a width, click Gear wheel In the upper right corner of gadgeten and then Change. Select the desired width and confirm by saving.
Move a gadget
You can change the order of your gadgets By dragging them in the desired location.
Tips! If you experience difficulty moving the gadget to the correct location, move it in a circular motion before you put it in the right place.
Change a gadget
To modify an existing gadget, click Gear wheel In the top right corner and select Change. The gadget will now open for editing. The options you get depend on the type of gadget. This functionality is also available to local administrators.
The activity diagram provides a good overview of the status of your device's activities. Clicking one of the colors will bring you to a view that filters out all the tasks with that status.
The activity diagram is a pie chart of the status distribution of tasks from the selected scorecard. The selected statuses will be visualized in your choice of colour to illustrate a situation analysis of the progress of the activities.
Enter a title and select the You The chart should apply to the Dropdownlistan. The colors that the statuses are represented by in the gadget are controlled by the settings in the status group that are used in the Control model column. See Activity settings.
This gadget is used to display Web pages on the home page of Stratsys.
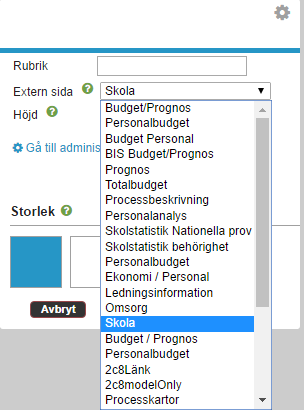
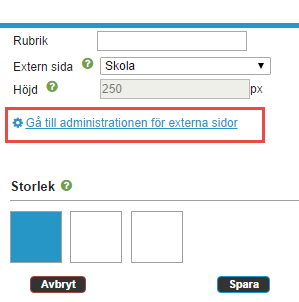
- Title-Select a name for your gadget.
- External page-Select an existing link to the external page. If the drop is empty, post a new link to the external page via "Go to Administration for external pages".
- Height-Set the number of pixels the gadget should take up in height. This can only be set if the gadget takes up 3 columns in width (set in the next step). If the gadget takes up 1 or 2 columns, the height is default 250 pixels.
- "Go to the Administration for external pages"-here you are linked to a new page where all external links are posted (see further info below).
- Size-Here you can choose how wide your gadget should be. The dashboard consists of 3 columns and each gadget can take up 1, 2, or 3 columns.
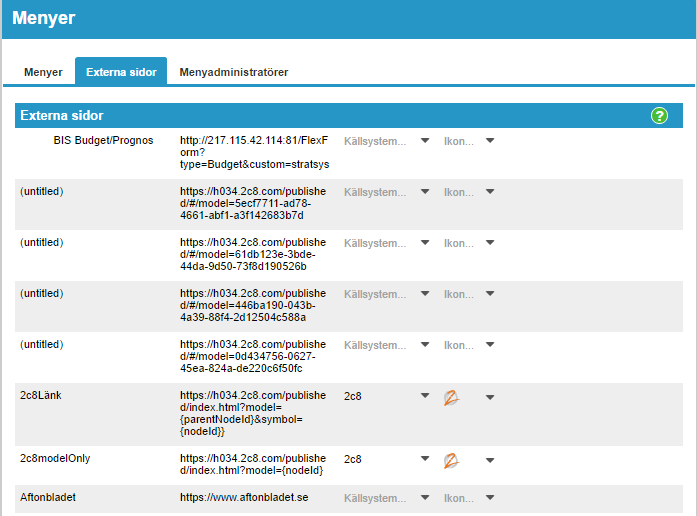
To change an existing link or add a new link, click here:
Then you get here (you can also access this page via Administration/Menus/external pages):
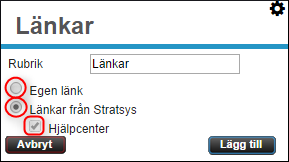
- Headline-Give your external page a headline that appears in Stratsys
- URL-Type the address of the page you want to link to. It is important that the home page starts with "https://". If the page looks weird, it might be because the page doesn't support https://.
Supported parameters for external codes: ORGUNIT, NodeId, ParentNodeId, USER
External code parameters fall back on an empty string if there are no external codes
Supported parameters for other parameters: CompanyCode, Version
All Paramatrerar are case-insensitive
- SOURCE system-if the external page refers to a specific source system, this can be tagged here. It will then be easier to keep track if many external pages are posted.
- Icon-If the system icon that the Sexterna page refers to is listed, the icon can be linked here.
- Add to current menu-this selection is only visible for the first time to post a new link.
Measurement analysis:
To add gadgeten For measurement analysis, click Add Gadget And then select Diagram.
Back on Dashboard , give the gadget a name, then select from the list of published measure analyses to display the desired måttanalys. The size of the Digrammet can be set to 1-3 squares depending on how much surrounding information is relevant to include. I gadgeten Also provides a quick link to the published måttanalysen.
Gadget: Tabellvy
This gadget displays a view that is created in Stratsys. However, the view may consist of only one column. You can control what is displayed by selecting the Nodegenskaper and setting the default filter in the view settings.
One area of use is, for example, If you want to highlight your key key figures directly on the start page.
Obs! Views always appear as a table in the gadget even if they have a different display mode/type when they appear in the menu.
The annual wheel is a tool that makes it easy to keep up to date with the most important time points for example. Meetings, financial statements, reports. Through the annual wheel, you can also view this information for a number of different devices in the same year.
In the annual wheel you have the option to do the following:
Rubric -Here you specify which heading your årshjul should have.
New Annual wheel -Create a new Annual wheel where you add the desired events.
Existing Annual wheel -Add an existing Annual wheel that was previously created. You can choose from these in a dropdown list. For example, you can use this functionality if you want to move a årshjul from one dashboard to another. Note! You cannot select the Annual wheel you created by the older model.
You -You can base the yearly wheel on a view and view the current nodes of the view at the unit level you are standing on.
Under Size box, you can specify the number of Årshjulet To take up on Dashboarden. Then you choose to save to view your Annual wheel.
New Annual wheel
If you choose to create a new Annual wheel in the gadget, you can then choose Add Event.
Here you have the option to set up the following information:
Name -Enter a name for Event. The name and description are displayed when the user clicks the event in the year wheel or in the list to the right of the annual wheel in the årshjulsgadgets that takes up more than 1/3 of the home page width.
Description -Enter a short descriptive text for the event.
Start and end dates -Enter the start and end dates of the event.
Devices -Specify which devices the event will be shown to-local administrators can choose to hide events that have been dispatched.
Delhändelser -Specify whether the event has sub-events associated with them and their start and end dates
Report -Here you can choose to link a report that can be opened from the event.
Links -Add external/internal pages and put a name on them.
Views -Here you can choose to link a view that can be opened from the event.
Document -You can choose to upload a document to the event. Obs! The maximum size per file is 10MB. For larger files Links directly to the location on your intranet.
Events in the annual wheel
Shorter events of 1 week or less appear as a single point in the annual wheel.
When you click an event, you can do the following:
- Click the Crossing To close the event.
- Click the Gear wheel To add or change settings for the event like above. You can also choose to delete an event.
- Click the The eye with a dash To hide the event on the current device. This can be useful when the event has been subdivided from the overlying device. Obs! Hidden events can be reviewed by clicking Add Event and select Select in Event. Then, check the events you want to view before clicking Add.
Existing Annual wheel
Select the Annual wheel you want to use, select size and click Save.
Modify an existing Annual wheel
If you have selected an existing Årshjul (based on a view) and want to make changes to it (or delete it), click Change Årshjul. Is Annual wheel.
Extend Event Visibility
It is possible to extend visibility to underlying units for events that have been assigned from above. To do this, click the event, then click the gear for the event. In the device tree you can now choose which underlying entities should also see the event, we therefore share further events created at our device level or assigned to our device level from overlying device (s).
Copy Events
Allows you to move events from one year to another. This will also affect the events that the devices themselves have created even if they do not appear on the device you are on. You are also able to choose the type of event you wish to copy.
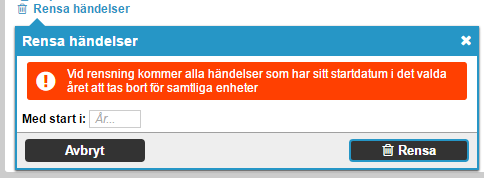
Clear Events
For all the years you have events in, the year will be displayed on the left side of the annual wheel. If you wish to show only the current year and the coming years, here is an opportunity to clear all events with a start date in a given year. This allows you, for example, to delete all events for 2014. and have the archived database save the information in the previous year.
Annual wheel based on view
If you choose View, you will get a list of all the views that have a task column. Select the view you want to base the year wheel on and click Save. Then you have the opportunity to do filtering in the view according to your needs.
Show larger Annual wheel
You can also choose to Show larger Årshjul Which opens up an expanded display mode, especially useful for årshjul that contain a large number of different nodes.
Click the Back To return to the regular dashboard again.
Delete or rename a Annual wheel
If you want to delete or rename a Årshjul, you can also find it by going to Administration/Dashboard and the Tab Årshjul.
Permissions
Only global administrators can add new årshjulsgadgets. Local administrators can add new events to all of the entities in the organization tree and choose to hide events that are controlled down to them. User groups.