Create process wheels with custom events categorized into different categories that can then be displayed as gadgets on the homepage.
Administration of Process Wheels
Create and Edit Process Wheels
Manage Events in Process Wheels
Copy an Older Process Wheel to the New Version
General Description
The process wheels showcase important events within your organization that you wish to keep track of and possibly be reminded about. The process wheels and their events are created centrally and can then be displayed on various dashboards. The events can be categorized, allowing for filtering, and they can also be set to repeat annually.
This article outlines the administration process necessary to later add the process wheel gadget.
Permission Requirements
Only full administrators have access to the administration of process wheels.
Administration of Process Wheel
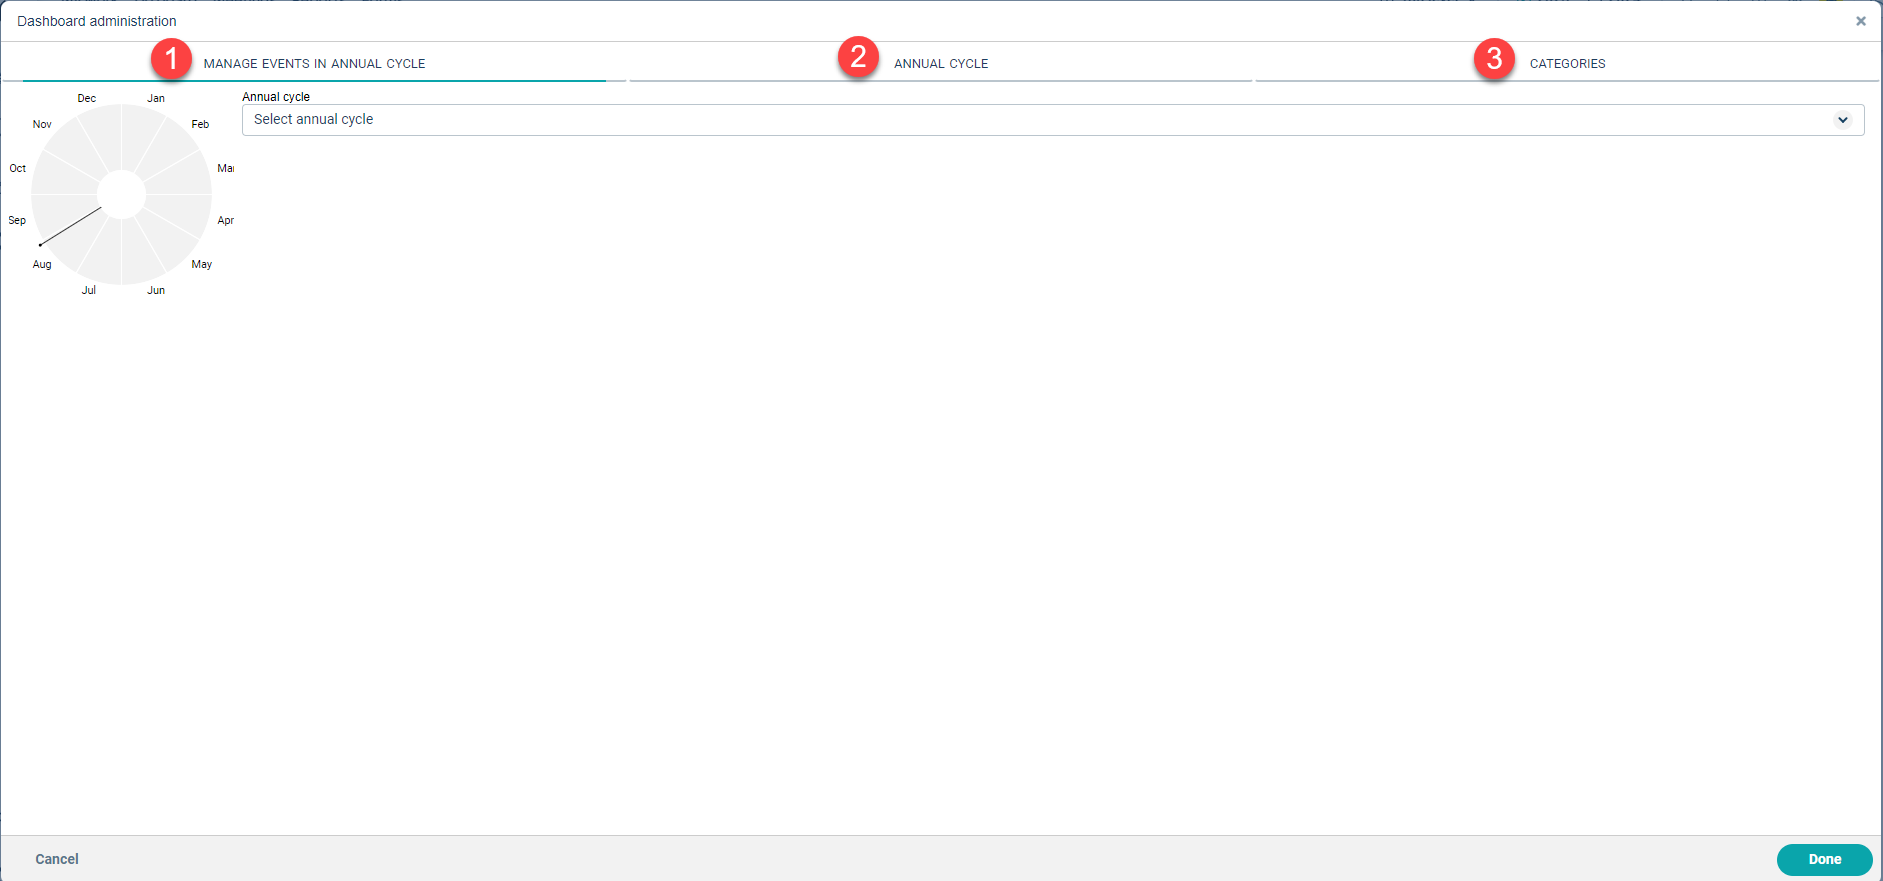
You can access the administration of the process wheel from your homepage, located at the top-right corner.

Administration of the Process Wheel consists of three components:
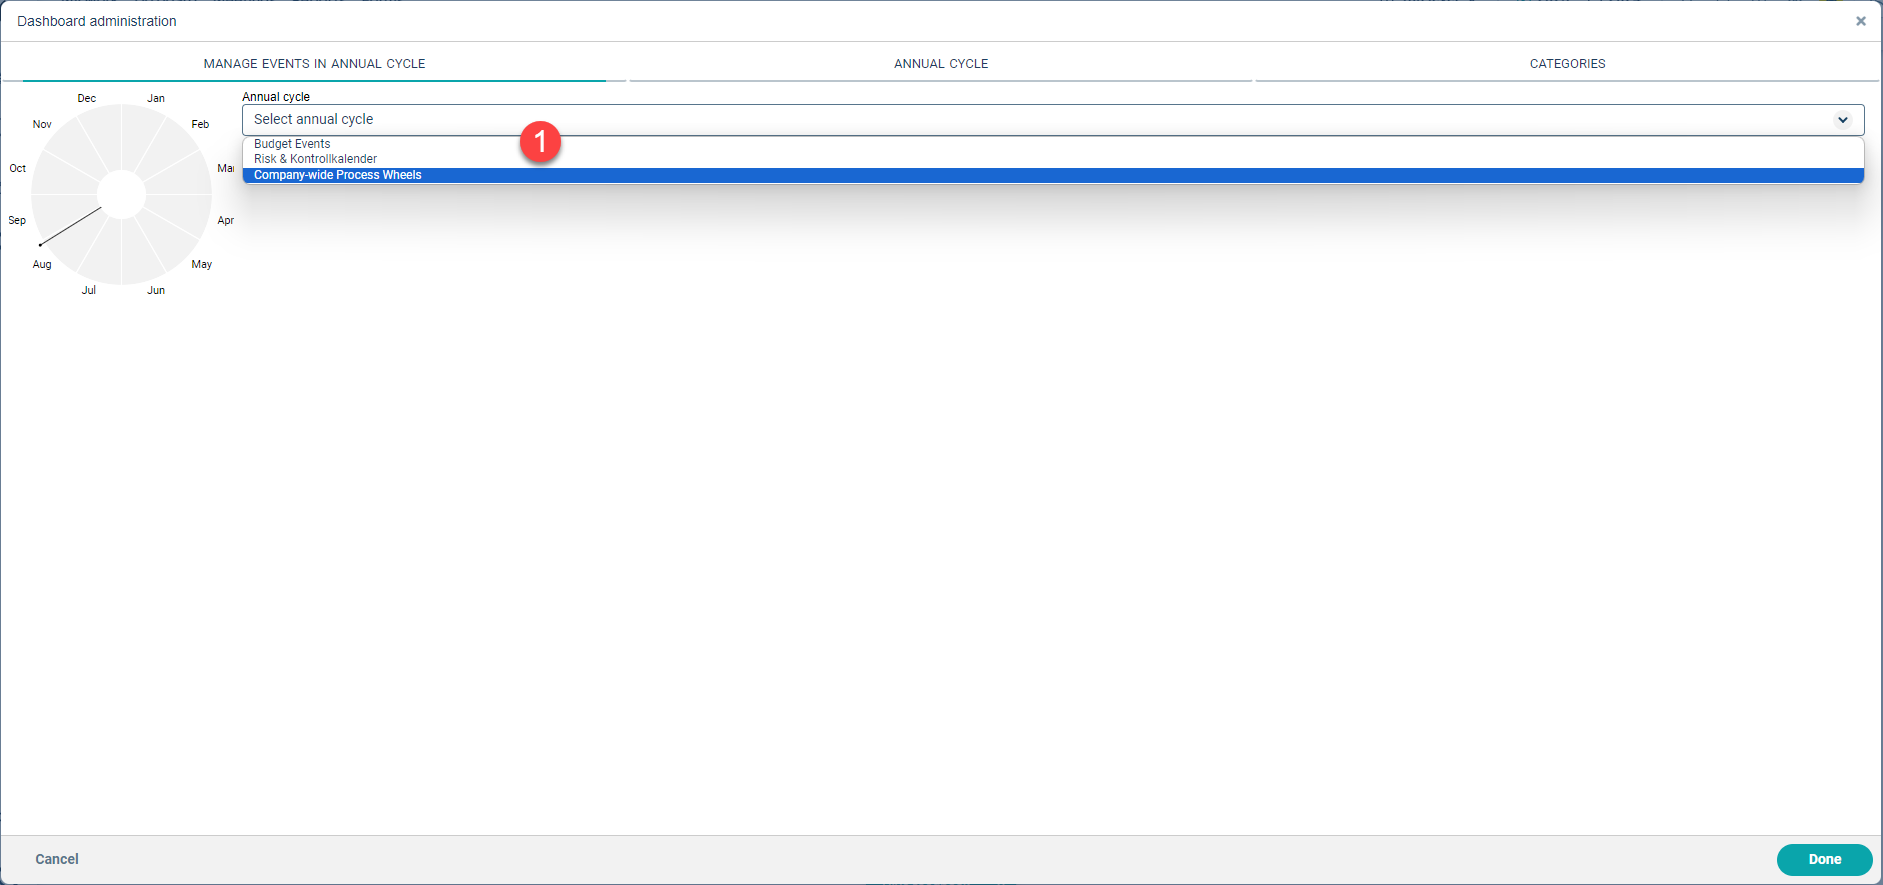
1) Manage Events in the Process Wheel - This tab is typically the starting point of your work. However, to manage events, you must first create your process wheel under tab 2).
2) Process Wheels - Here, you add new process wheels that you want to visualize on your dashboards.
3) Categories - This is where you create categories to classify your events for clearer visualization.
Create and Edit Process Wheels
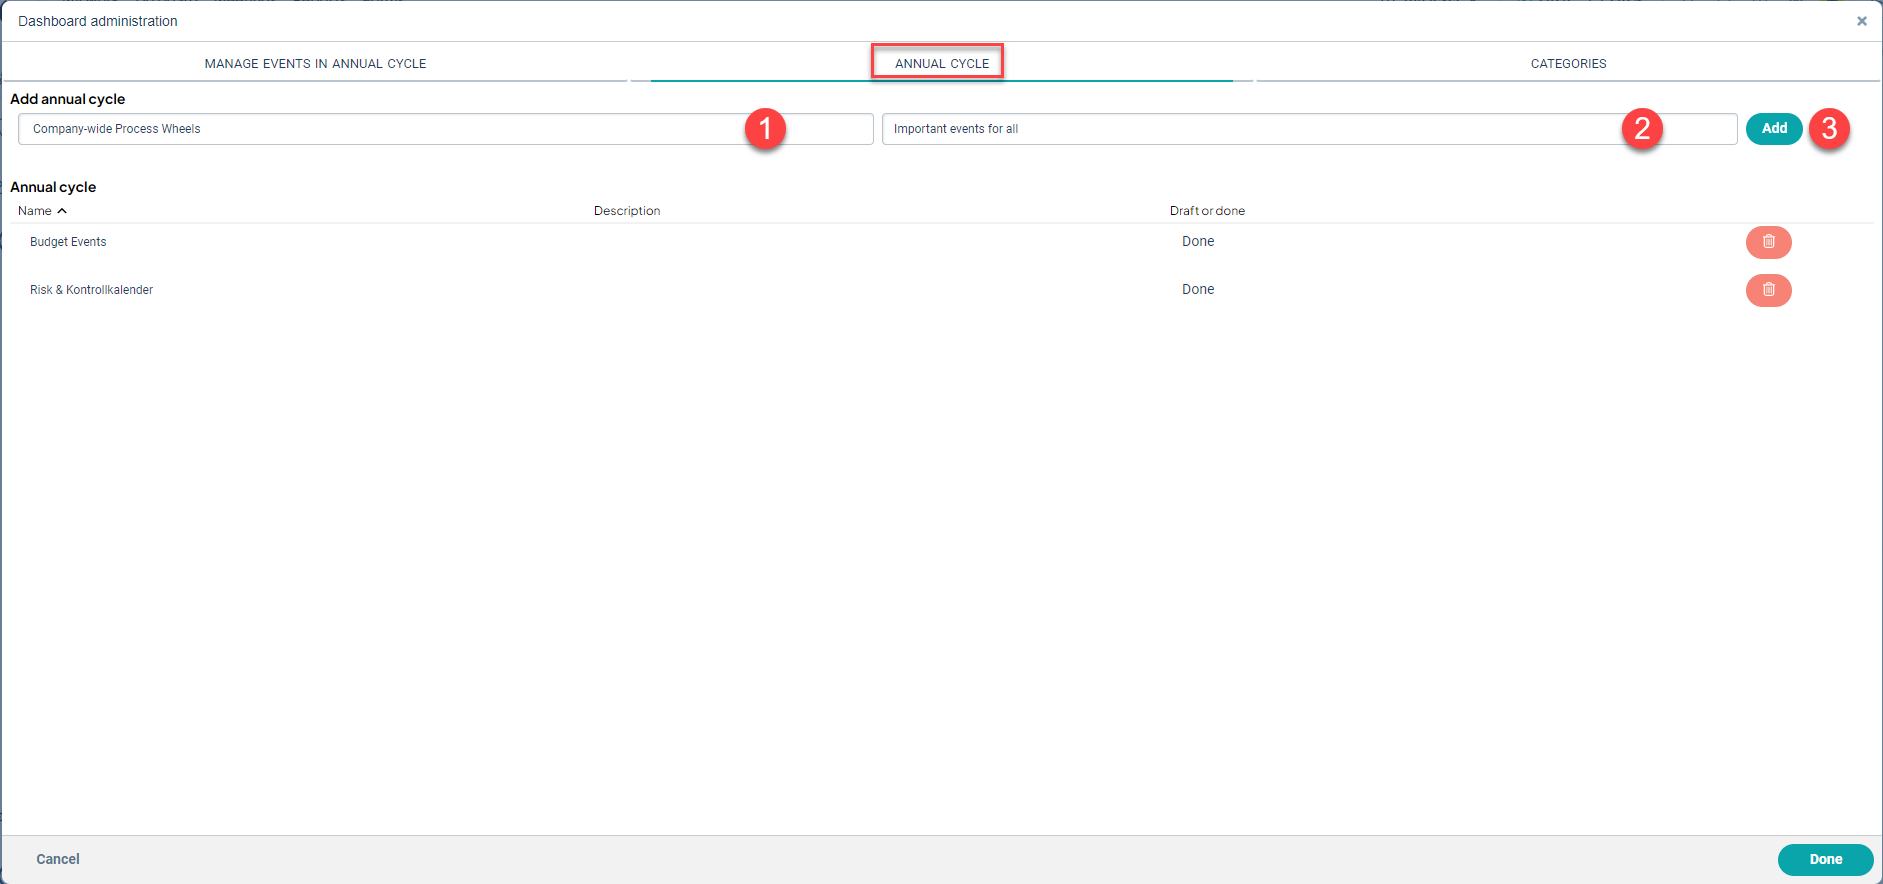
In the Process Wheels tab, you create the process wheels, mark them for publishing, as well as edit and delete existing process wheels.
Create a New Process Wheel
Under "Add Process Wheel":
- Name the process wheel.
- Provide a description (not mandatory, but you must click in the field to be able to add).
- Add.
Mark as Ready and Edit
The process wheel starts as a draft, allowing you to add events at your own pace without it being published on any homepage. Once you are satisfied, you can choose to mark it as ready - it will then be available under "Add Gadgets" on the Dashboard.
Please note that you might need to refresh the homepage before it becomes available.
To mark it as ready, click on your process wheel in the table - in this mode, you can also change the name and description if necessary:
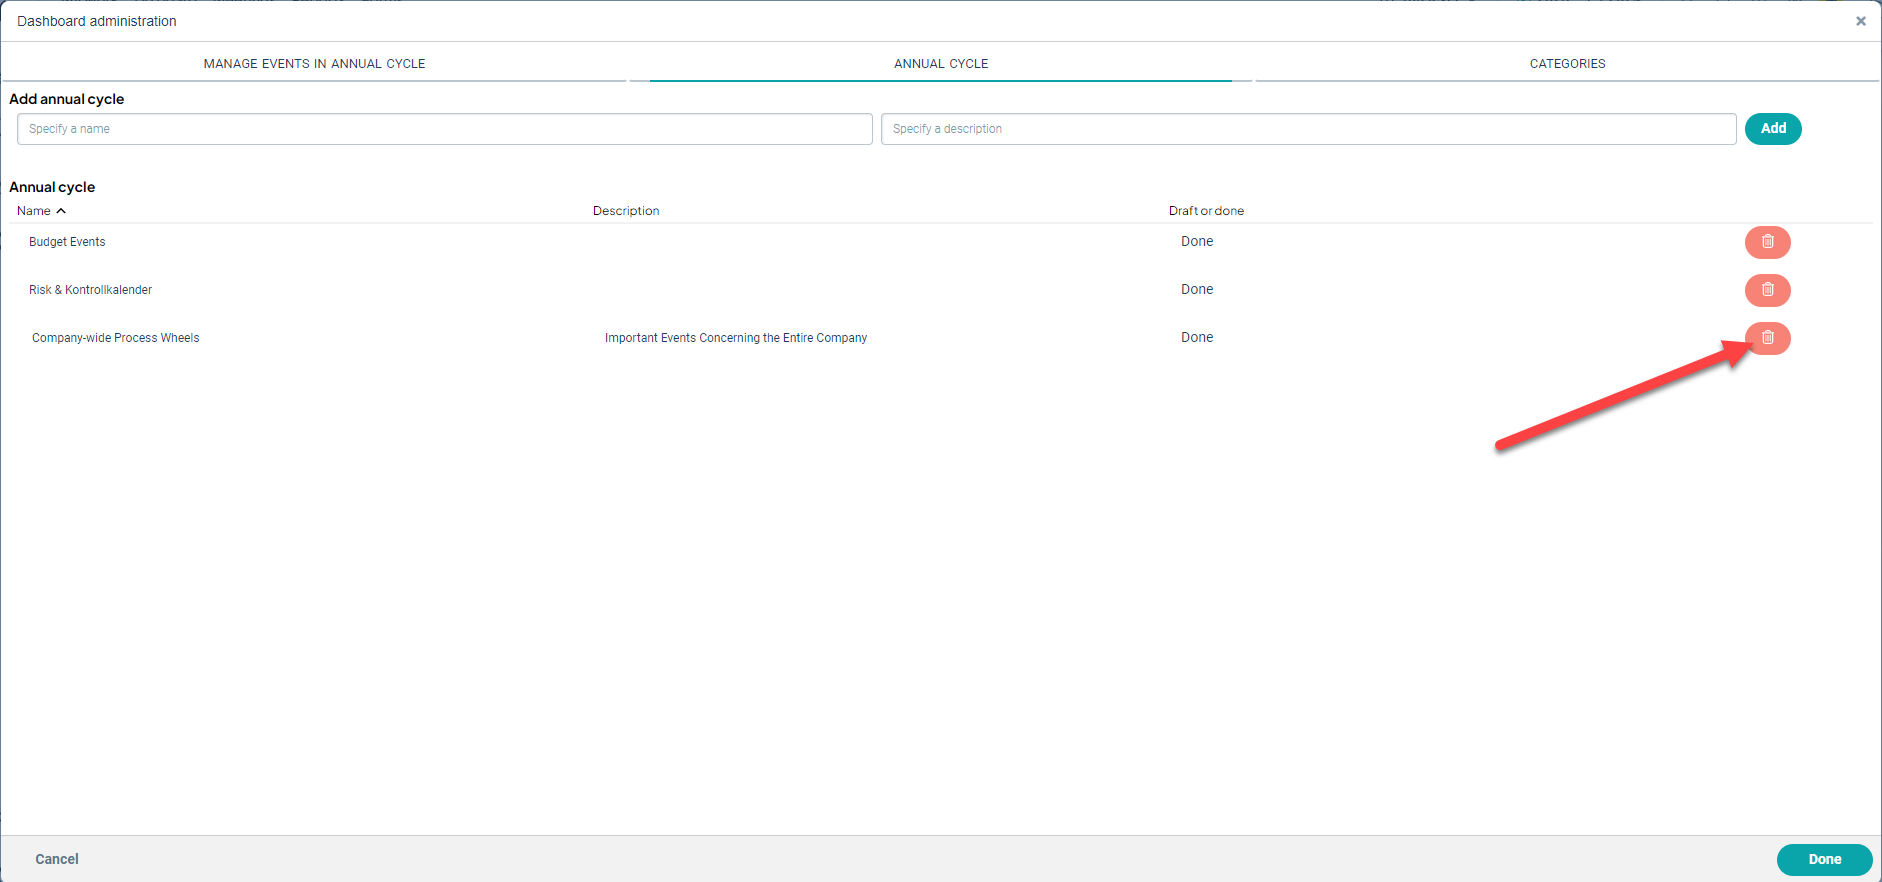
Delete Process Wheel
To delete a process wheel, click on the trash can icon to the right of the process wheel. However, please note that no categories will be removed, as they are shared among all process wheels.
NOTE! Deletion cannot be undone. All events linked to the process wheel will also be removed. The process wheel will also be removed from all users' gadgets where it is currently being used.
If only this process wheel is selected for a gadget, that gadget will become empty. The gadget will then need to be manually removed.
Create and Edit Categories
Under the Categories tab, you create categories that are used in all process wheels. These categories are what provide the different colors in the process wheel.
Events without any category will automatically fall into the "Uncategorized" category (purple).
Create a new category
Under "Add Category":
- Name the category.
- Provide a description (not mandatory, but you must click in the field to be able to add).
- Choose a color for the category.
- Add.
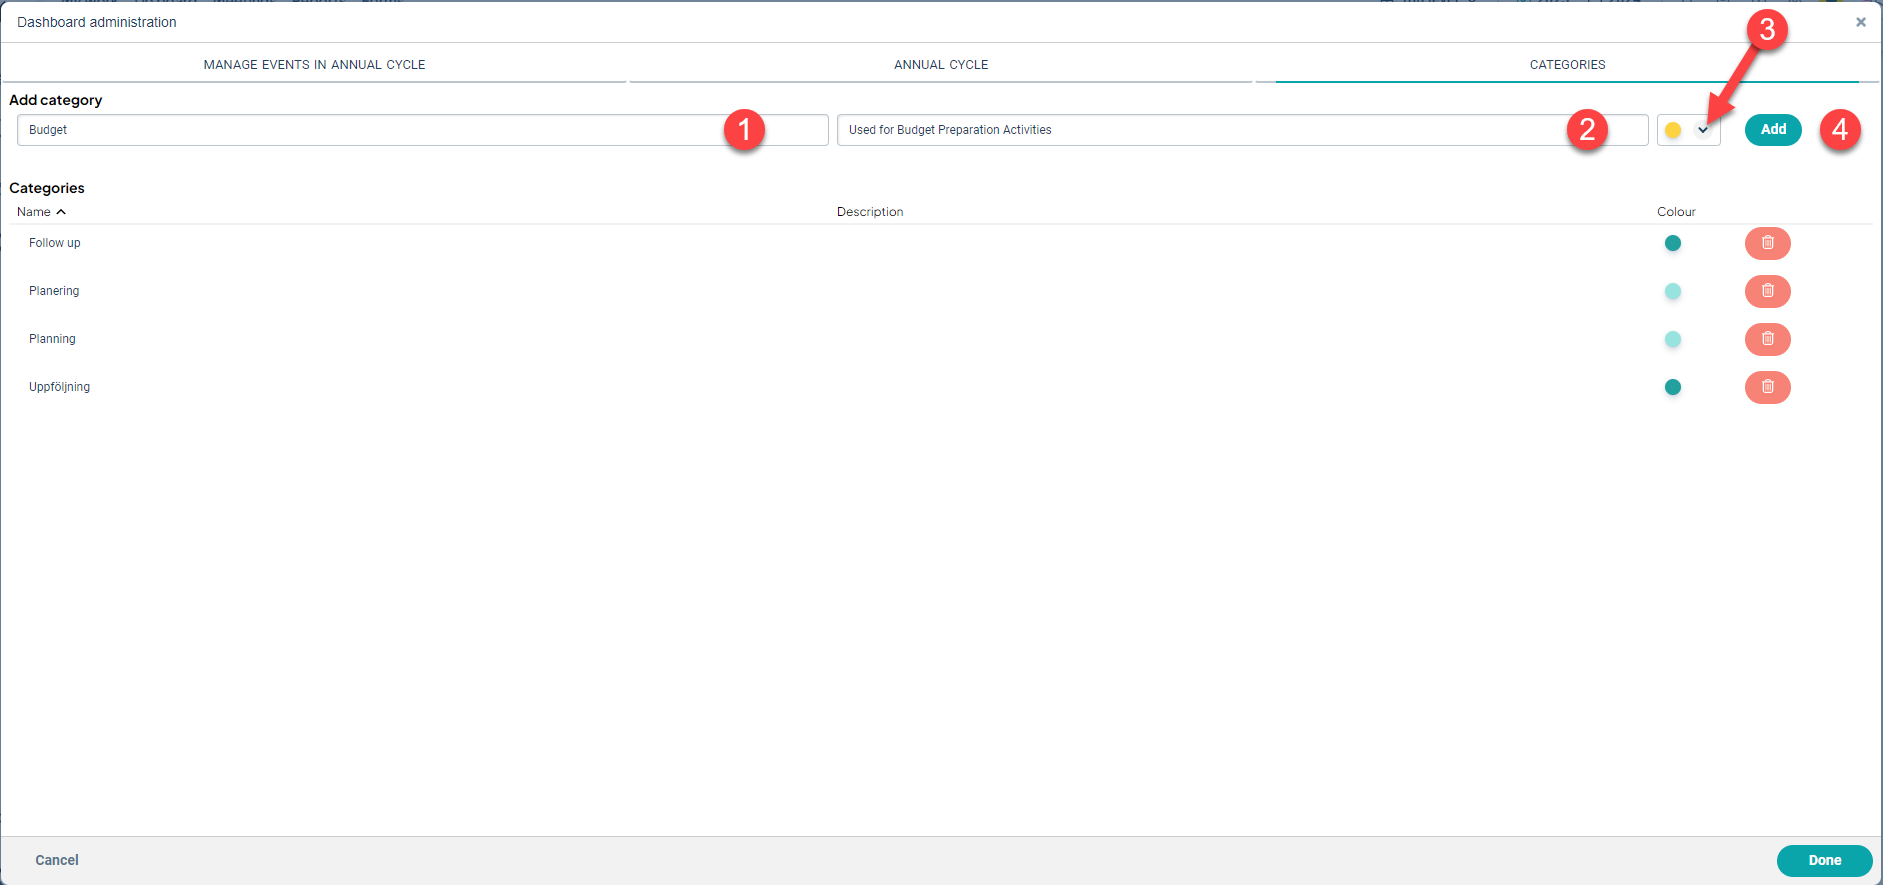
The category can now be used for events in all process wheels.
Edit Category
To edit a category, click on the row and then click the green checkmark when you're done.
Delete Category
To delete a category, click on the trash can icon. Any events in this category won't be deleted; they will be moved to the "Uncategorized" category.
Manage Events in Process Wheel
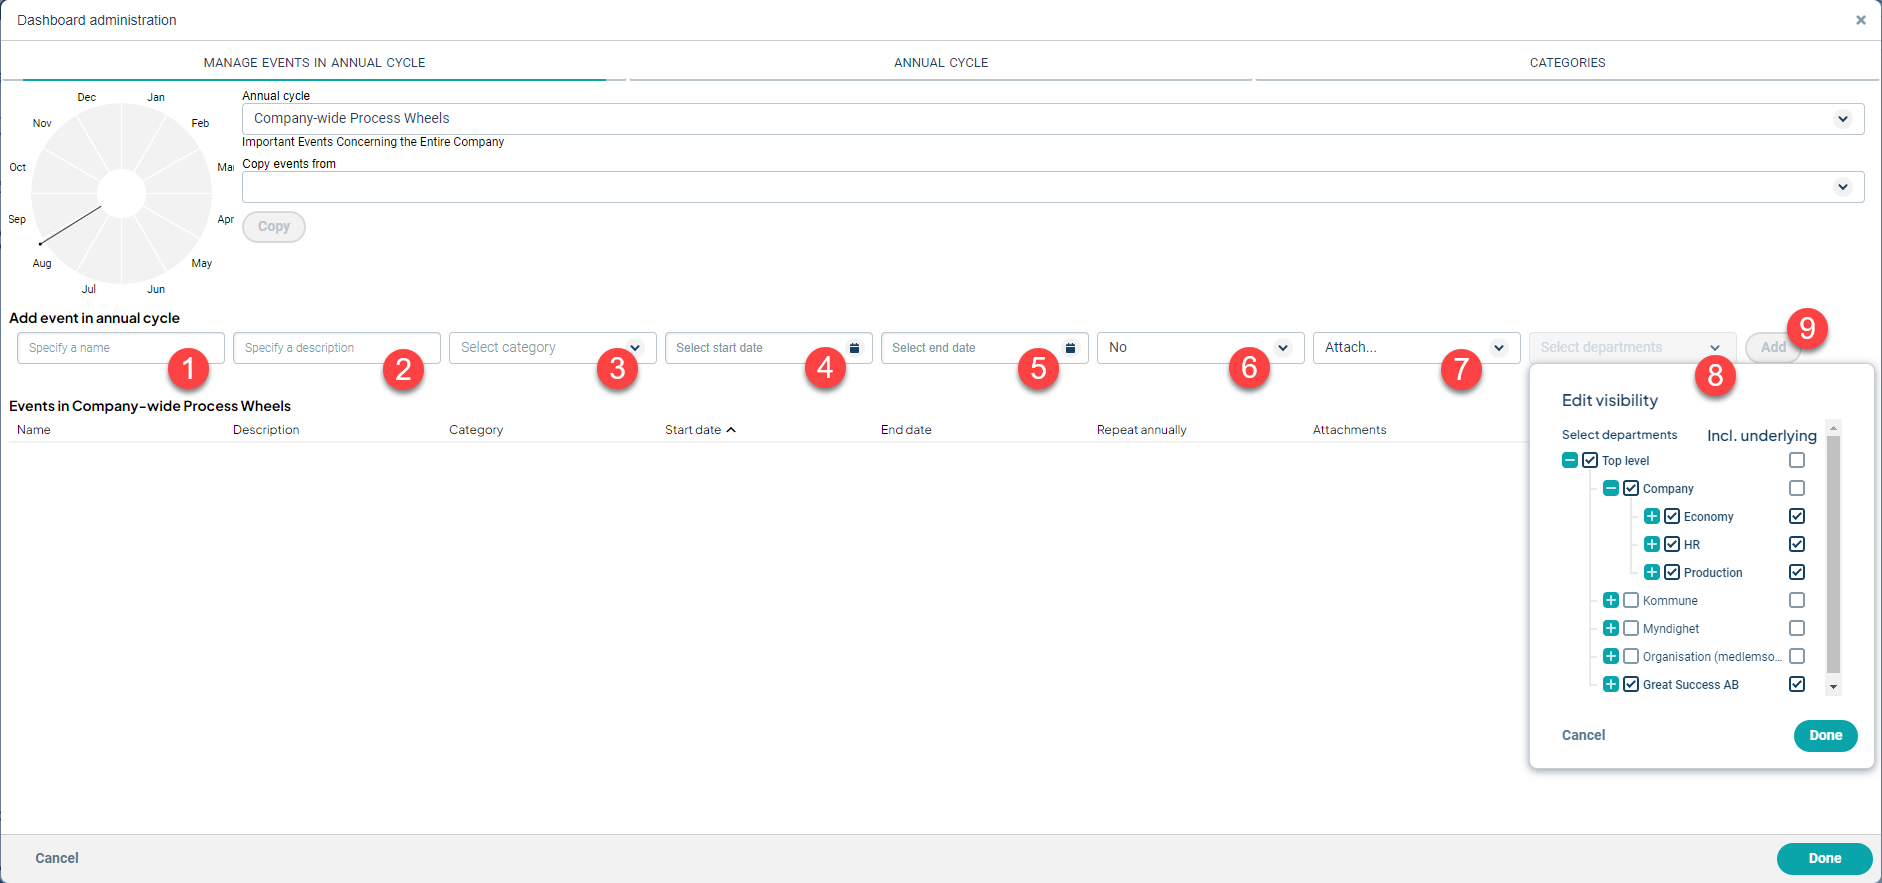
Select the "Manage Events in Process Wheel" tab to create a new event.
- Choose the process wheel for which you want to create the event.
- Provide a Name
- Provide a Description (optional)
- Select a Category
- Start Date
- End Date
- Choose whether you want the event to repeat every year
- Attach supporting material by linking web pages, pages within Stratsys, e.g. reports and views, using a link - see section below
- Distribute the event to selected parts of the organization
- Add.
Bifoga underlag
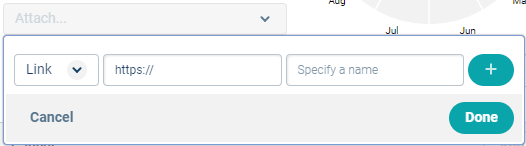
Using the "Link" option, you can link to external web pages outside of Stratsys, as well as to views and reports within Stratsys.
- Select "Link" from the dropdown list.
- In the "https://" field, paste the link to the page you want to display. Remember that links must always start with "https://" (not http).
- Under "Name," you can customize the link's name based on how you want the link to be presented to the user, for example, "TN" / "Today's News".
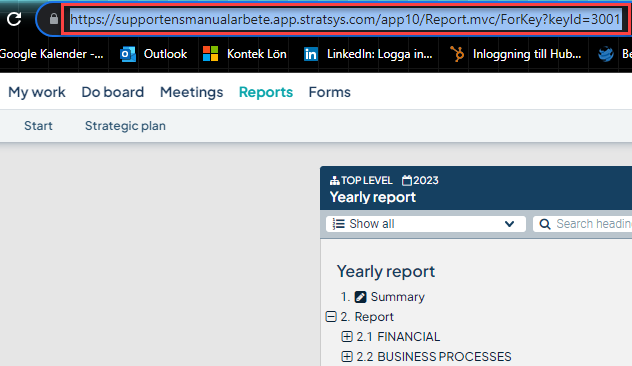
To link to reports in Stratsys:
-
Go to the Reports page and select "Edit Common Template."
-
Then select "View Report." Note that the link in the browser becomes shorter and contains the "KeyID."
-
Copy the entire link from the browser's address bar as indicated in the highlighted area.
Go to the event to which you want to attach the link and paste the link into the "Enter link" field.
Give the link a name, for example, "Interim Report." Click on the "plus sign" and then "Done."
Link to a View
For views, you can select a specific view from the dropdown list. This option is only accessible to administrators.
Publishing Process Wheels
You can effectively communicate planning and follow-up both internally and externally by publishing gadgets with process wheels on your homepage through your intranet, public pages, or via iFrame.
To enable the publishing of process wheels, please contact your contact person at Stratsys who will assist you further.
Publish Process Wheel Gadget
To publish a gadget with a process wheel, the gadget needs to be shared with the relevant departments.
1) The gadget must be visible to at least one department for publishing to be possible.
2) Then select "Enable gadget for publishing."
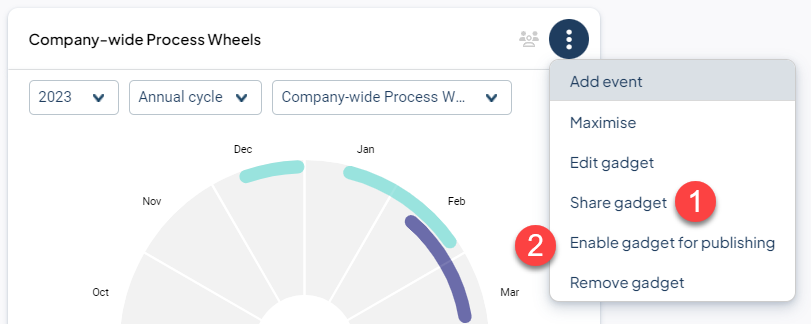
Follow the instructions in the pop-up box and then select "Done."

The radio tower icon indicates that the gadget is published. You can deactivate the publishing at any time and access the information again through "Edit publishing...".
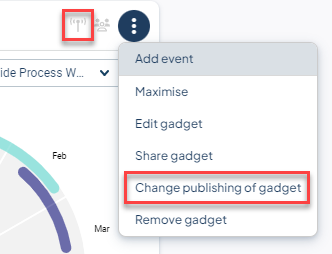
The entire gadget is published, which means that all selected process wheels are published. To publish a single process wheel, place it in a separate gadget.
Copy Events from an Older Process Wheel to the New Version
For those who have worked with the previous version of event-based process wheels, here's information about the possibility of copying events from the old process wheel to the new version.
Important Points to Note Before Copying
- All events will be copied over, regardless of the user who created the event.
- Copying can only be done once; you cannot update with more events from the old process wheel later.
- After the events are copied over, there will no longer be any connection between the old and the new process wheel. Therefore, we recommend that you delete the old process wheel after copying and ensuring that everything looks good.
- Only users with full permission (full administrators) can copy events.
- Only events with end dates from 2018 and onwards will be copied over.
- The copied process wheel can only be displayed on the new homepage, not on the older dashboards.