Manage connections from the object window
Connections
Under the Connections section in the object window, you can:
-
Display the connection tree to see the object's entire connection chain.
-
Add a new connection to any product and object, provided that the connection is allowed (see connection rules).
-
Edit existing connections that this object already has. The connections are organized here by product and scorecard column. You can also easily add new connections to products that are already connected.
Add connection
You add a new connection in three steps:
-
Select the product and scorecard column to connect to
-
Select the object to connect to
-
Choose how to handle connected sub-objects and unit distribution
1) Select product and scorecard column to connect to.
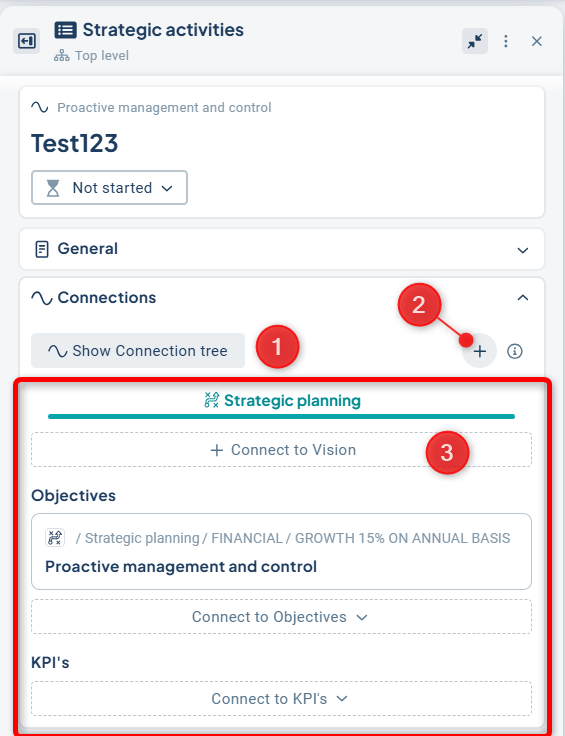
To add a new connection for an object, click on the "Connections" section (1).
The product associated with the current view is preselected in the tabs under the "Show connection tree" button (2). If the object already has connections for other products, these will appear as tabs to the right of the preselected one.
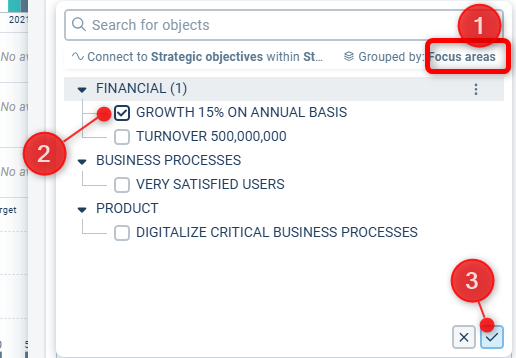
Click "Connect to ..." for the column you wish to connect to, for example, "Connect to Objectives" as shown in the image example (3).
If you want to connect to a new product, instead select the plus sign to the right of "Show connection tree" (4).
If no options for new connections are displayed, it may be due to lack of permission to edit the object, or because you're attempting to change a sub-object whose connection is governed by a higher-level object.
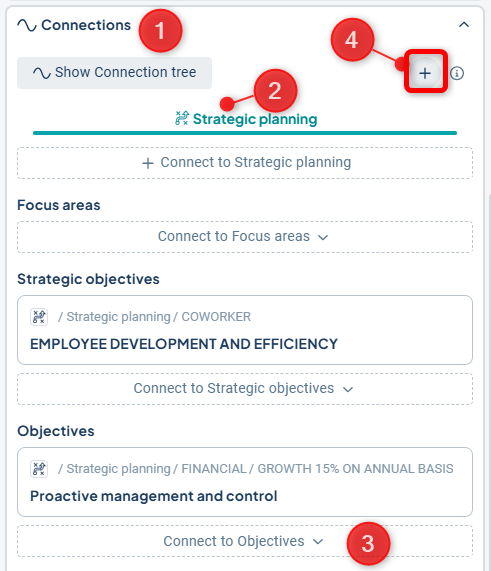
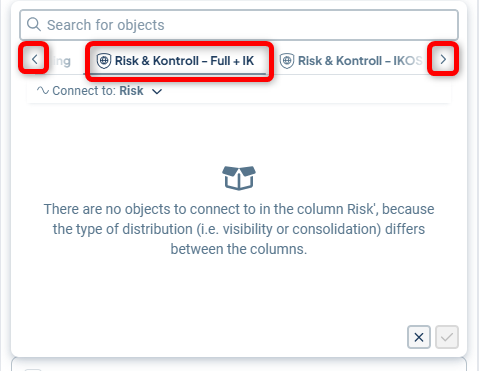
If you have chosen to create via the plus sign, the next step is to select a product. You can scroll between products using the left and right arrow keys. Click on the product you want to connect to, then follow the steps below.
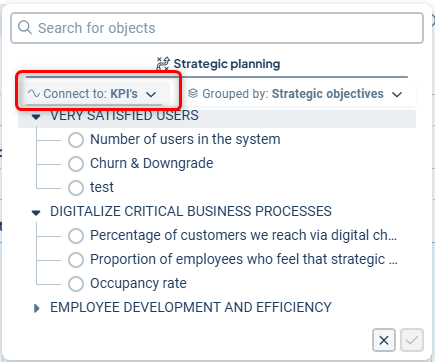
2) Select object to connect to
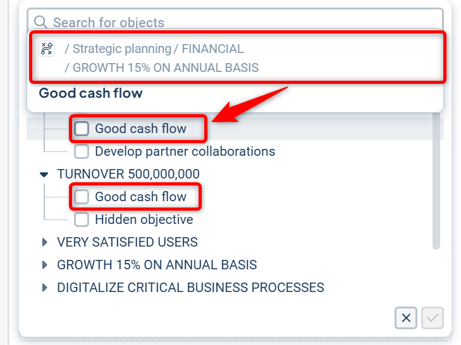
A window will appear showing the available connections. You can use the search bar at the top to find objects within the grouping you selected.
By default, objects will be grouped by the next column to the left, but you can change the grouping—for example, if you know which area you want to connect to instead (1).
You can expand the groupings by clicking the arrow symbols on the left to reveal more possible connections.
Click on the desired connection(s) (2) and confirm your selections in the lower right corner (3).
Good to know:
In some groupings, the same object may appear multiple times if it has several connections to an intermediate column. You can hover over the objects to get more information about that specific connection.
3) Choose how to handle connected sub‑objects and department distribution
In the next step, select how you want to treat any sub‑objects already connected to the object you're linking to. The default is to include connected objects if possible—note that this may not work if the structure between products differs.
You can also choose whether to apply the connection only to the current unit you're in, or to propagate it to all unit levels in the source product. The default is also to include unit distribution.
If the "include unit distribution" option is not visible, it means that different unit-level connections are not allowed for this object type. In that case, the connection will be applied to all underlying units.
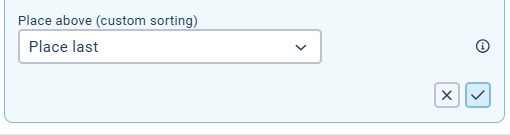
Optionally, set the positioning relative to other existing objects in the same column using the “Place above (custom order)” list.
Finally, confirm the new connection.

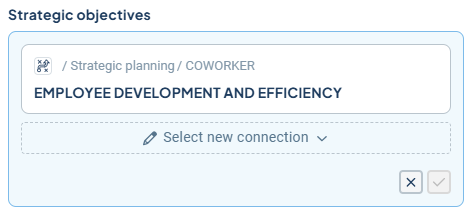
Edit an existing connection
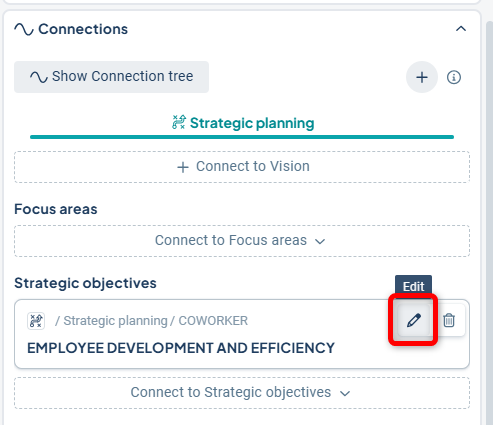
To edit an existing connection, click the “Connections” section. Then, click the tab for the product in which you want to modify the connection.
Hover over the connection you want to edit and click the pencil icon “Edit” that appears in the top-right corner.
If no pencil icon appears, it may be because you lack permission to edit the object, or because you're trying to modify a subordinate object where the connection is controlled from the top level.
Then click “Select new connection”
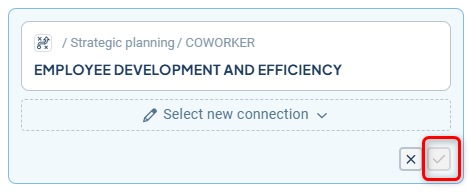
Select a new connection in the dialog. The existing connection is displayed as preselected. You can change the column you want to connect to by selecting a different column from the “Connect to:” dropdown list.
For more details on grouping, see: 2) Select the object to connect to.
Review the new connection, and optionally select a new placement relative to the other connected objects in the list “Place above (custom order).” Finally, confirm the new connection to save.
. 
Remove connection
To be able to remove a connection, there must be at least two connections. If you want to remove the only remaining connection, you will instead need to delete the object itself.
Hover your mouse over the connection you want to remove and click the trash can icon that appears in the upper right corner.
If no trash can icon is displayed, it may be because you lack the permission to edit the object or because you are attempting to change a subordinate object whose connection is controlled from the top level.
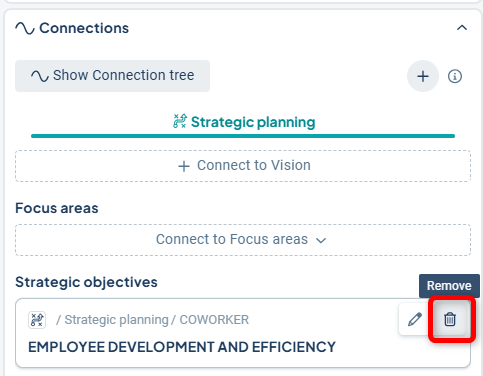
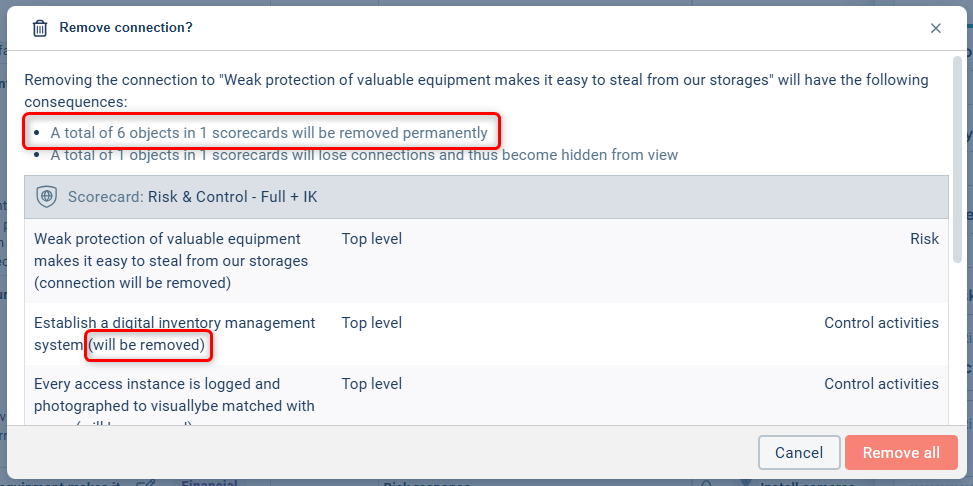
Review what happens carefully! Pay special attention to whether objects will be permanently deleted.
In the example image below, a connected object will be permanently deleted when the connection is removed.
Select "Remove all" if you want to delete the connection. If there are objects that will be permanently deleted that you want to keep, click "Cancel" instead and make sure those objects are given a new connection first.