If you need to create more than just a few users, you can use the user import feature
With the import function, you can easily create many users via a file.
The import process occurs in two steps. First, you must upload a file to the Platform Administration to create the users. After that, an additional import is needed into the database(s) that the users should have access to. In this step, you specify the permission group and primary department for each user.
Step 1 – Import to Platform Administration
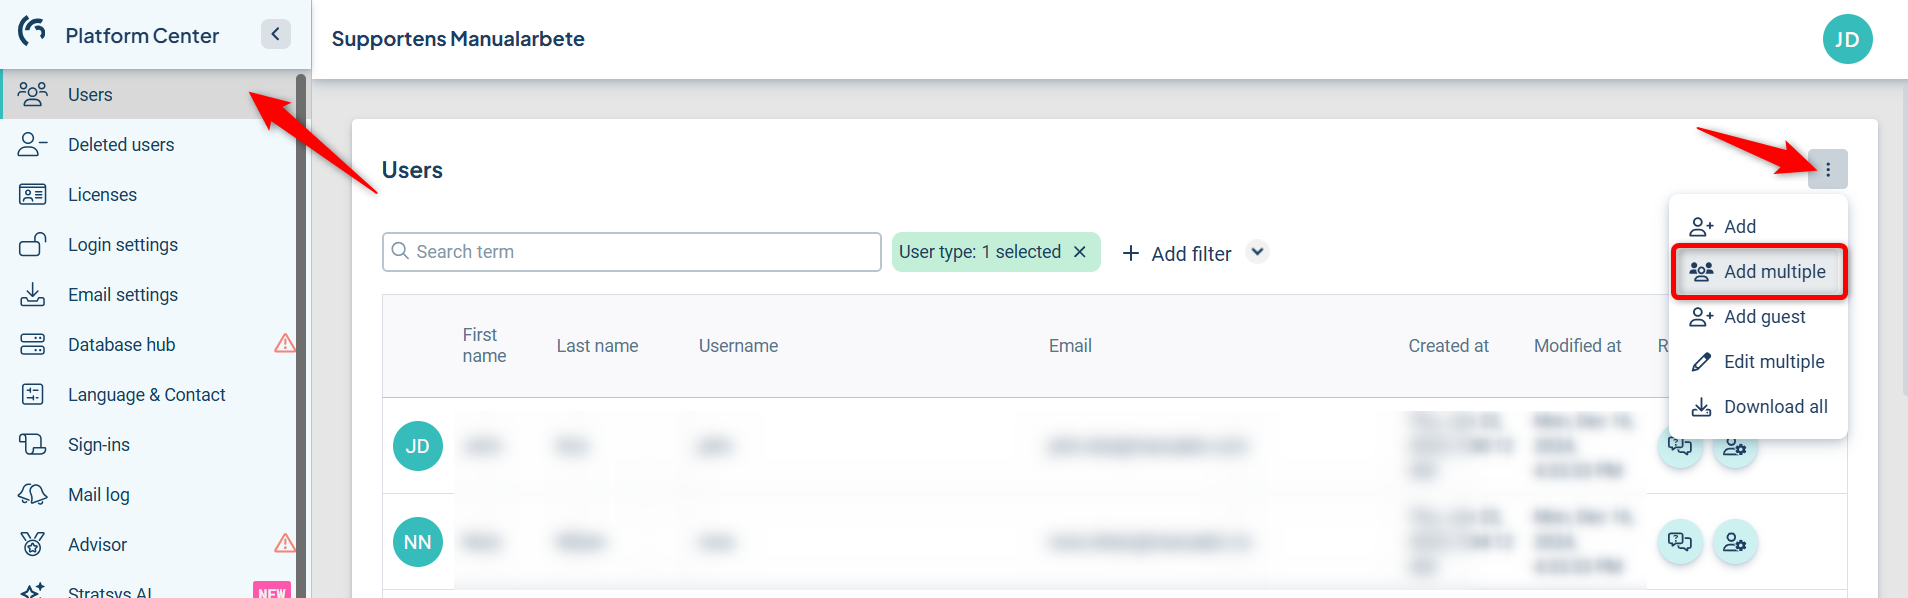
In the Platform Administration, select "Users", and then from the three-dot menu, choose "Add multiple".
To ensure the correct file format, you can download the example file. This will show you the required structure the file must follow for a successful import.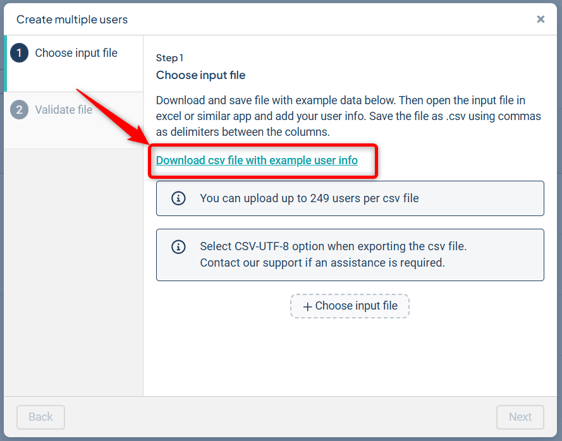
If the file does not open with one field per cell in Excel, you can use the "Get Data from Text" function and specify that the data is comma-separated.
Add your own users according to the example format. Remove the example user and save the file as instructed. You can upload a maximum of 249 users per file.

Upload the file using "Choose input file".
In the next step, the file is validated ("Validate file"). If you encounter validation errors, correct them, save the file again, and re-upload it.
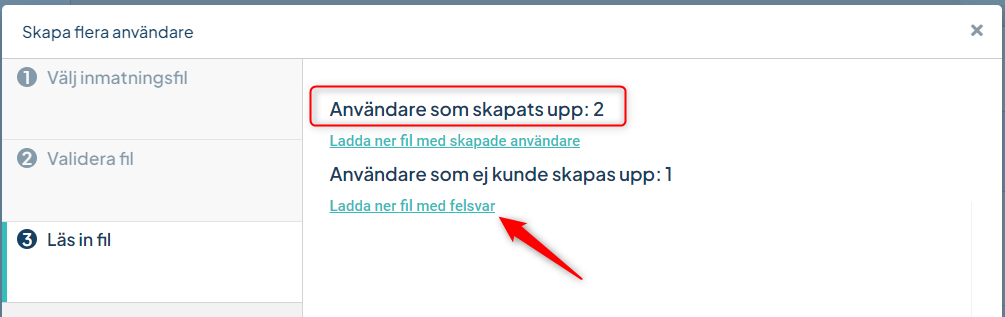
In the final step, you’ll see how many users were created and any error messages—for example, if a user with the same username already exists. You can download the file with error messages to get details on what failed and why.

Step 2 – Import to the database
The users are now present in the platform, but they do not yet have access to any database.
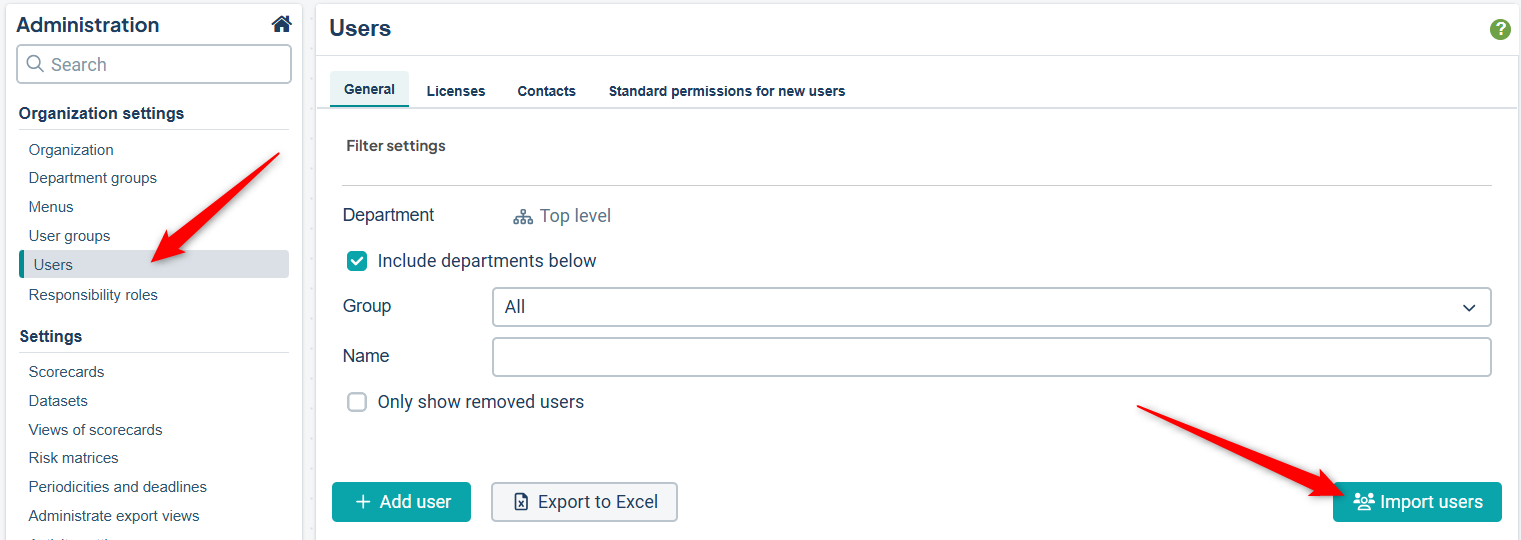
Go to the Administration section in the database where you want to grant users access, select "Users", and then choose "Import users".
Again, download the example file here to ensure the correct file format.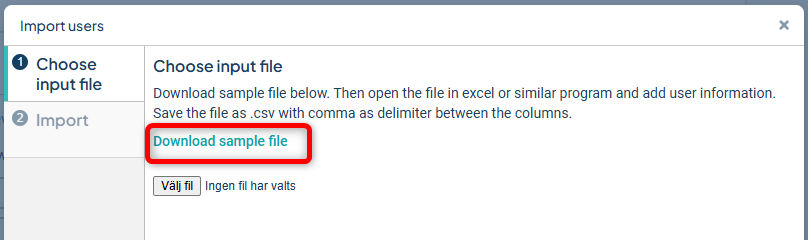
Add your users, remove the example row, and save the file.
It is important that the email address, department (departmentId), and permission group (groupName) are all correct, and that the user has already been imported to or exists in the platform.
If these requirements are not met, the system will not allow the import and you will receive a validation error.

Correct the errors, save the file again, and re-upload it.
Once the import is complete, you will receive a report summarizing what was successfully imported and what was not.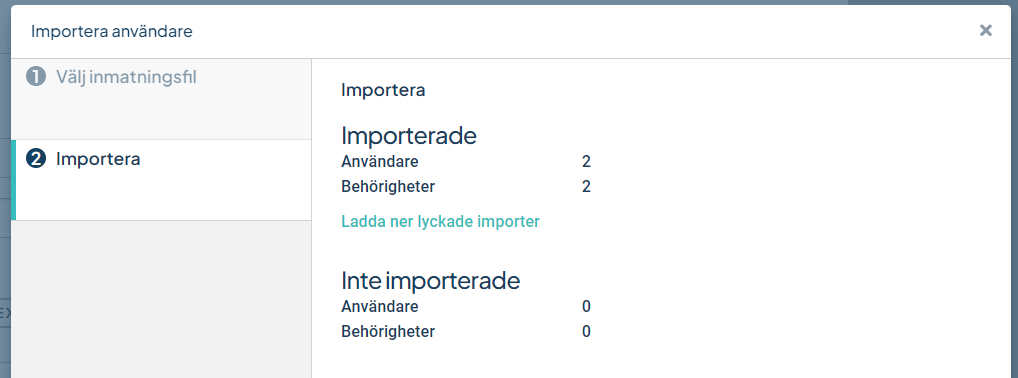
Any additional permissions that users should have must be assigned manually afterwards.