This article describes how to create a template that you can then base your checklists on.
Create and edit checklist templates
Create a new question in a Forms template
Updating templates in ongoing checklistsr
Add an owner to a Forms template
Before you begin
Please read through this article to get an overview of what Forms entails, as well as the required permissions and licenses:
Checklistor med Forms - en översikt
Create and edit checklist templates
Checklists are created based on a template. The steps below will describe how to create such a template.
Create a new template
You can access the administration from the top toolbar. Click on Forms to go to the administration for Forms templates.
Then click the plus icon to create a new checklist.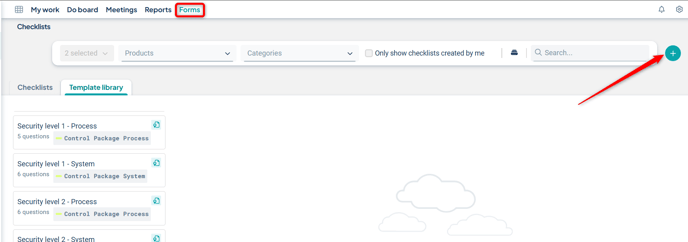
Template overview
When creating a template, you can specify:
-
Name and description for the template
-
Link the template to a product
-
Edit the name and description of sections in the Forms template
-
Edit the name and description of questions in the Forms template
-
To create a new section or question, click “Create” under any question

Create a new question in a Forms template
A new template always includes an initial question by default.
-
Rename the question by clicking on the title bar that says “New question”
-
Select the type of question you want – you can choose between “Single choice” (default), “Multiple choice”, and “Free text”. Note: Answers from Multiple choice and Free text questions are currently not supported for display in reports.
-
Create the next question by clicking “+ Create” below the current question. You can choose to copy the question directly above or create a completely new question using the standard options. You can also create a new section.
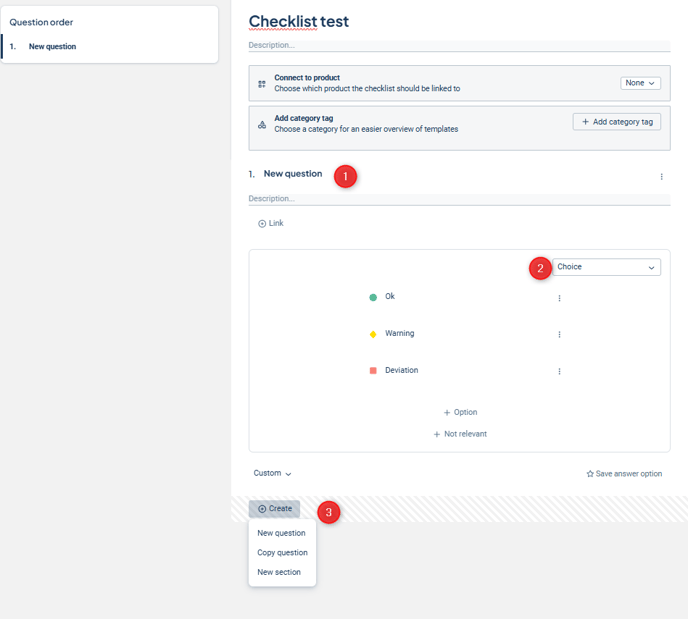
If you select “Copy question,” the answer options from the previous question will be duplicated, but the name and description fields will be blank and need to be filled in.

Edit answer options
Answer options can be edited. You can change the following:
-
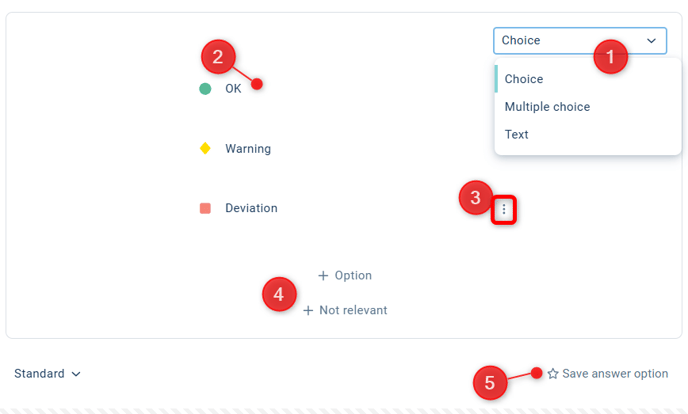
Select the question type from the dropdown at the top right. The "Choice" option (single-choice question) can be combined with color markings to indicate positive (green), neutral (yellow), and negative (red) responses. "Multiple choice" allows users to select several options, and "Text" provides a text box for open-ended responses. The latter two cannot be combined with colors and are therefore not grouped as positive/negative in the results view.
-
Rename an answer option by clicking on the existing text.
-
Change the icon and order of the answer option, or delete it by clicking on the three dots. Then select “Move down,” “Move up,” “Change icon,” or “Delete answer option” from the menu.
-
Add another answer option by clicking the "+ Option" button below the existing options. Add or remove the "Not relevant" option by clicking the "+ Not relevant" button, or remove it using the cross to the right of the "Not relevant" option.
-
You can save the answer option group and reuse it in other questions in this checklist. Give the group a descriptive name. Select the saved group from the list at the bottom left for future questions.
When you save an answer option, give it a descriptive name to make it easier to find in the list of saved options.

Once you have saved a custom version, it will appear in a list at the bottom left of the question. Select it to switch to this option, or back to the default.

Updating templates in ongoing checklists
If a template that is already in use in a distributed checklist is modified, the changes will be applied immediately only if there is no ongoing reporting for the checklist.
If reporting is in progress, the changes will instead be applied to the next occurrence, meaning only after the current reporting period's end date has passed.
Publish the template
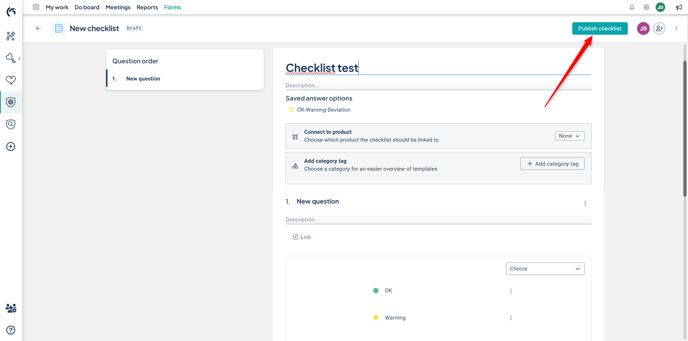
Publish the form template by selecting "Publish checklist" in the upper right corner. It will then be available for use within the organization. See how to proceed in the article Create a Forms checklist.
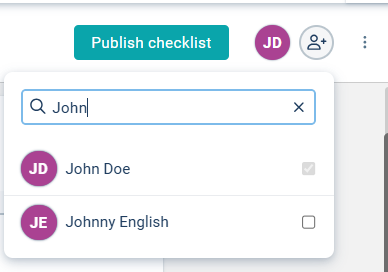
Add an owner to a Forms template
To add an owner to a Forms template, click the person icon on the right. Check the box next to the person or people you want to add as owners of the template. These individuals will then be able to modify the template and publish the changes.
Category
Forms templates can be organized into different categories. These categories can be used for filtering, but also to restrict which templates are available for different management model columns in the products. Read more about how to configure this here: Management Model Columns – Advanced Settings.
You manage the categories from the "Categories" icon in the toolbar, located to the left of the search bar.

Here you can add new categories, and edit/delete categories you have created yourself via the context menu to the right of the category. Any changes you make are saved directly in the dialog. As the owner of the category, you can also see which checklists the category is currently being used in.

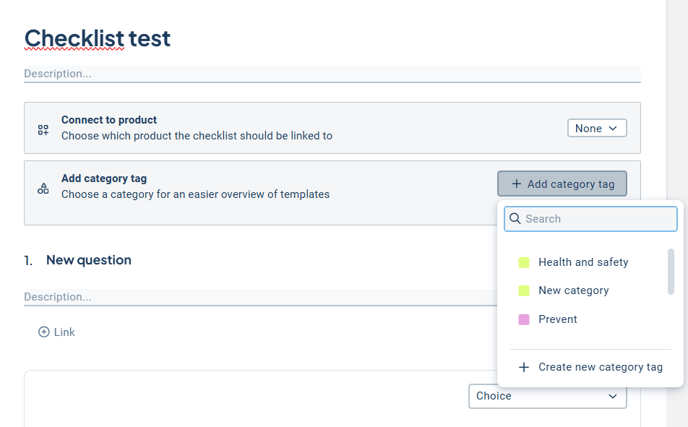
To place the template in a searchable category, click on "+ Add category tag". You can then either link the template to an existing category or create a new category to which the template should be linked.
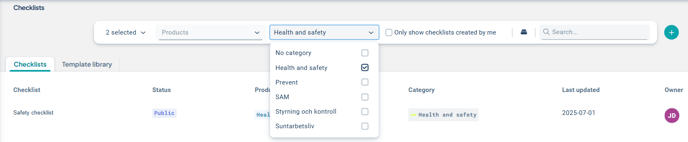
Filter by the different categories in the overview of your templates.
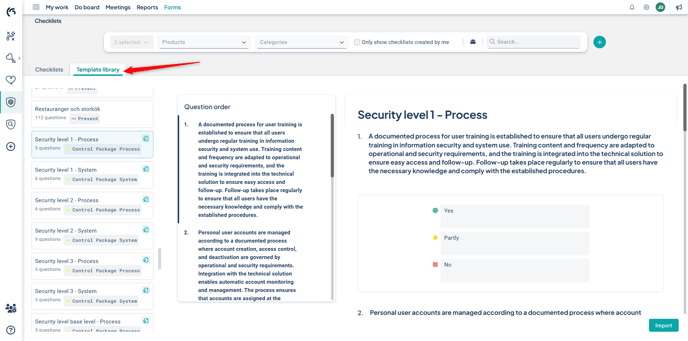
Use an existing template
Use an existing template by copying it from the Stratsys template library tailored to our products. Some templates are quality-assured by Stratsys, which is indicated with a label. These templates cannot be edited.
Templates that are not quality-assured can be imported and then customized according to your preferences.
If you want to use an existing template, go to the "Template Library" tab and then click "Import".
Remove a template
To delete a template, click the three dots in the menu and select the "Remove" option.
Observe that it is not possible to delete a checklist template that has already been used by one or more checklists. These can instead be archived, see below.

Archive a template
To archive a template, open the template and click the three dots in the menu. Then select "Archive" from the options. To reactivate an archived template, follow the same steps.

Once a template has been archived, it will not appear in the standard template library, but it can be retrieved by using the filter function in the Forms overview.

In the views where the archived template was previously used, users will no longer be able to respond to the checklist. Instead, a message will be displayed indicating that the checklist has been archived.
Note: Checklists that have been created from a template will not disappear when the template is archived.