Respond to checklists from a card or a view. Comment and create risks and actions. Pause and resume. Respond in different ways.
Edit responses after submission
Pause and resume checklist completion
Other ways to respond:
Answer a Checklist From the View
Answer outside of scheduled instances
Answer a Checklist
The checklist is primarily completed or followed up by the person(s) responsible for the linked checklist object.
Once the checklist has been answered for one or more units, the results become available. See the article View results from a Forms checklist.
Answer via the To-do list
The easiest way to complete a checklist is by clicking on the card in the To-do list from your homepage, "My Work".
As the person responsible for a checklist, you’ll receive a follow-up card on the "My Work" homepage when the start date of the checklist follow-up period becomes active. One card is generated per follow-up instance. The card is active during the open period for responses, that is, between the follow-up instance’s start and end dates.
The follow-up card is no longer shown once the checklist has been completed or when the end date has passed and the checklist is no longer available for responses.
Click the follow-up card and select "Complete checklist". You will then automatically be directed to the correct department and can immediately answer the checklist questions (which open on the right side of the view) by clicking the "Answer checklist" button at the bottom right.
Answer in the mobile app
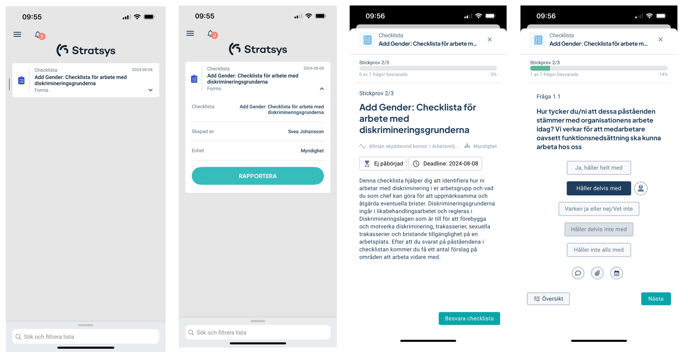
If you are responsible for completing a checklist, you can do so in the Stratsys mobile app. This is especially useful for rounds that require mobility.
Log in to the app, and the checklist will appear as a to-do card. From there, you complete the checklist in the same way as in a web browser.
Answer a question in the list
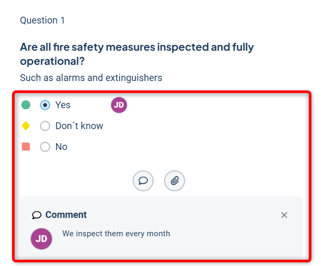
Answer each question by selecting one or more of the answer options beneath the question text, or by entering your response in the free-text field – the available response method depends on the question type.
Add comments and attachments
After responding, you can also add:
-
A comment by clicking the speech bubble icon
-
An attachment, such as a file, by clicking the paperclip icon
Add risks and actions
If the checklist is configured to allow adding risks and/or actions, and you have the necessary permissions, you can also add these. However, if you answered "Not applicable," you can only add a comment.
-
Add a risk by clicking the warning shield icon
-
Add an action by clicking the calendar with checkbox icon
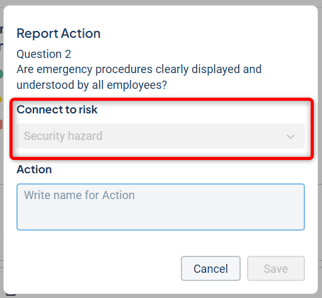
If you create both a risk and an action, the action will automatically be linked to the risk. If more than one risk has already been created for the question, you can choose which risk to link the action to:
Risks and actions may need to be completed with relevant information in the view after the checklist has been submitted.
Read more here: Actions and risks created from a checklist
Answer the next question
When you're satisfied with your response, click "Next." You can return to previous questions using the "Previous" button.
Image: Answer the question (1), add materials to the question (2), and proceed to the next question (3).

Free-text questions
For free-text questions as well, you can add actions and risks, and provide a comment—for example, related to the action or risk being added.
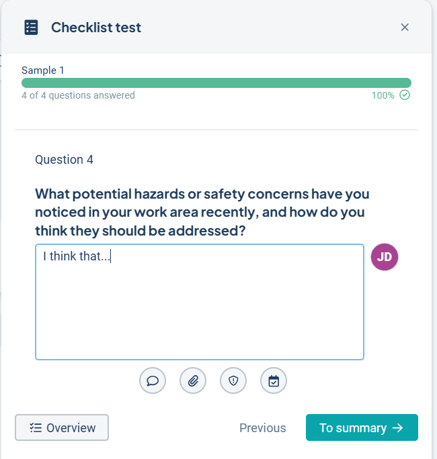
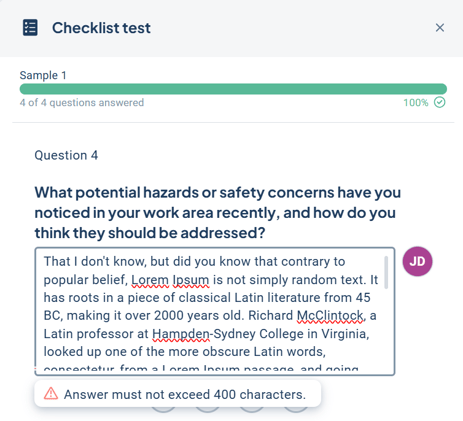
Note that free-text responses have a character limit of 400 characters. If this is exceeded, a validation error will be displayed and you must delete some text before proceeding. However, the comment field does not have the same limitation, so you can supplement your response there if needed.
Submit your responses
Once the final question has been answered, the "Next" button changes to "To summary", and you can then submit the checklist.
Edit a response
Use "Previous" or "Next" to navigate to the desired question, or go directly via the overview.
You can change your answer before the checklist is submitted by clicking a different answer option.
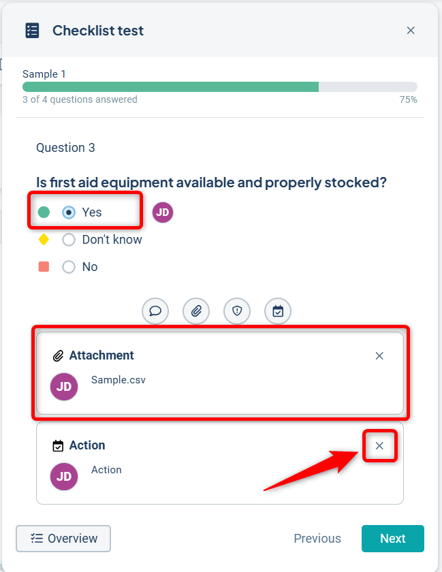
To edit a comment or the name of a risk/action, click the card below the response. If you click on an attachment card, it will be downloaded – to change an attachment, you must first delete the incorrect one and then add the new one.
Remove a comment, attachment, risk, or action by clicking the X in the top-right corner of the respective item.
Access the overview
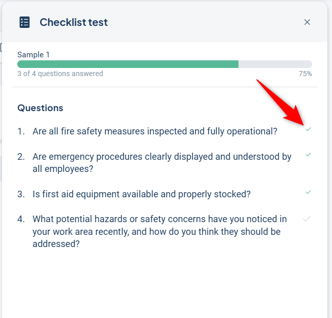
While completing the checklist, you can access an overview by clicking the "Overview" button at the bottom left.
Answered questions are marked with a small green checkmark, and unanswered questions with a gray one.
Continue answering the questions by clicking "Overview" again or selecting any question from the overview list.

Submit responses
When all questions are answered, a summary of the responses and any additions is presented. From here, you can still go back to edit your answers.
When you are satisfied with all responses, click "Submit". After submission, responses can no longer be edited, but you can still add actions and risks later via the results page.
Read more about this here: Detailed results – Questions and answers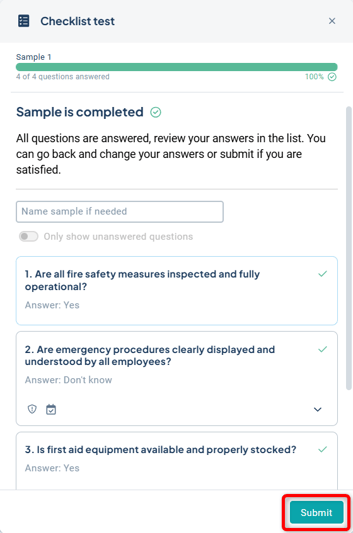
Notification upon submission
When a checklist is submitted by a delegate, the responsible manager/user for the checklist will receive a notification, and an email if this setting is enabled, informing them that a result has been received and can be reviewed and possibly acted upon.
If the responsible manager and the reporting user are the same person, no notifications are generated.


Complete a sampling checklist
A checklist of the sampling type is completed in the same way as a survey-type checklist. The difference is that the checklist may need to be completed multiple times before the to-do card disappears from My Work, if multiple samples are to be taken.
The different samples can be completed by different users. On the card, you can see how many samples have already been completed, and in the form, which sample in the sequence you are currently working on.
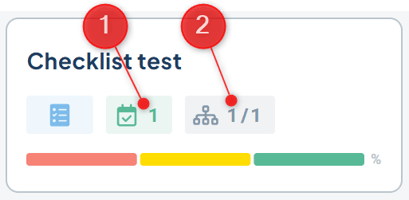
 On the checklist card in the view, you can see on the left how many samples have been completed for the current unit (1), and how many units have fully completed their samples (2).
Edit responses after submission
A checklist can be completed multiple times per follow-up period and unit while the checklist remains open. Already submitted responses cannot be changed, but you can add actions and risks afterward. This is done from the Results tab.
If you need to change one or more answers, you must complete the checklist again. In that case, you will see an information message stating that the checklist has already been completed.
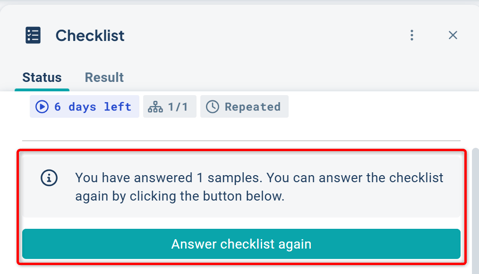
Only the most recently submitted response will be valid and therefore displayed.
We recommend assigning only one responsible person per reporting unit for surveys, to avoid unnecessary duplicate work.
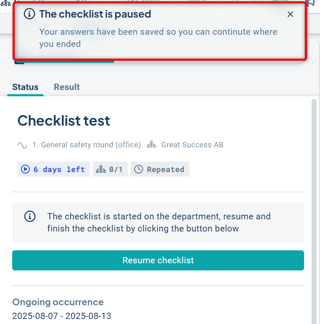
Pause and resume checklist completion
You can pause and later resume a checklist that has already been started. If a user pauses the checklist, another user can also continue answering from where it was left off.
This facilitates collaboration within the checklist and allows a colleague to finish it from the most recently answered question. The checklist is locked for other users while someone is actively working on it.
To pause a checklist, the user must exit it via the close icon ("Exit checklist") in the upper right corner of the checklist. This allows the user to pause their work if they don’t have time to complete the entire checklist and resume it later.

When doing so, all previously entered responses, comments, actions, and risks created by the user are saved in the system and will remain when the checklist is resumed. You can also see which questions have been answered and by whom.

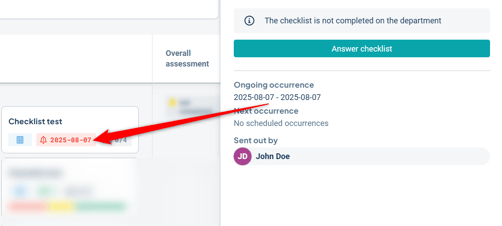
The Forms card in the view will also display the start date of the checklist if it has not been completed, indicating that it has been paused and can be resumed. This is shown up until the deadline date; on that day, the deadline icon is displayed along with information that the checklist has not been completed and the deadline date.
If a responsible user has started answering the checklist but does not submit the responses before the deadline, the system will treat the checklist as unanswered. This means that all responses, comments, actions, and risks that have been created will be deleted and no longer available.
It is therefore important to ensure that all answered questions are submitted on time to avoid data loss.
Answer a Checklist From the View
Observe: If you complete a checklist in any way other than through a card in the To-do list, it is your own responsibility to verify whether you are the person who is actually supposed to complete the checklist.
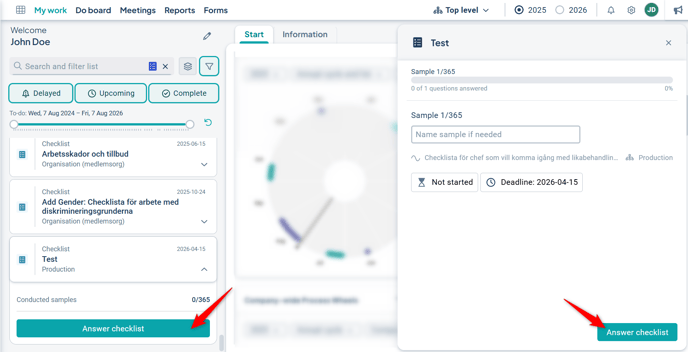
You can also complete a checklist by selecting the correct department in the organization selector and navigating via the menu to a view that displays the checklists. In this case, click the checklist card and then select "Answer checklist," which opens on the right side of the view.
 Note: In some cases, it is possible to answer the checklist even if no scheduled instance exists. In that case, the "Answer checklist" button will appear greyed out, and you will receive a warning about this.
Read more in the next section: "Answer outside of scheduled instances."
Answer outside of scheduled instances
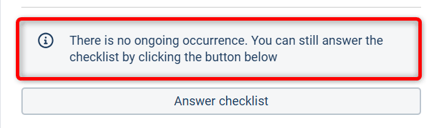
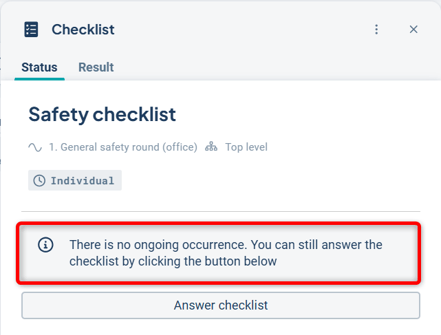
In some cases, it is possible to complete a checklist even if there is no active reporting instance—for example, if no instances have been scheduled yet but the checklist is activated.
In such cases, you will see an information message stating that the checklist has no active instance. You can then respond as an "extra instance" by clicking the "Answer checklist" button.
The result from these "extra instances" is shown as a separate entry with the date under the Results tab. The result is only visible for the unit that performed this extra instance and is not included in summaries across multiple units, as is the case with scheduled instances.
Answer in paper format
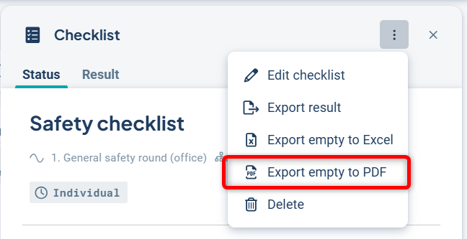
It is also possible to export the questions to PDF format, which can be printed so users can answer on paper if needed. If you are a local or full administrator, go to the checklist and select "Export empty to PDF."
Don’t forget to enter the results into Stratsys once the checklist has been completed!