With the help of Forms checklists, you can easily create, distribute, and respond to checklists within your organization.
Workflow:
2. Create a Checklist from the Template
3. Configure and Activate the Checklist
Introduction
Forms is Stratsys' format for digital checklists. It is a tool for conducting surveys and operational audits.
With the help of Forms checklists, you can easily create, distribute, and respond to checklists within your organization as part of your quality work in Stratsys products.
Forms is an integrated part of the workflow in Stratsys, where results are compiled and presented in a clear and structured way. The checklists can be used in all your products where you have a product license.
This overview outlines the functionality at a high level, with links to more in-depth articles where you can learn more.
Workflow
1. Create a Template
To enable reuse of questions and answers, the checklist is first built as a template and saved in your template library. You can create a fully customized template with the questions and answer options you want users to respond to, or choose to import Stratsys' quality-assured ready-made checklists for immediate use.
The template can later be edited, which will affect new checklists using the template, but not existing activated checklists. Templates that are no longer in use can also be archived.
Learn more: Create a Checklist Template
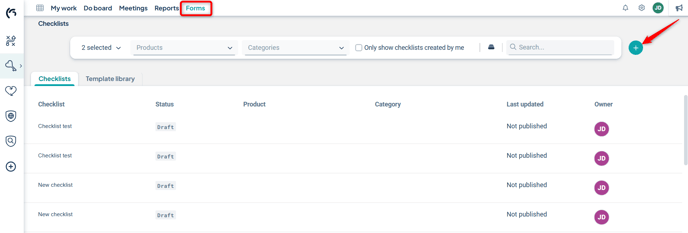
2. Create a Checklist from the Template
In the next step, you create a checklist in a Stratsys product with a product license from one of the templates by linking the checklist to an existing object in the model.
Users who have responsibility assigned to the linked object will be reminded to respond to the checklist. Respondents can either be regular users with a user license or delegates, who then use a light license.
Learn more: Create a Checklist, Configuration for Users and Delegates

It is possible to control which categories of checklist templates are displayed within the product. This is configured in the settings of the management model column.
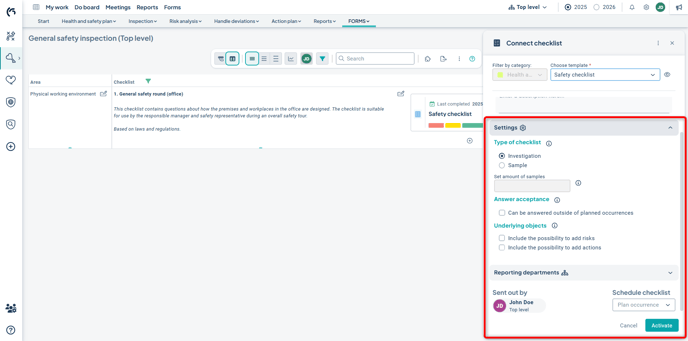
3. Configure and Activate the Checklist
Configure the checklist by first selecting the checklist type: investigation or sample.
Choose which units in your organization should respond to the questions and schedule when the checklist should be completed. The checklist can be recurring—such as monthly—or completed on single occasions only.
Decide whether respondents should be able to create actions and risks for questions with deviations. Actions and risks that are created will be linked to the checklist object, and you can then continue to manage them in Stratsys.
Finally, activate the checklist, making it available for responses within the specified timeframe.
Learn more: Create a Checklist, Configuration for Creating Actions and Risks
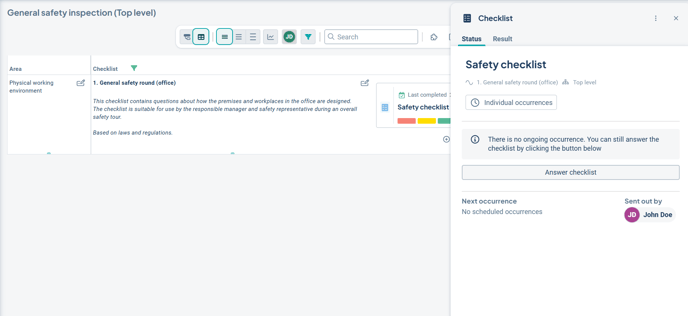
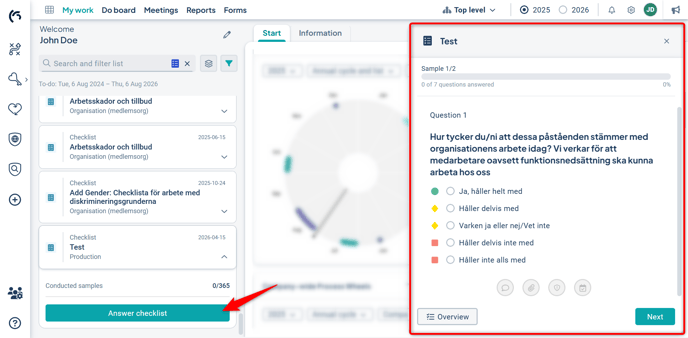
4. Respond to the Checklist
At the appropriate time, users assigned to complete the checklist will receive a card on their To-do List, where they can respond to the checklist through a simple workflow. Responsible users may also receive email reminders about their responsibility, if configured.
Respondents can comment on each question, attach additional materials, and create risks and suggested actions.
The checklist can be completed either in a web browser or in the Stratsys mobile app. It is also possible to export the questions to PDF for paper-based responses if needed.
As the creator and activator of the checklist, you will receive notifications as different units submit their responses, allowing you to monitor the process.
Learn more: Respond to a Checklist
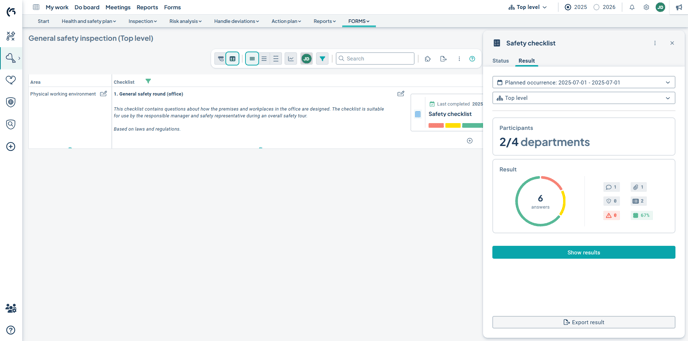
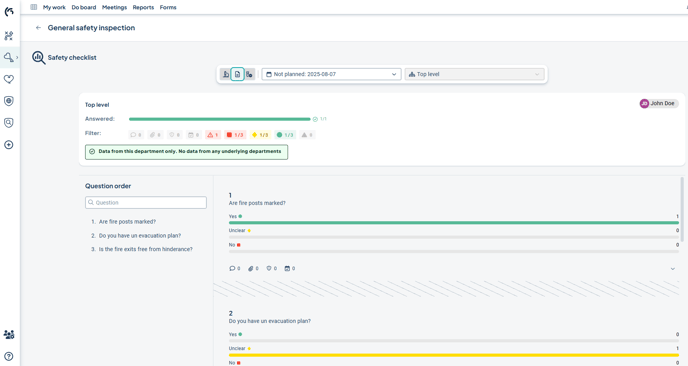
5. View Results
The results from each response session are compiled separately and displayed via the checklist card in the view. You can view the responses at the unit level or aggregated for underlying levels. The results from the checklists are also shown in the follow-up window for the linked object, making the results available during follow-up.
You can filter by, for example, deviating responses and the risks and actions created for them. You can see which units have not yet responded, and whether there are deviations without actions. In such cases, you can add actions and risks directly from the results view.
The responses, as well as risks and actions, can also be displayed in reports. There is also a gadget you can place on the home page of your products that links to the checklists.
It is also possible to export the results to PDF format.
Learn more: View Results from a Checklist, Checklist Gadget