Update the factors in affected measures when the value of an emission factor changes using a simple step-by-step guide.
Automatic Process for Changing Factors
Manual Process for Changing Factors
Description
When one or more emission factors are updated with new values, the measures using those factors also need to be updated. It's a good practice to review this annually.
Stratsys Catalog
Factors managed by Stratsys will receive new versions as needed, but you are responsible for updating the measures that use them.
Custom Factors
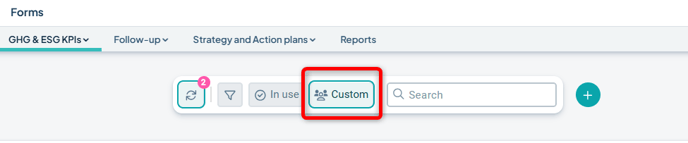
If you use custom-created factors, you need to create new versions of these yourself. The easiest way to do this is to filter for your custom factors in the Emission Factor Catalog and then duplicate the factor by selecting this menu option on the right side of the row.

Update at least the value for the new year, then save the row. This will become the new version of the factor for the selected year.![]()
Learn more about how to create and maintain custom factors here: Create and Update Custom Emission Factors.
Automatic Process for Changing Factors
When one or more factors used in your setup have updated versions, this is indicated by a number in the corner of the Version Handler button (icon with double arrows).
The number shows how many factors have new versions that affect existing measures.
Note: The measures are updated in both the current version and the planning version, regardless of which version you're in when performing the update.
Click the “Version Handler” button to update the affected measures. This will open a three-step guide.

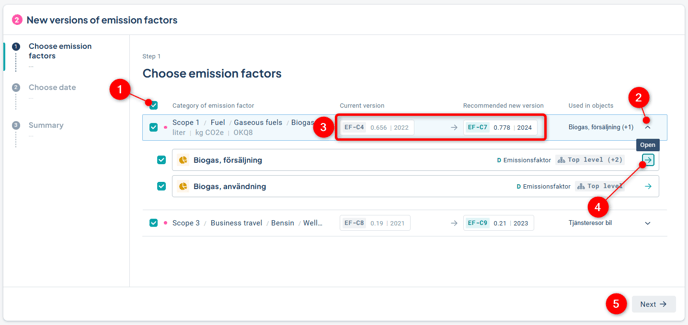
In Step 1, you select which emission factors and associated measures you want to update:
1) Use the checkboxes to select the factors (and their linked measures) that you want to update.
2) Click the downward arrow on the far right to view which measures currently use each factor.
3) Review the proposed version change—hover over the factor to see more details.
4) If needed, open the object window for any affected measure to review the current data before proceeding.
5) Click Next to continue.
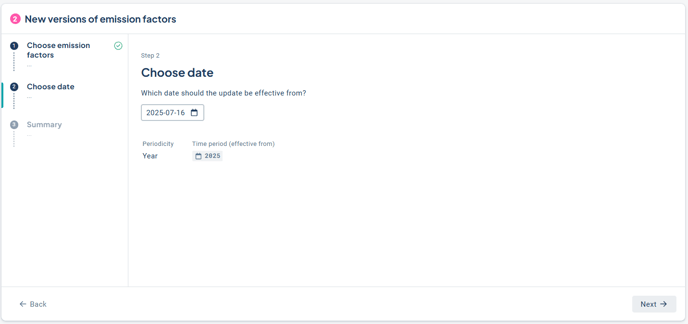
In Step 2, you choose the start date. This determines which periods in the measures will receive the new factor. If the measures have different periodicities, all affected periods will be listed.
If you want different factors to have different start dates, you can perform the update in multiple rounds, selecting a few factors/measures in each round.
Click Next once you've entered the desired date.
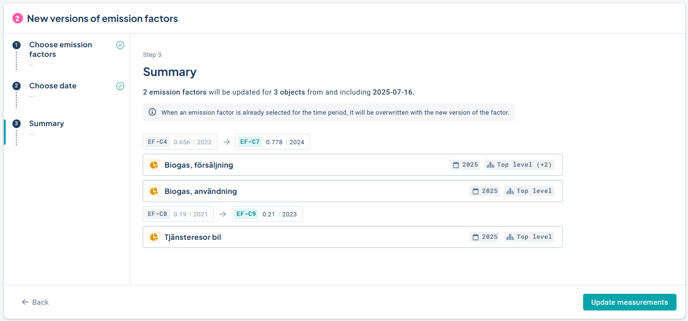
Review the summary. If you're satisfied, click Update measures to apply the changes to the selected measures.
If not, select Back to make any necessary adjustments.
Good to Know
-
The system automatically selects the latest version of each emission factor.
-
All changes made to emission factors are logged and visible in the event history of the affected objects, ensuring transparency and traceability.
-
Make sure you've completed reporting for historical periods before the update. After the update, the new factor will also apply to past periods if no data had been previously reported for them.
Manual Process for Changing Factors
Observe: Use the guided process above as your primary method. However, if it doesn’t work for your specific case, you can follow the manual method described below.
When an emission factor is selected for a measure column, the value becomes locked. If you need to change this factor to a new one, you must first manually clear the old values.
The steps below explain how to do this. If you need assistance or if the process doesn't work despite following the guide, contact Support or your Account Manager.
Switching to a Custom Factor?
If you plan to switch to a new custom factor, make sure to create it first. Learn how here: Create and Update Custom Emission Factors
Is the measure Used on One or Multiple Departments?
First, determine whether the measure is used on one or multiple departments, and then choose the appropriate method.
If the measure exists on only one department – follow these steps:
-
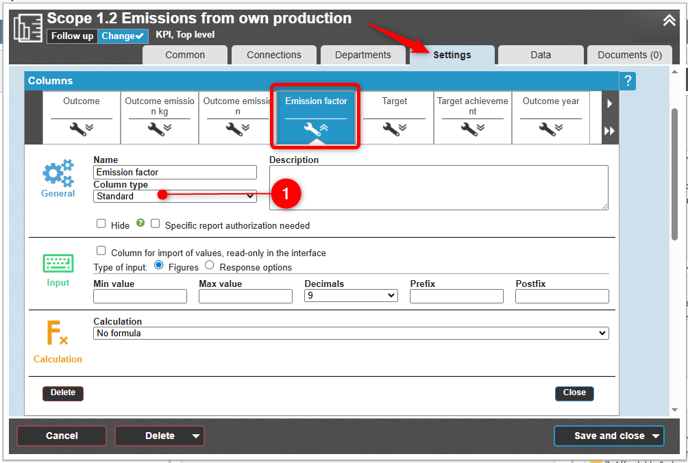
Go to the Settings for the measure column where the emission factor is selected.
-
Ensure that the column type is set to “Standard.” If the column type is something else—like “Goal” or “Annual Goal”—switch it to Standard.
-
Make a note of the ID number of the currently used emission factor. Change the formula for the measure column to “No formula.” Save.
- Then, delete the numeric value of the emission factor for the periods where you want to apply a different factor. Save.

For the Classic Edit Window, first click on the Data tab:
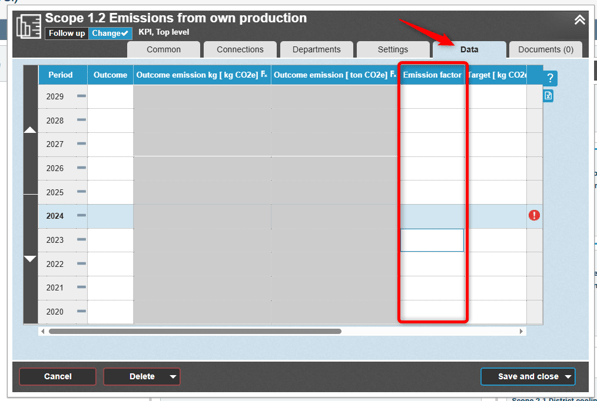
-
Select the “Emission Factor” formula again for the measure column and choose the new emission factor. Save your changes. The emission factor for the updated periods is now applied—verify the result!
If the measure exists on multiple departments – follow these steps:
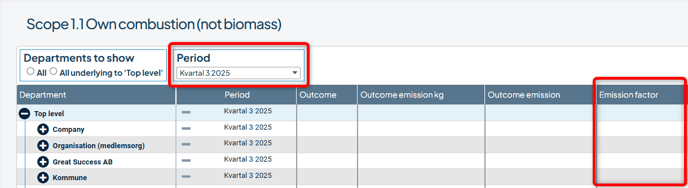
- Go to the consolidation view for the measure.

-
Open the edit window for the measure at the top-level department from the consolidation view.
-
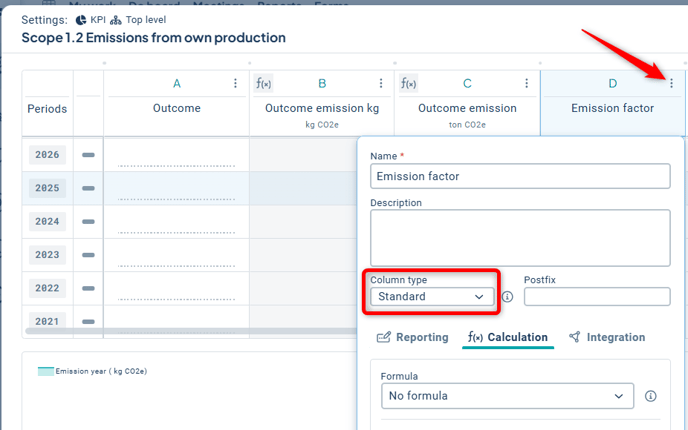
Go to the settings for the measure column where the emission factor is selected.
-
Ensure that the column type is set to “Standard.” If it's set to something else (for example, “Goal” or “Annual Goal”), switch it to Standard.
-
Note the ID number of the current emission factor. Change the formula to “No formula.” Save and close.
-
From the consolidation view, manually clear the numeric value for the factor for the departments and periods where you want to apply a different emission factor. Use the period selector to switch periods.
-
Reopen the edit window on the top-level department and select the “Emission Factor” formula for the emission factor measure column. Then choose the new emission factor.
-
Save and close.
-
The emission factor will now be updated for the modified periods—verify the outcome!
Switch to Standard Column:
Ensure that the column type where the emission factor is applied is set to “Standard.”
If it has a different type, switch it to Standard and save.
Equivalent in the Classic Edit Window:
Switch to “No Formula”:
Change the measure column where the emission factor is applied to “No formula”—you'll find it at the top of the formula list. Save your changes.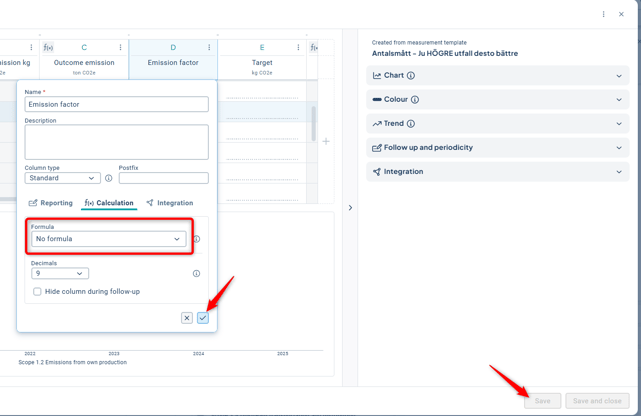
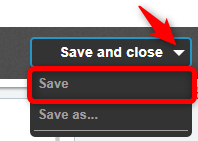
Equivalent in the Classic Edit Window:

Here, you can save without closing the window by clicking the downward arrow next to the save button and then selecting Save.
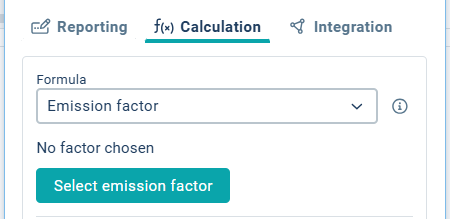
Select New Emission Factor:
Set the calculation formula back to “Emission Factor” for the measure column and choose the new emission factor, which will now apply to the cleared periods where data exists.
Classic Edit Window – First switch to the Settings tab:

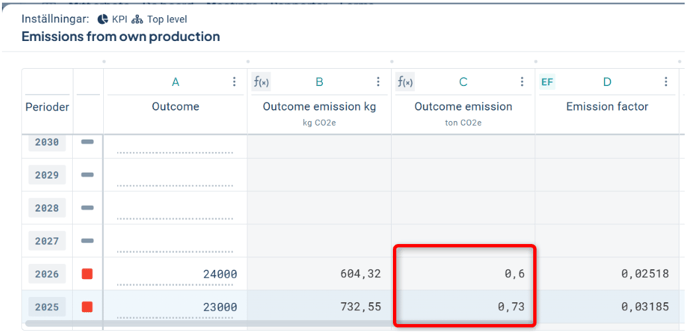
Verify the Result:
Also verify that the outcome matches expectations—
In this case, we now have different factors applied for the years 2025 and 2026, as intended.
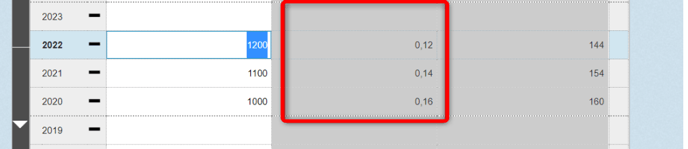
Equivalent in the Classic Edit Window –
Here, three different emission factors are used for 2020, 2021, and 2022, respectively. Verify that each factor is correctly applied to its corresponding year.